Get Started with OCI and OCI Console Using a Free Account
In this tutorial, we will do a quick walkthrough of the Oracle Cloud Infrastructure (OCI) Console and show you where you can find the most common features or services and how to navigate to the OCI Console.
Before you can start, you have to create a free account. With this account, you can perform some basic tasks for free and this will also help you to get more familiar with the OCI services and OCI Console.
Objectives
- Sign up for a new Oracle account as a customer.
- Add your payment details.
- Start your free trial.
- Log in to OCI using your new account.
- Configure MFA using the Oracle Mobile Authenticator (OMA) application.
- Review the OCI Console.
Task 1: Sign up for a new Oracle Account as a Customer
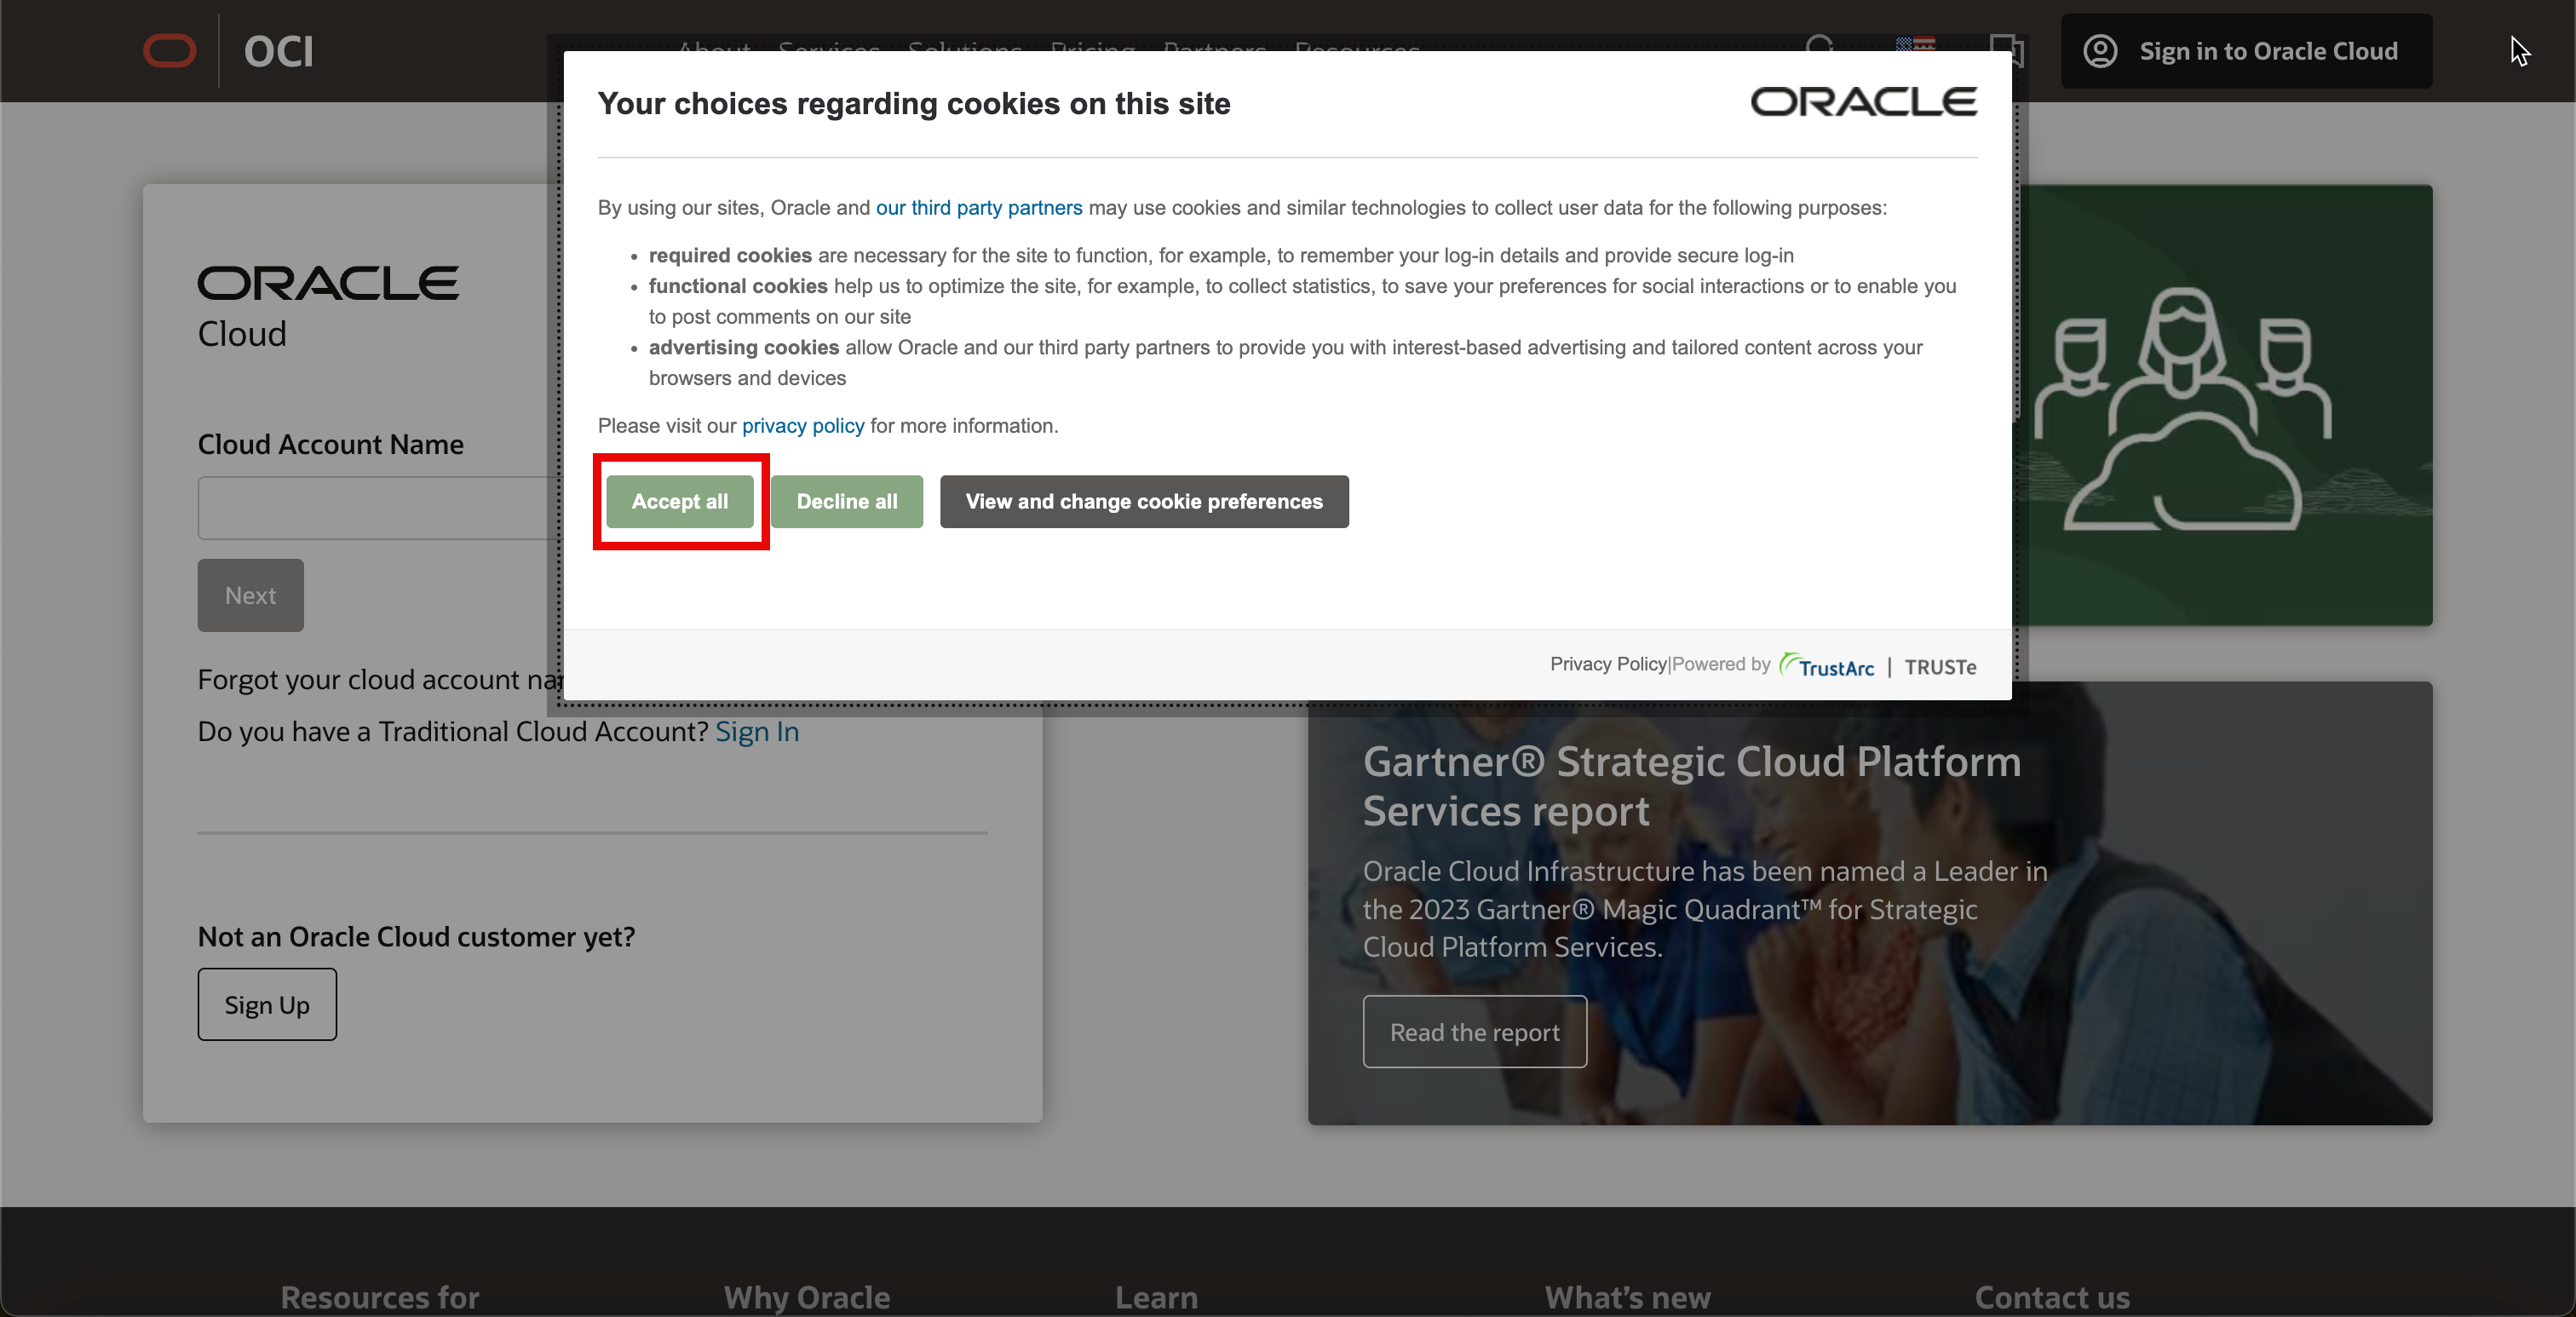
- Open cloud.oracle.com, you will get a question related to cookies, and to make sure the website operates the best, click Accept all.
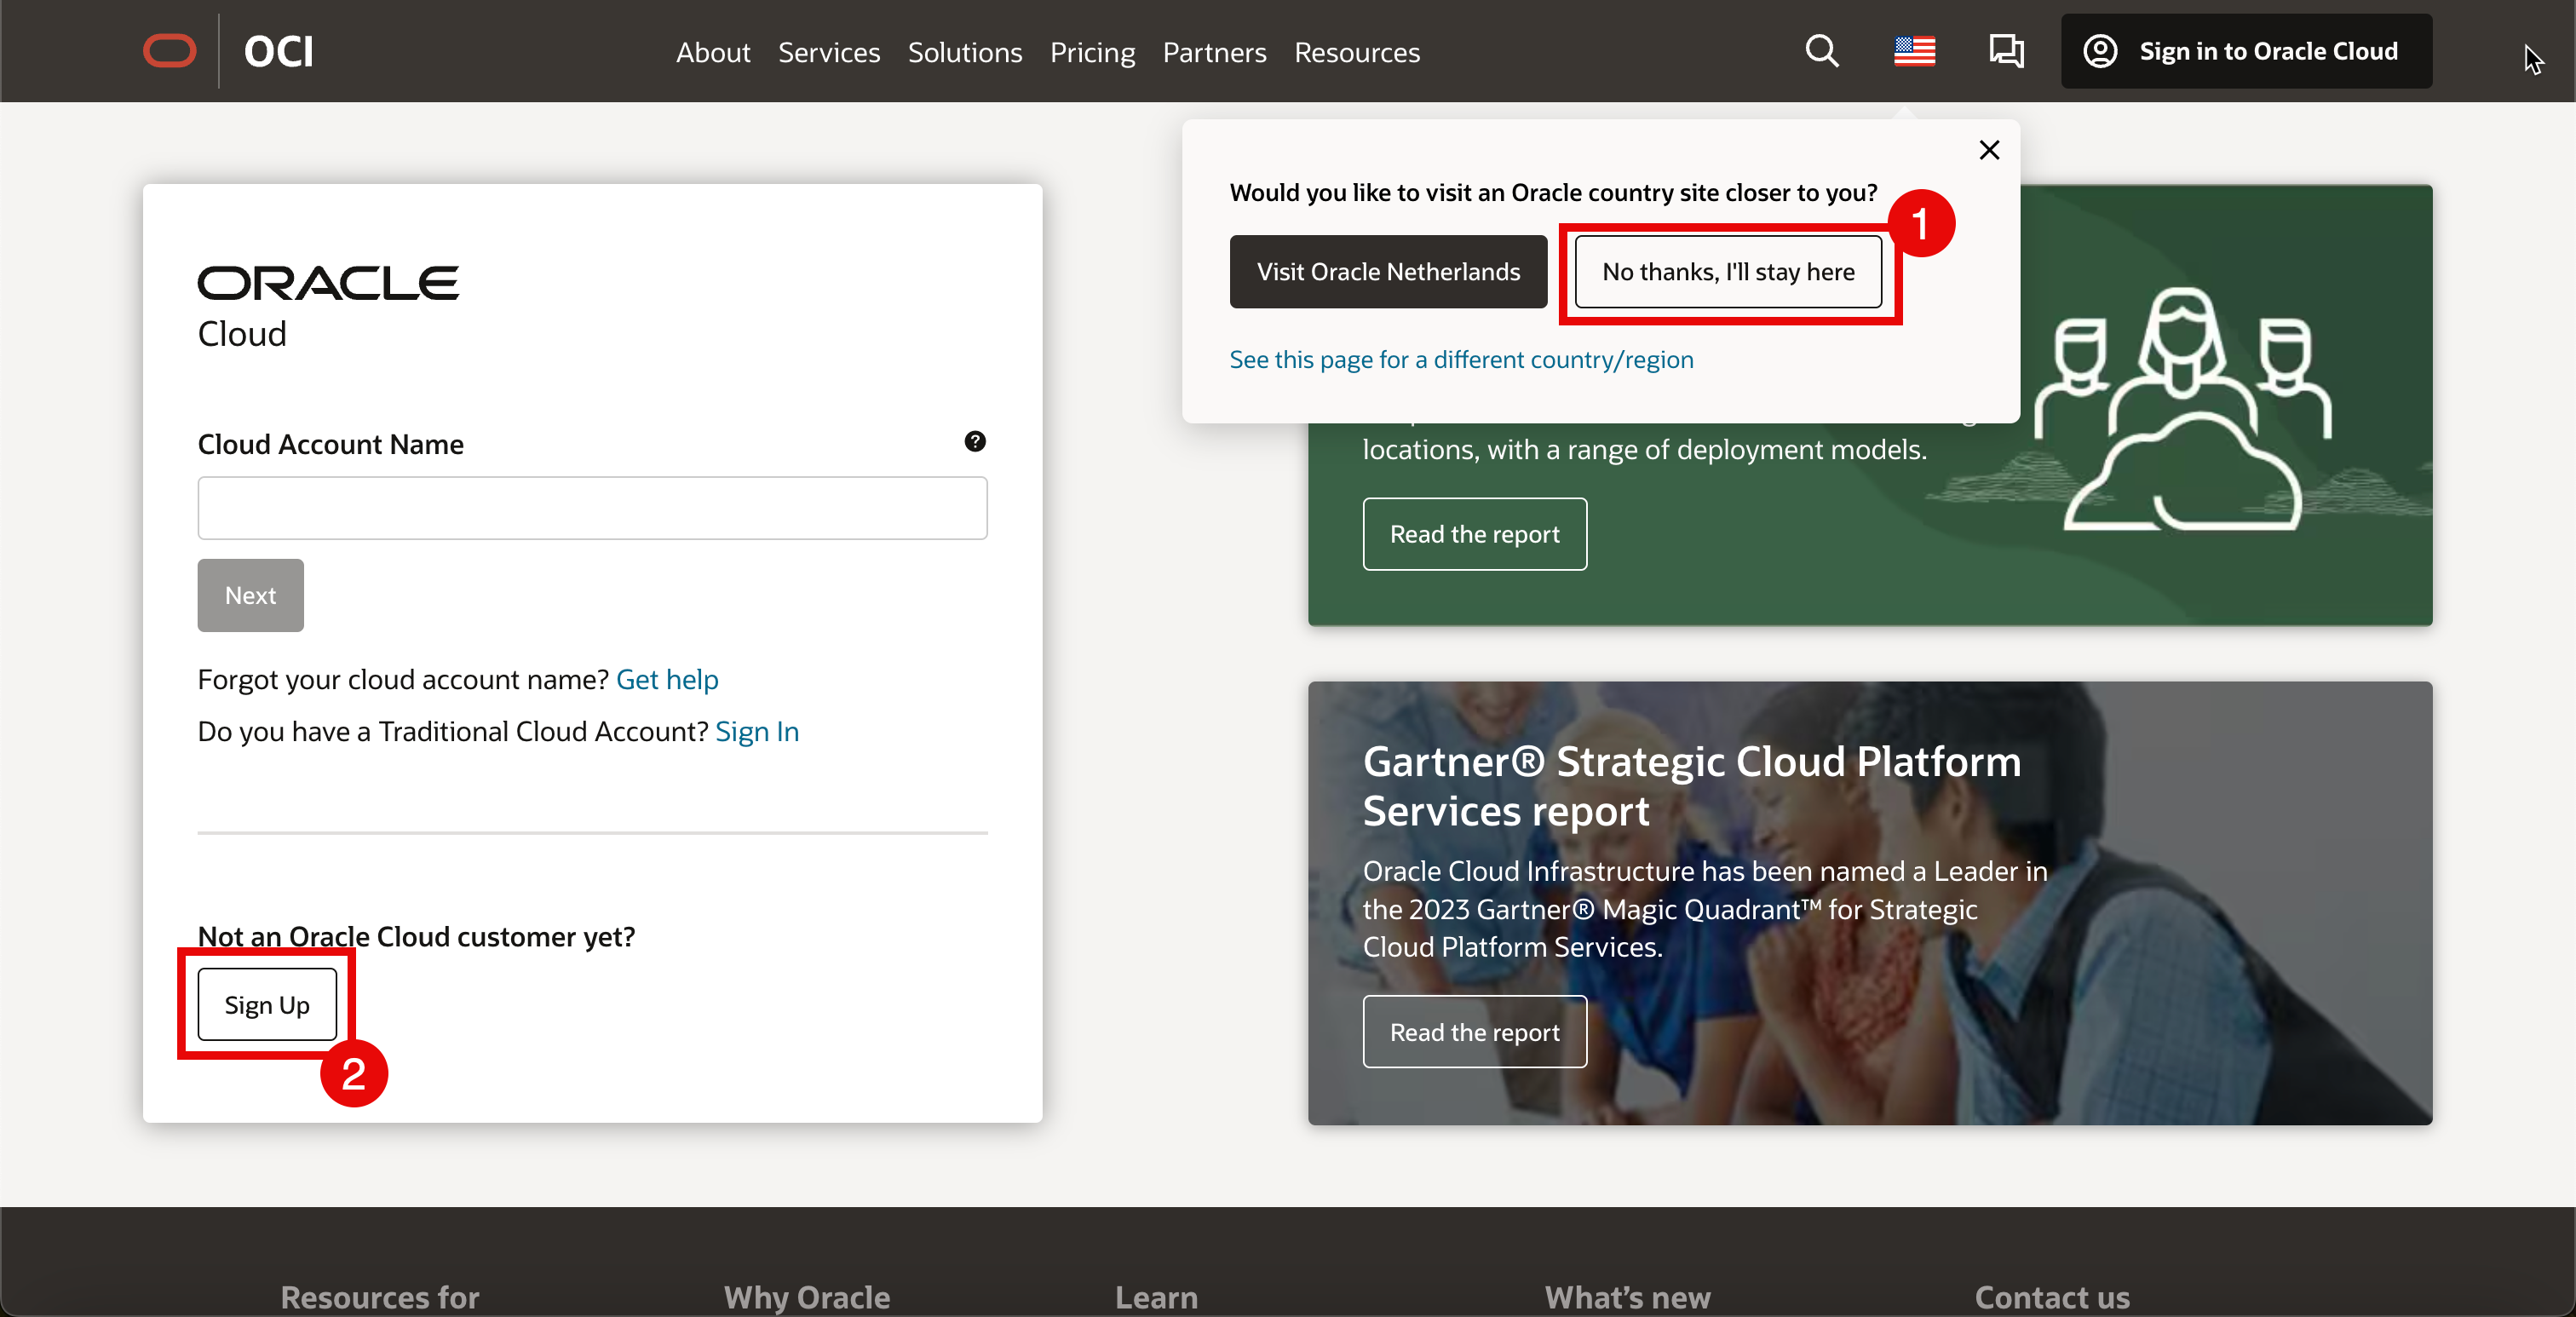
- Based on the country that you are based you may get a question if you would like to visit the Oracle website that is close to your region or to personalize the content tailored to your region or country. For this tutorial, select No thanks, I’ll stay here.
- Click Sign Up.
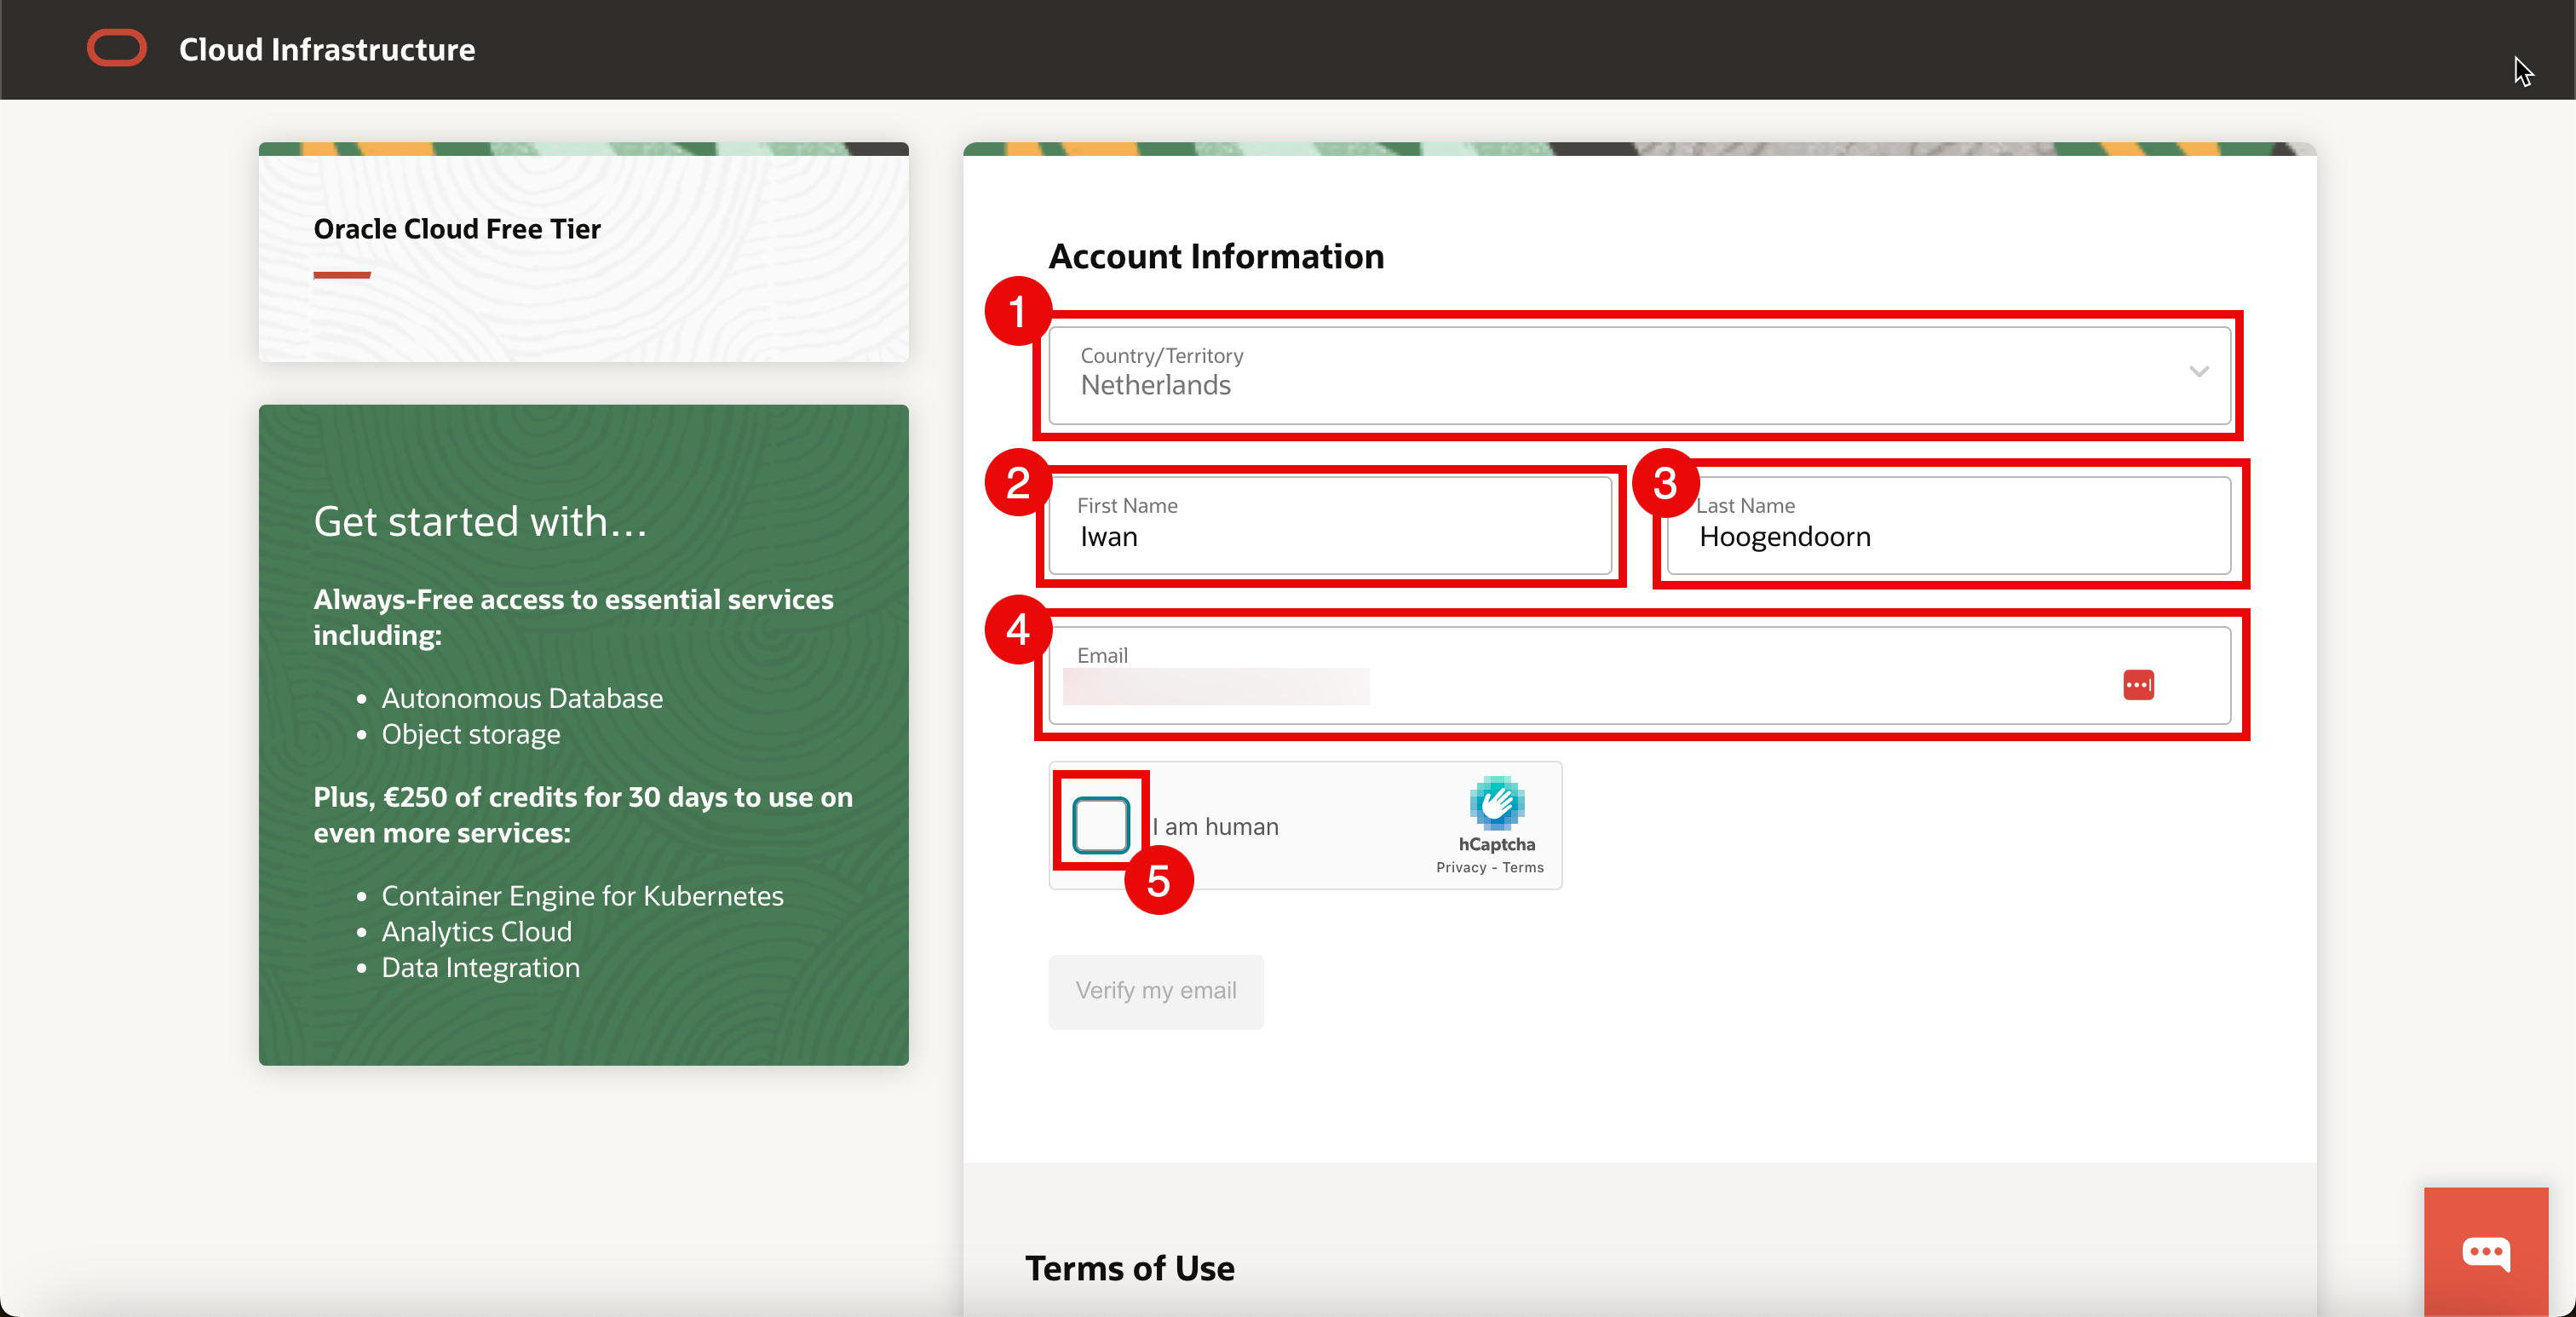
- Select your residential country.
- Enter your First Name.
- Enter your Last Name.
- Enter your Email address.
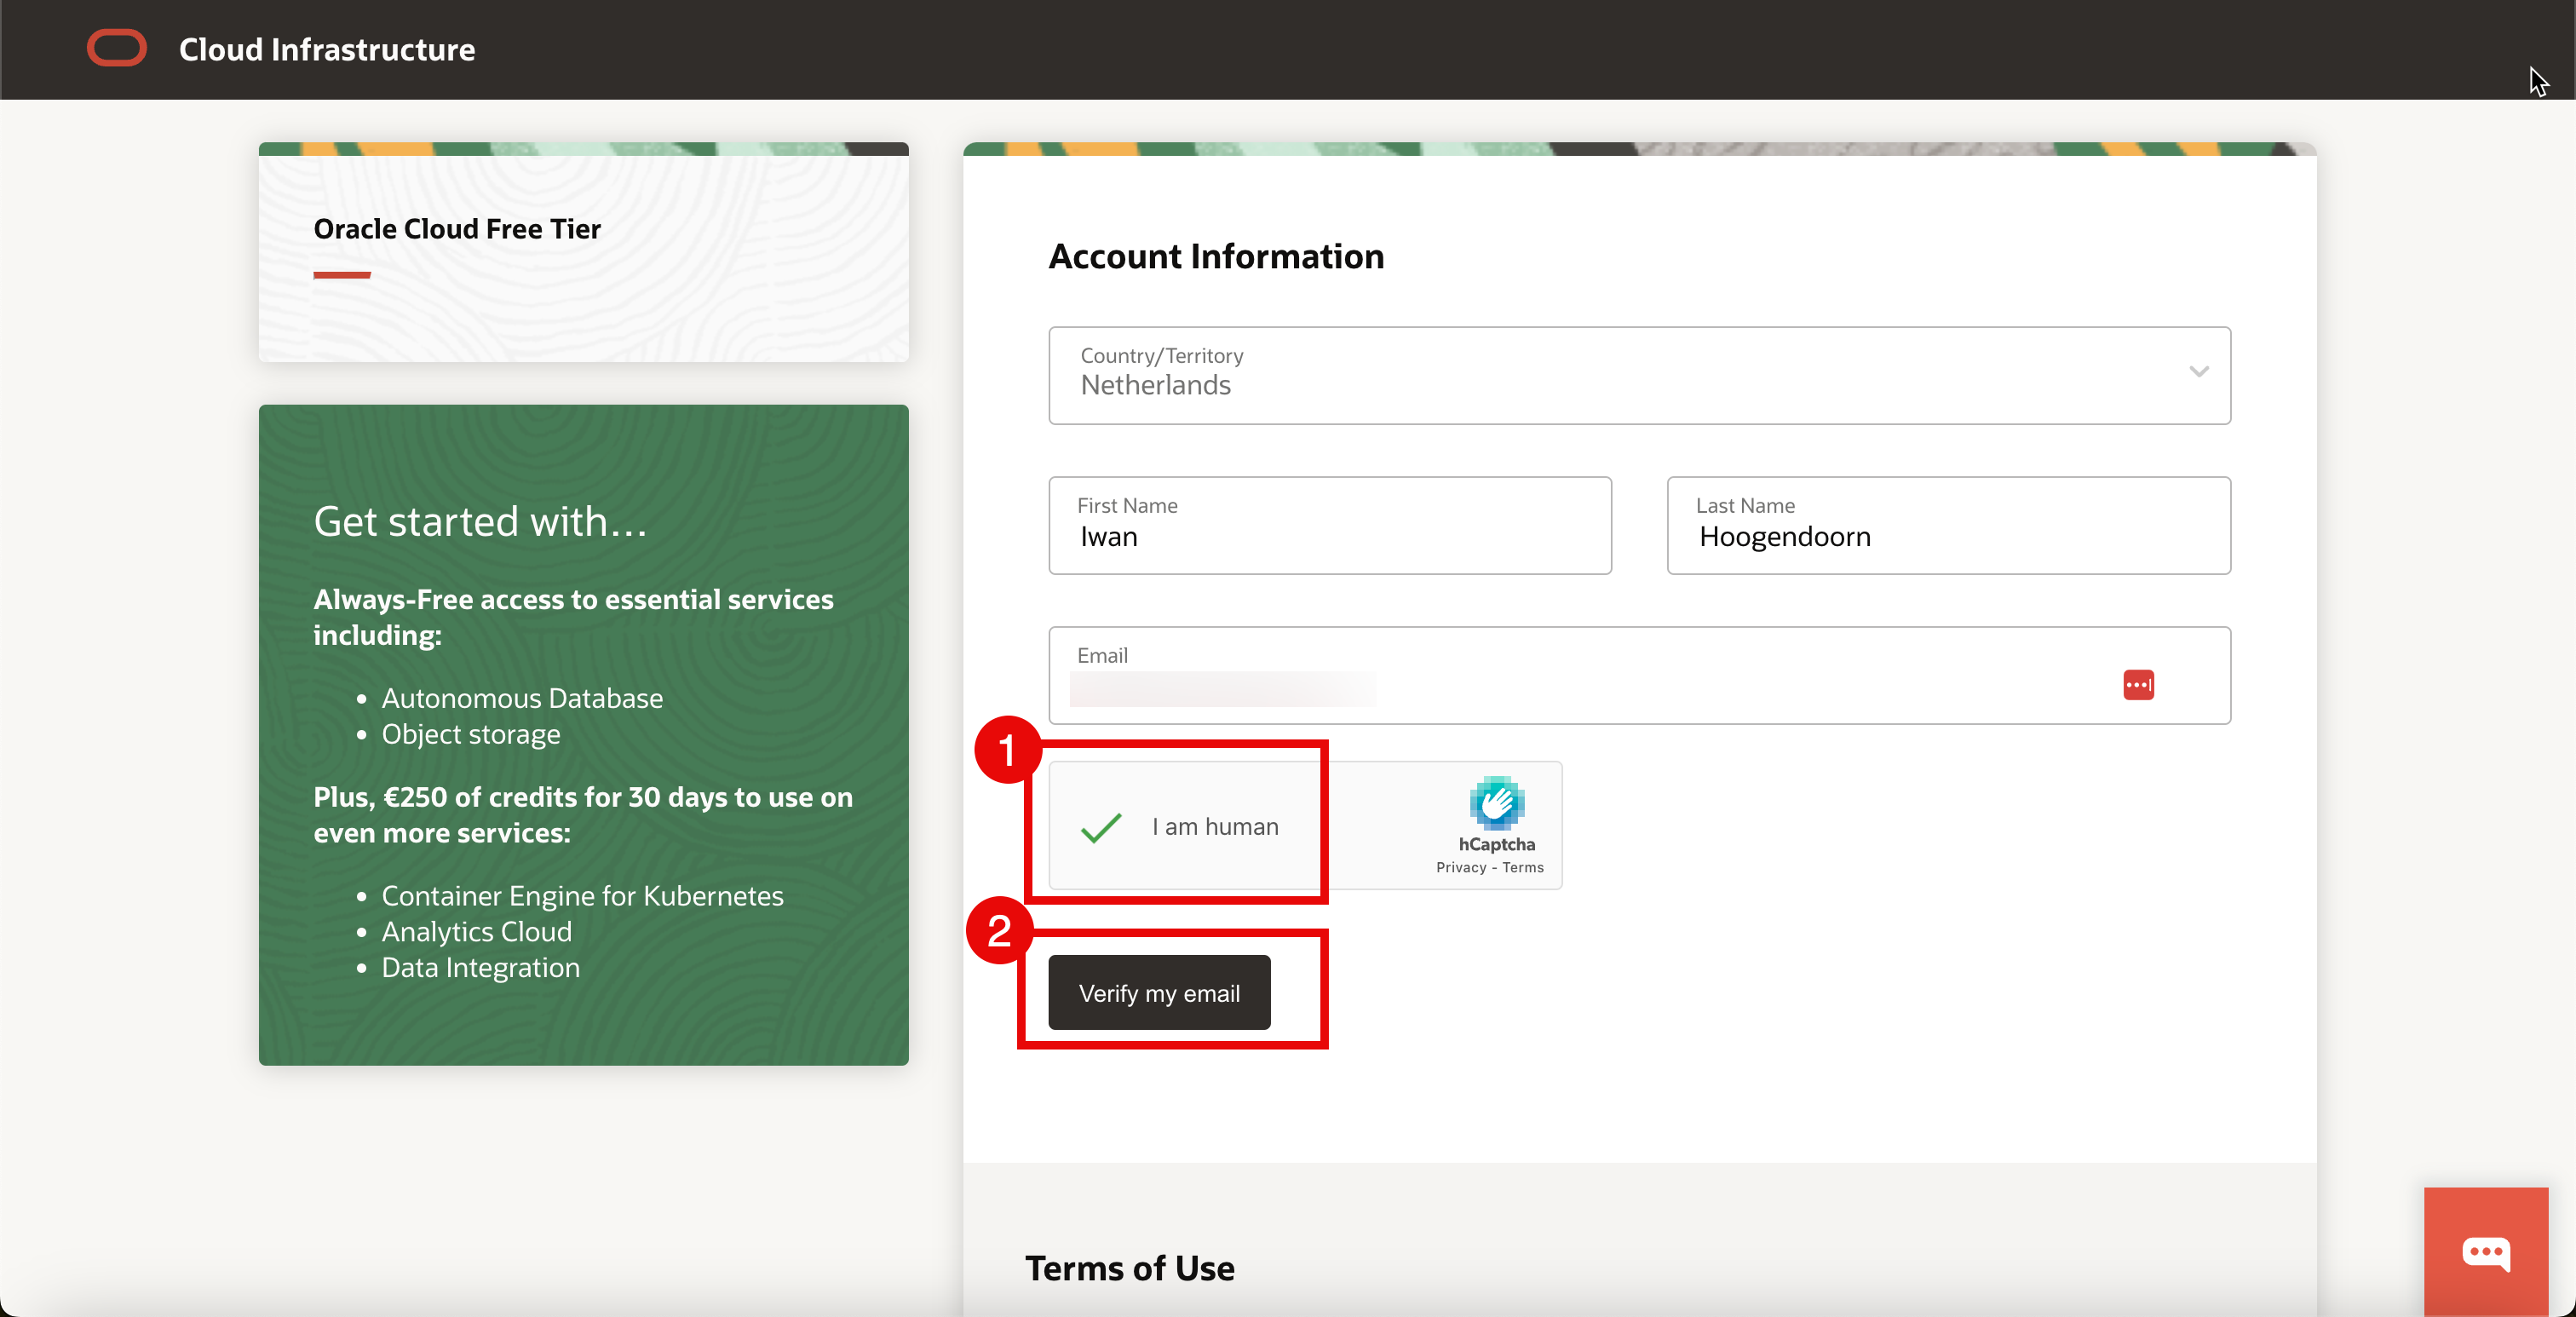
- Tick the checkbox to prove you are not a robot.
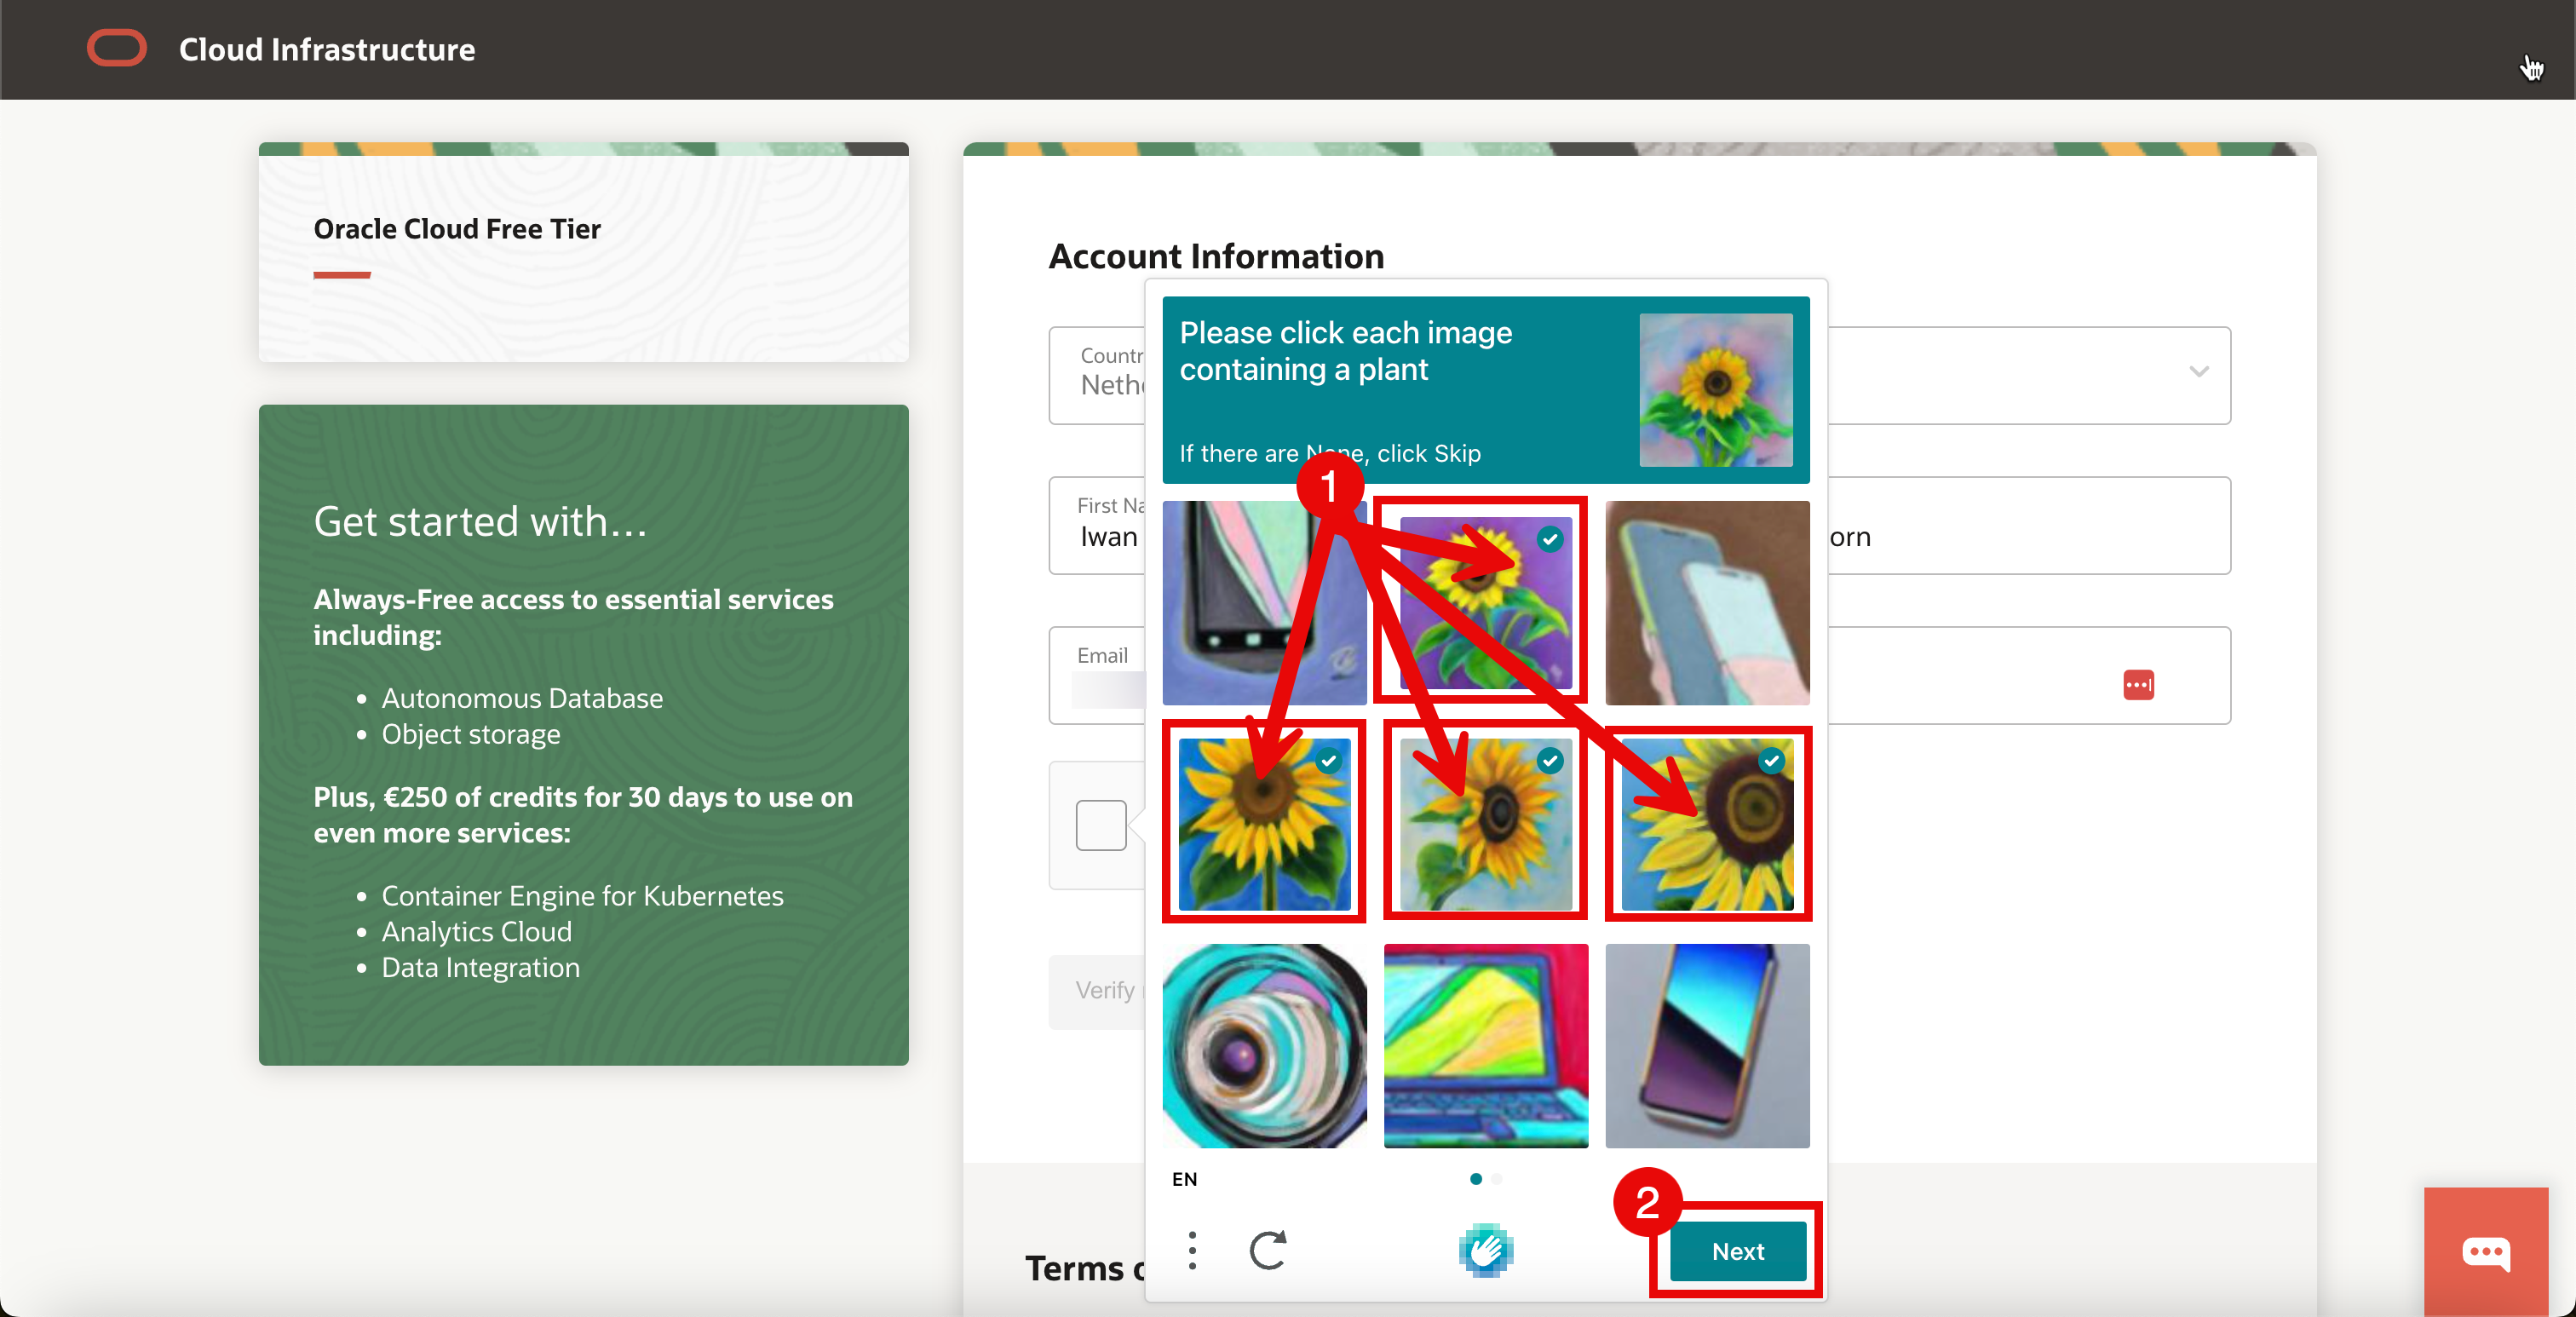
- In order to prove you are human you need to identify images.
- Click Next.
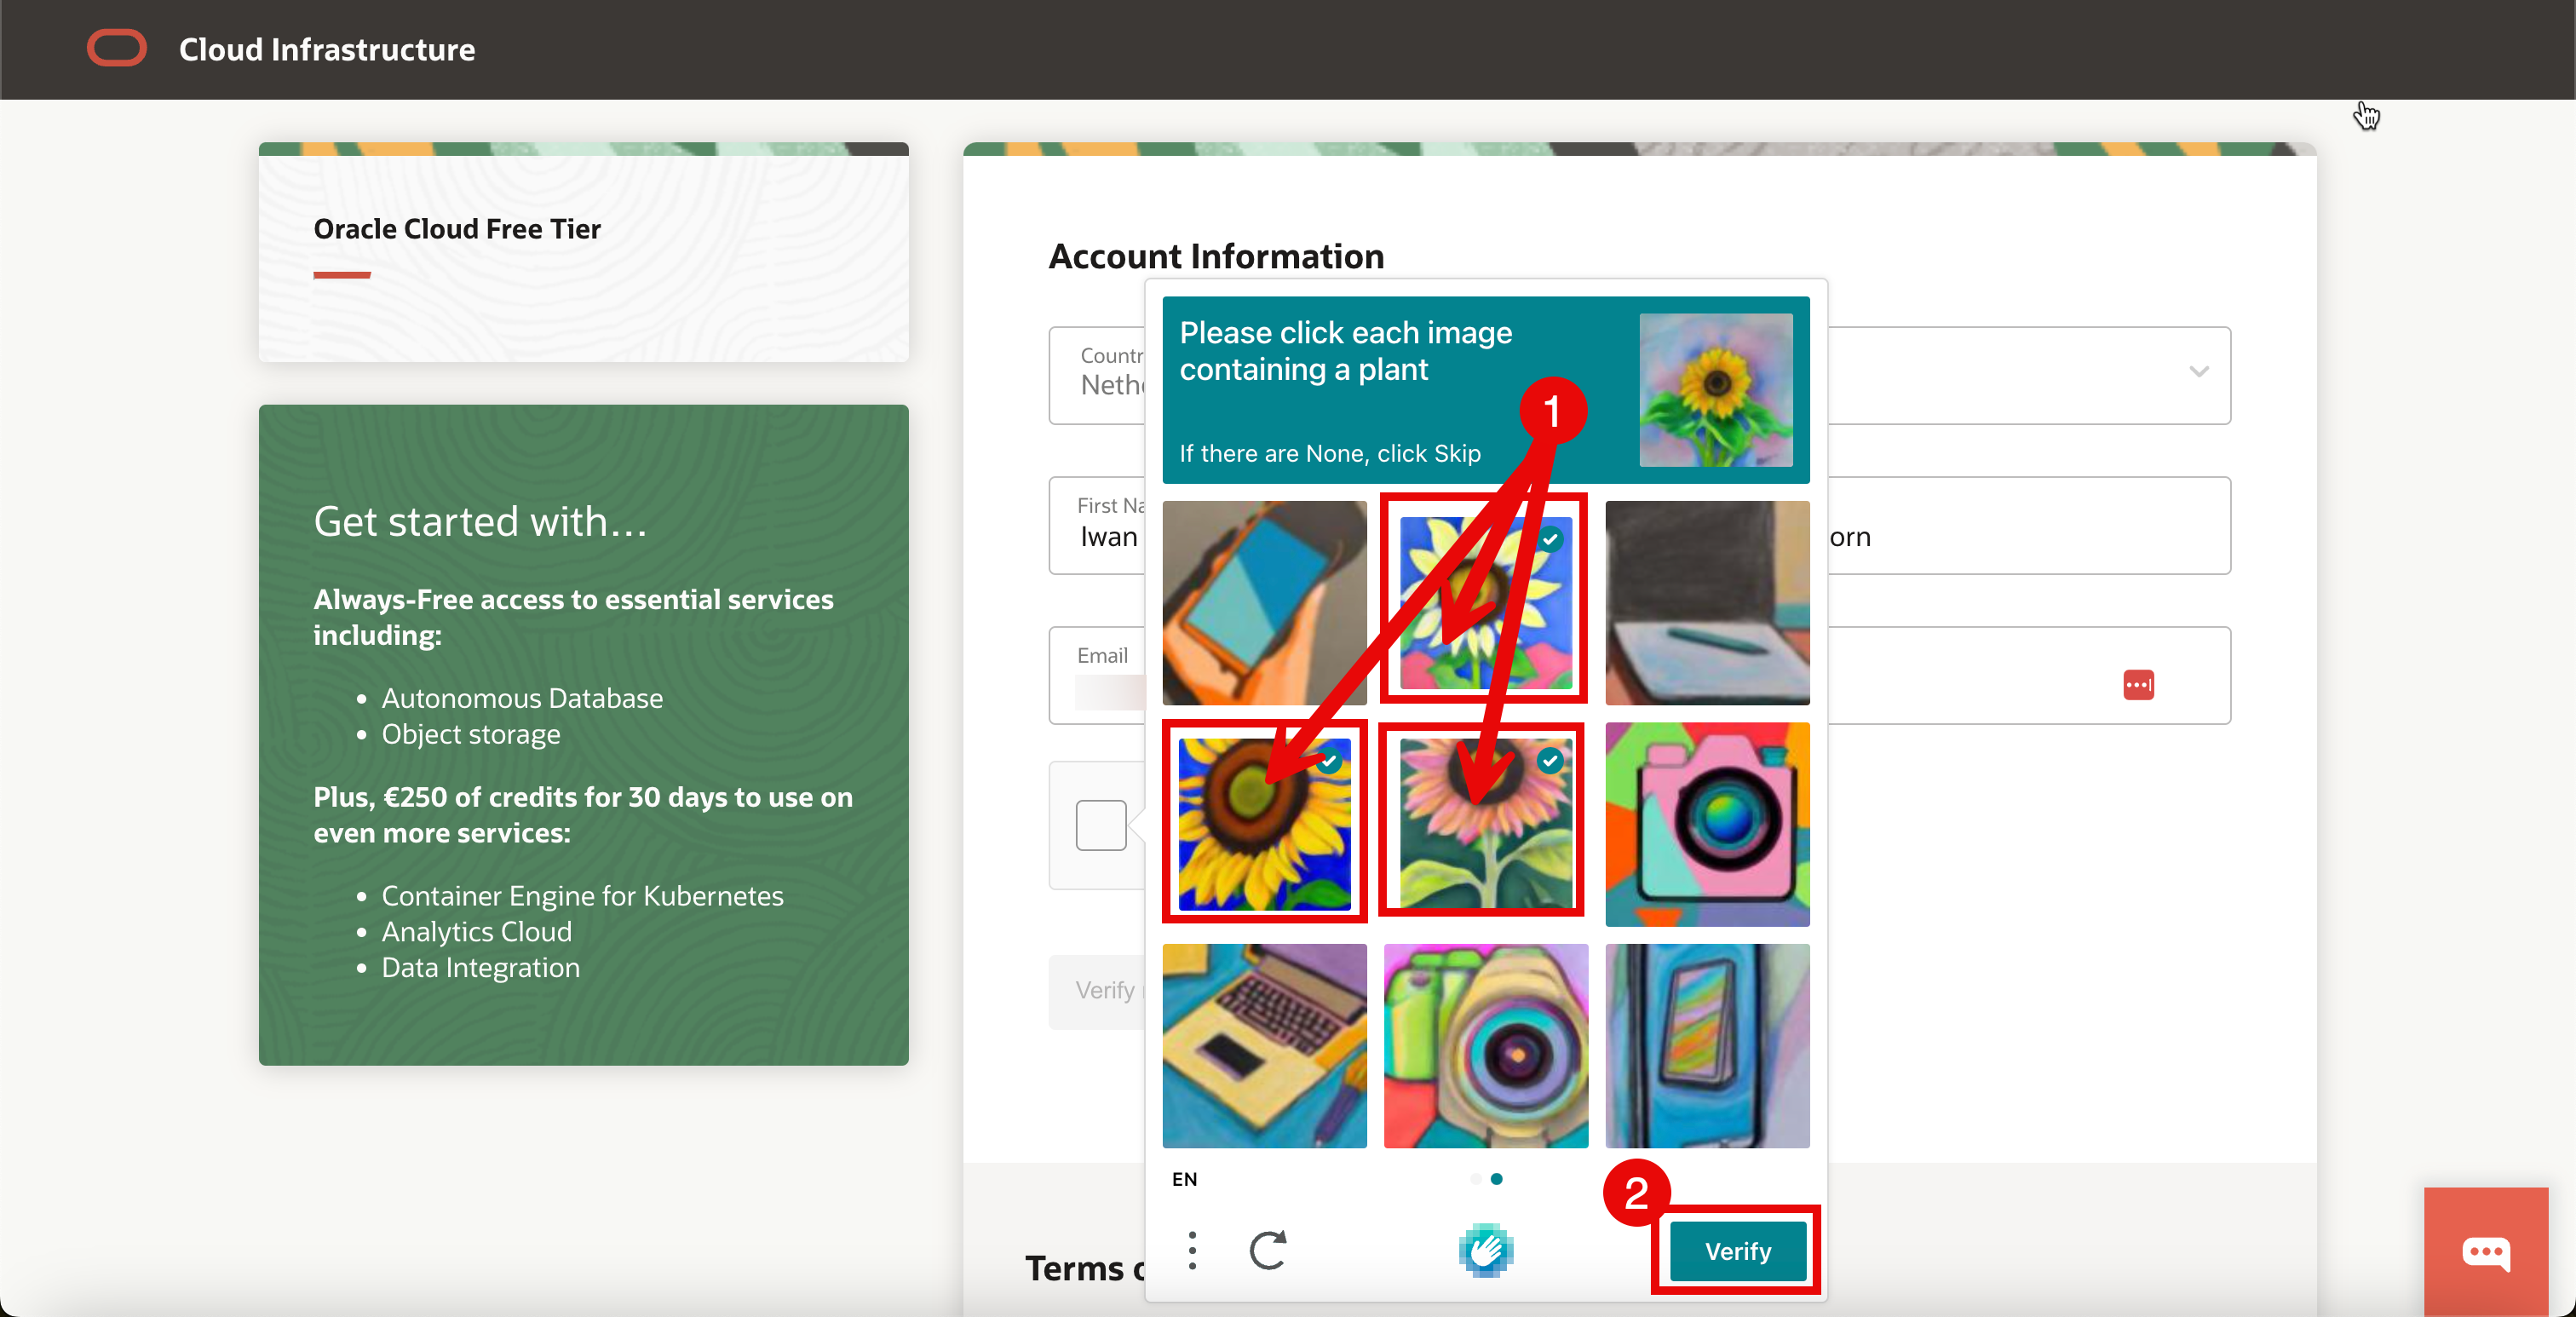
- Identify images for another round.
- Click Verify.
- Once you jumped through the hoops to prove you are human, you will now see a checkmark in the checkbox.
- Click Verify my email.
A message that an email verification link is now sent will be displayed.  Go to your email client and look for this email.
Click Verify email in that email message.
Go to your email client and look for this email.
Click Verify email in that email message.  You will be redirected to complete your account.
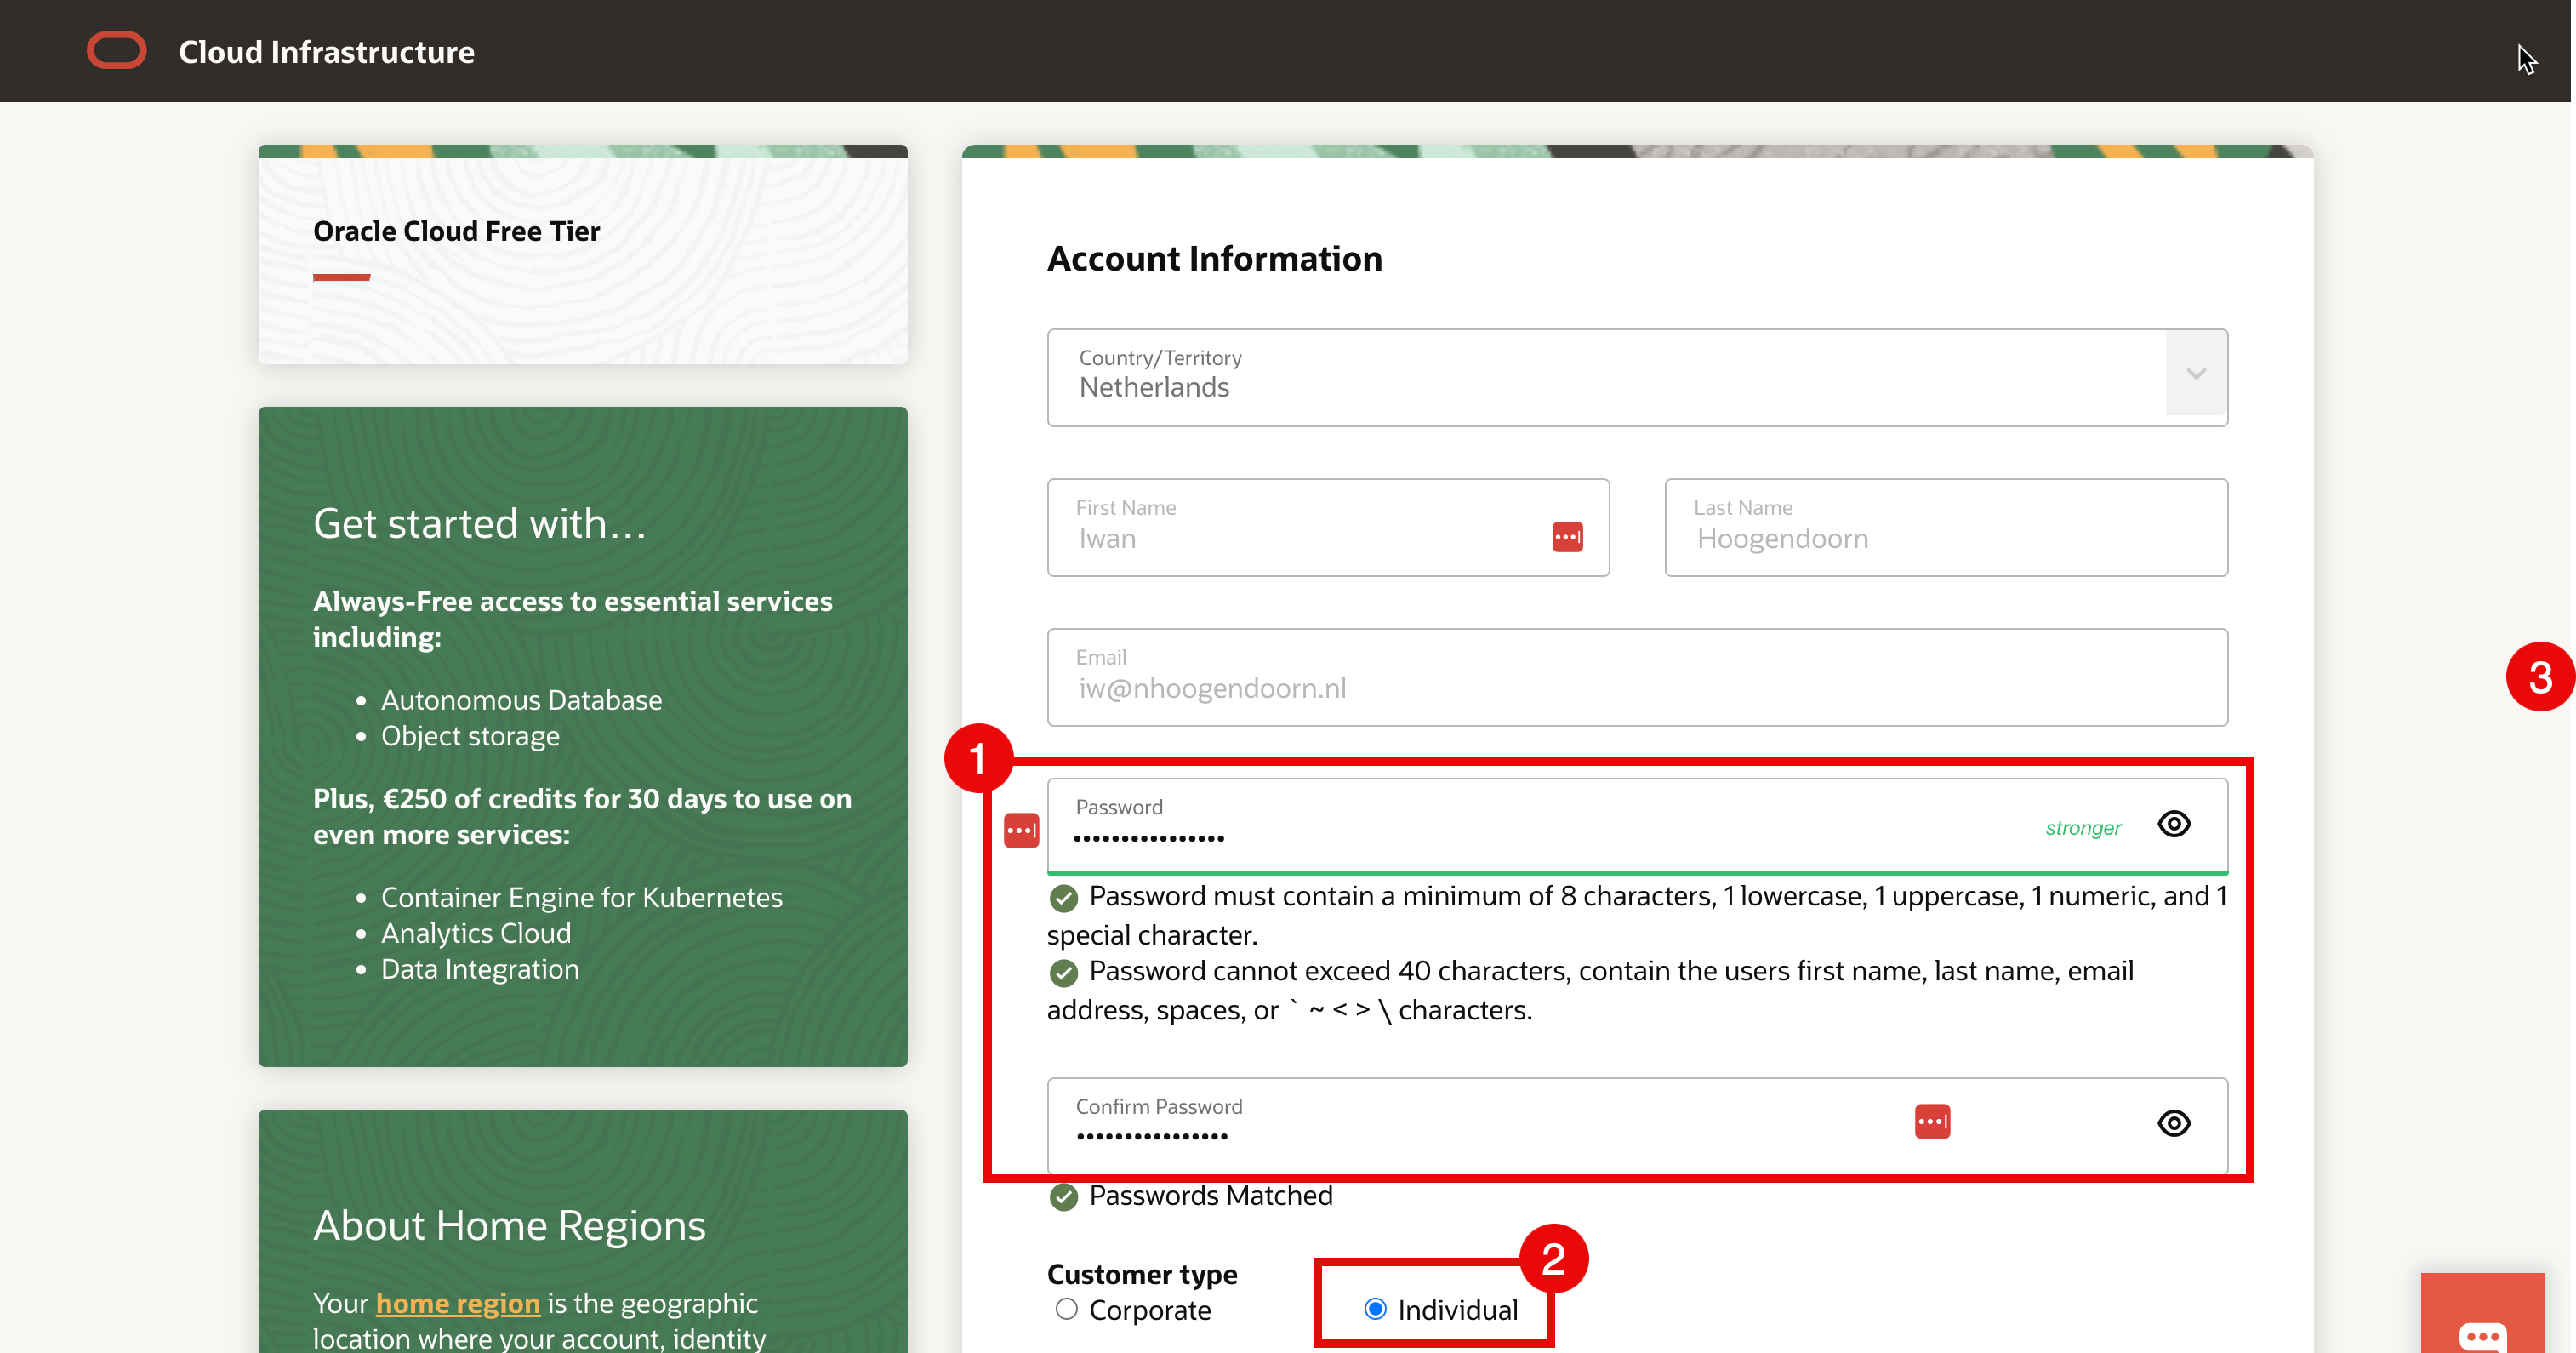
- Enter your new account password.
- Select your customer type. In this tutorial, we have selected Individual.
- Scroll down.
- Enter your Cloud Account Name.
- This is an important identifier that can not be changed later, so think of something that makes sense and do not use personal information like your full name. For this tutorial, we use ihmyfreeocicloud .
- Select your Home Region. For this tutorial, it is The Netherlands, because this is my home region.
- Acknowledge that the home region you select now can not be changed later.
- Click Continue.

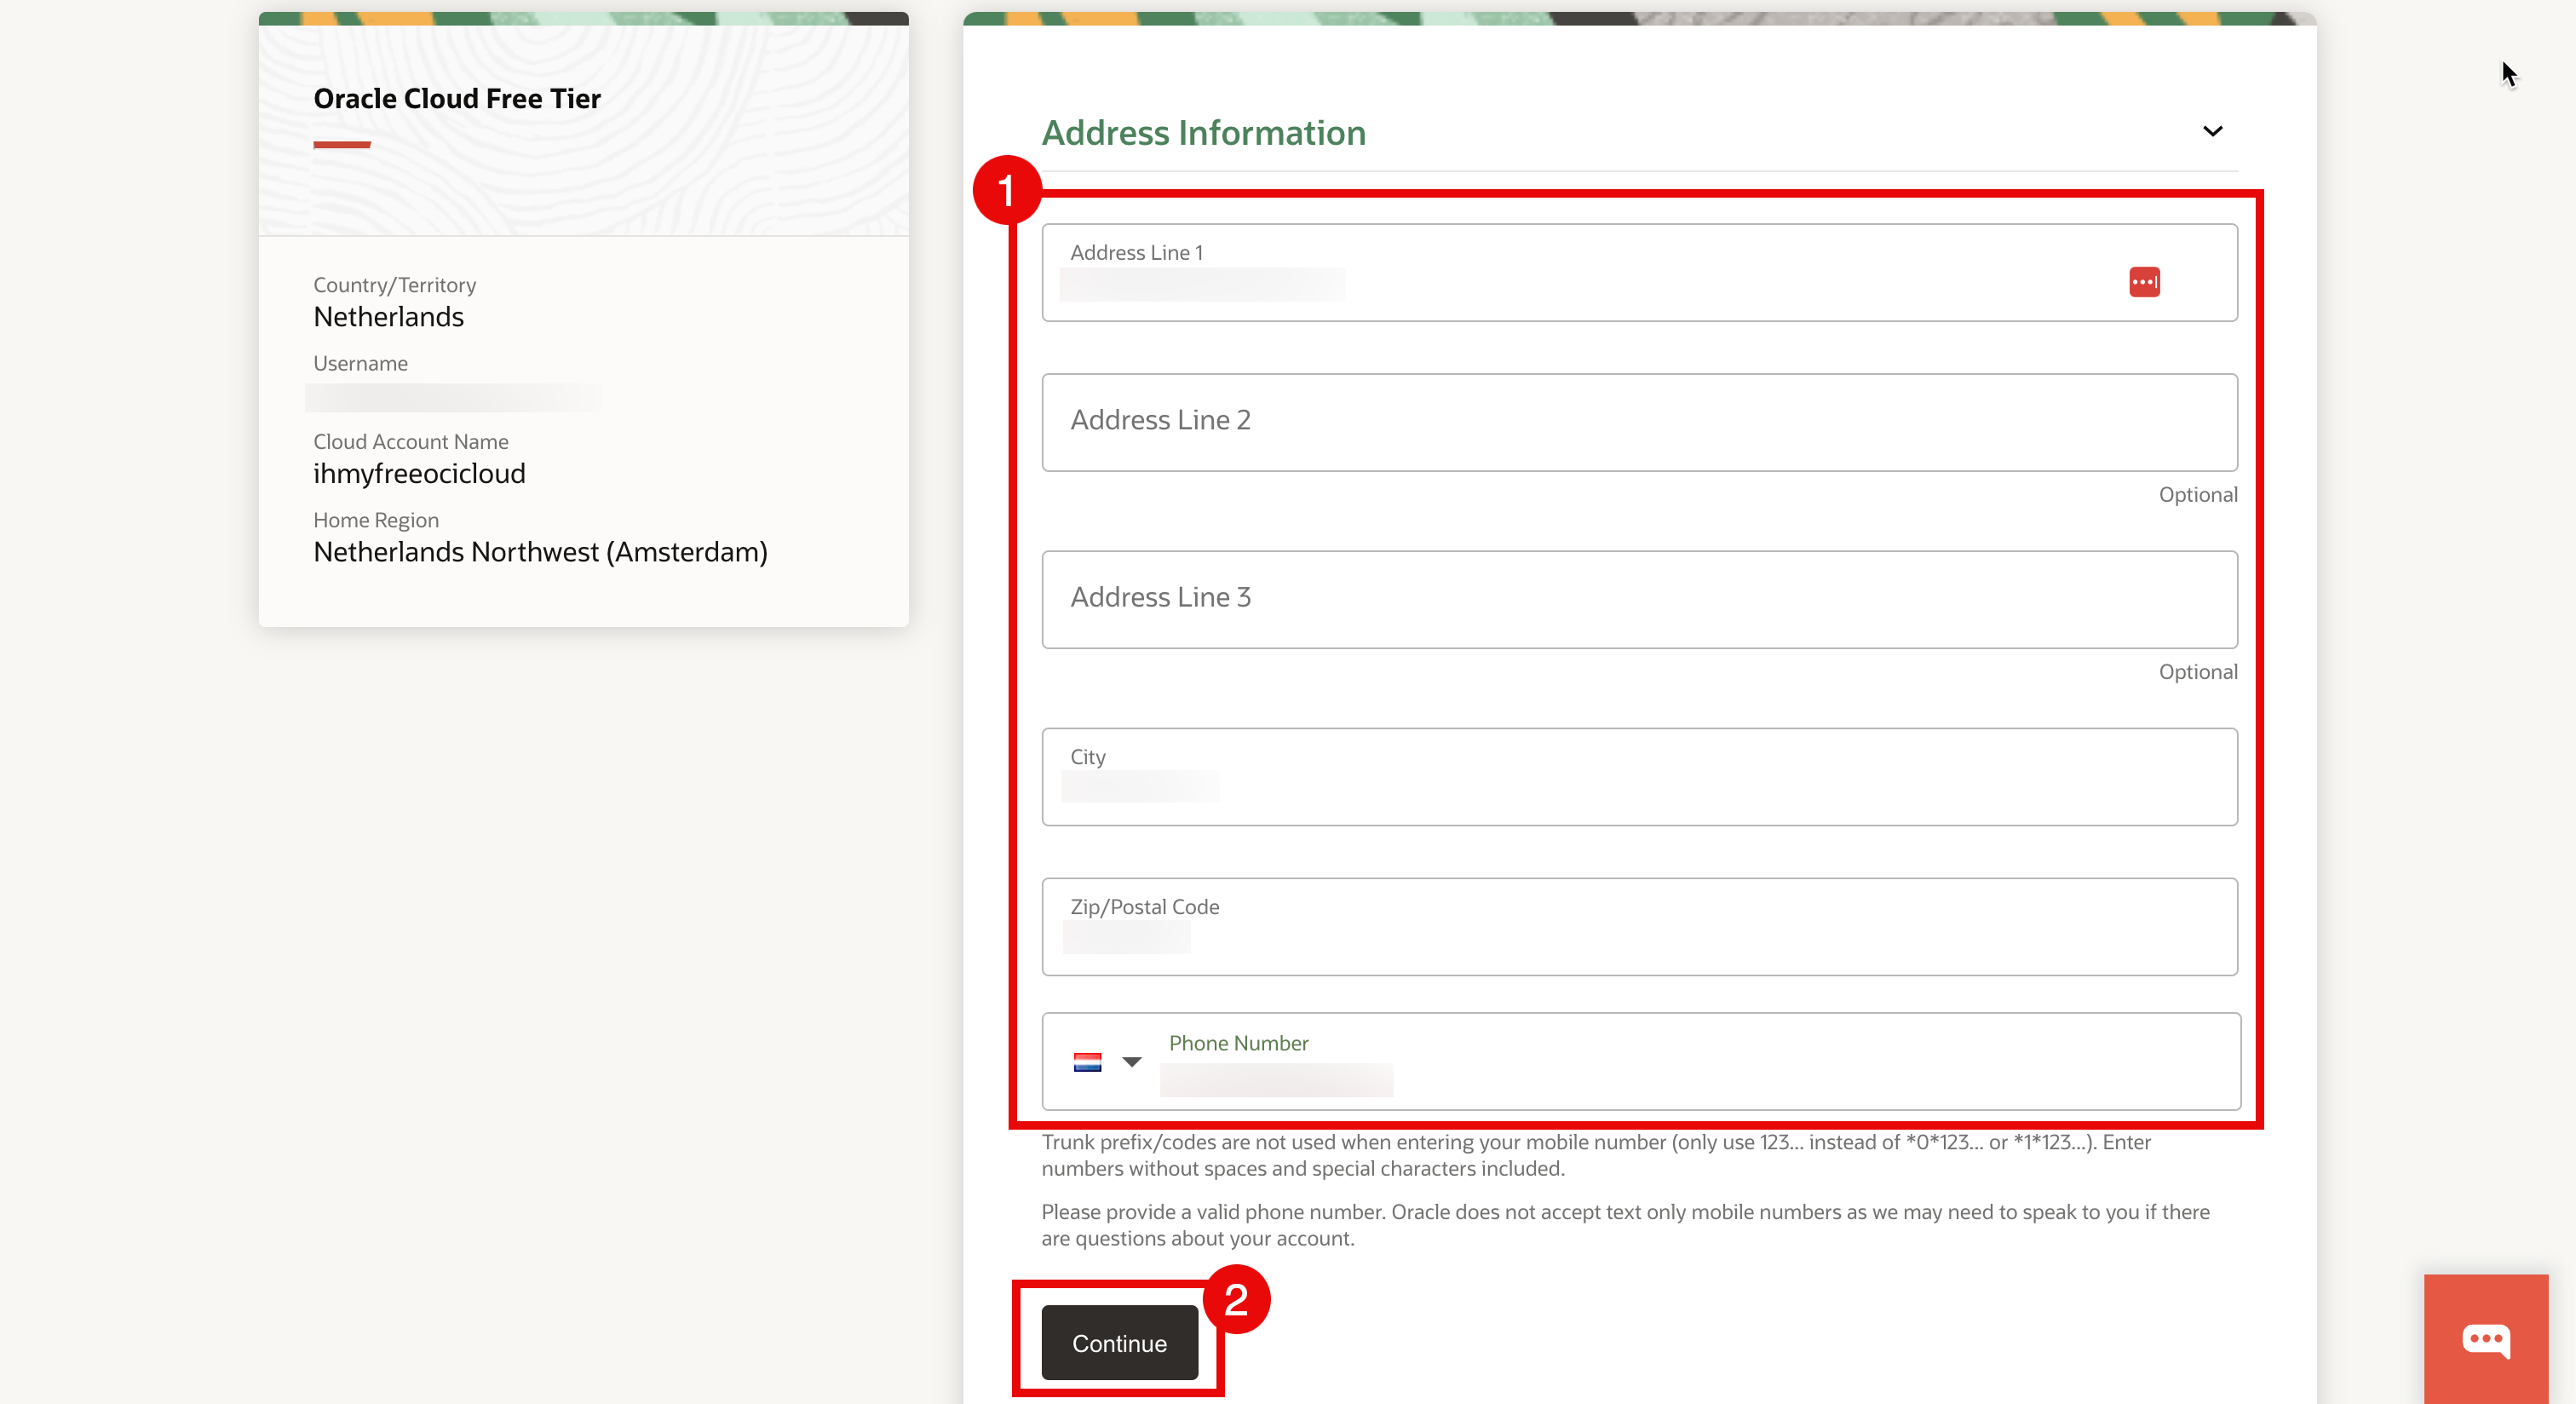
- Enter your address information and phone number.
- Click Continue.
Task 2: Add Payment Details
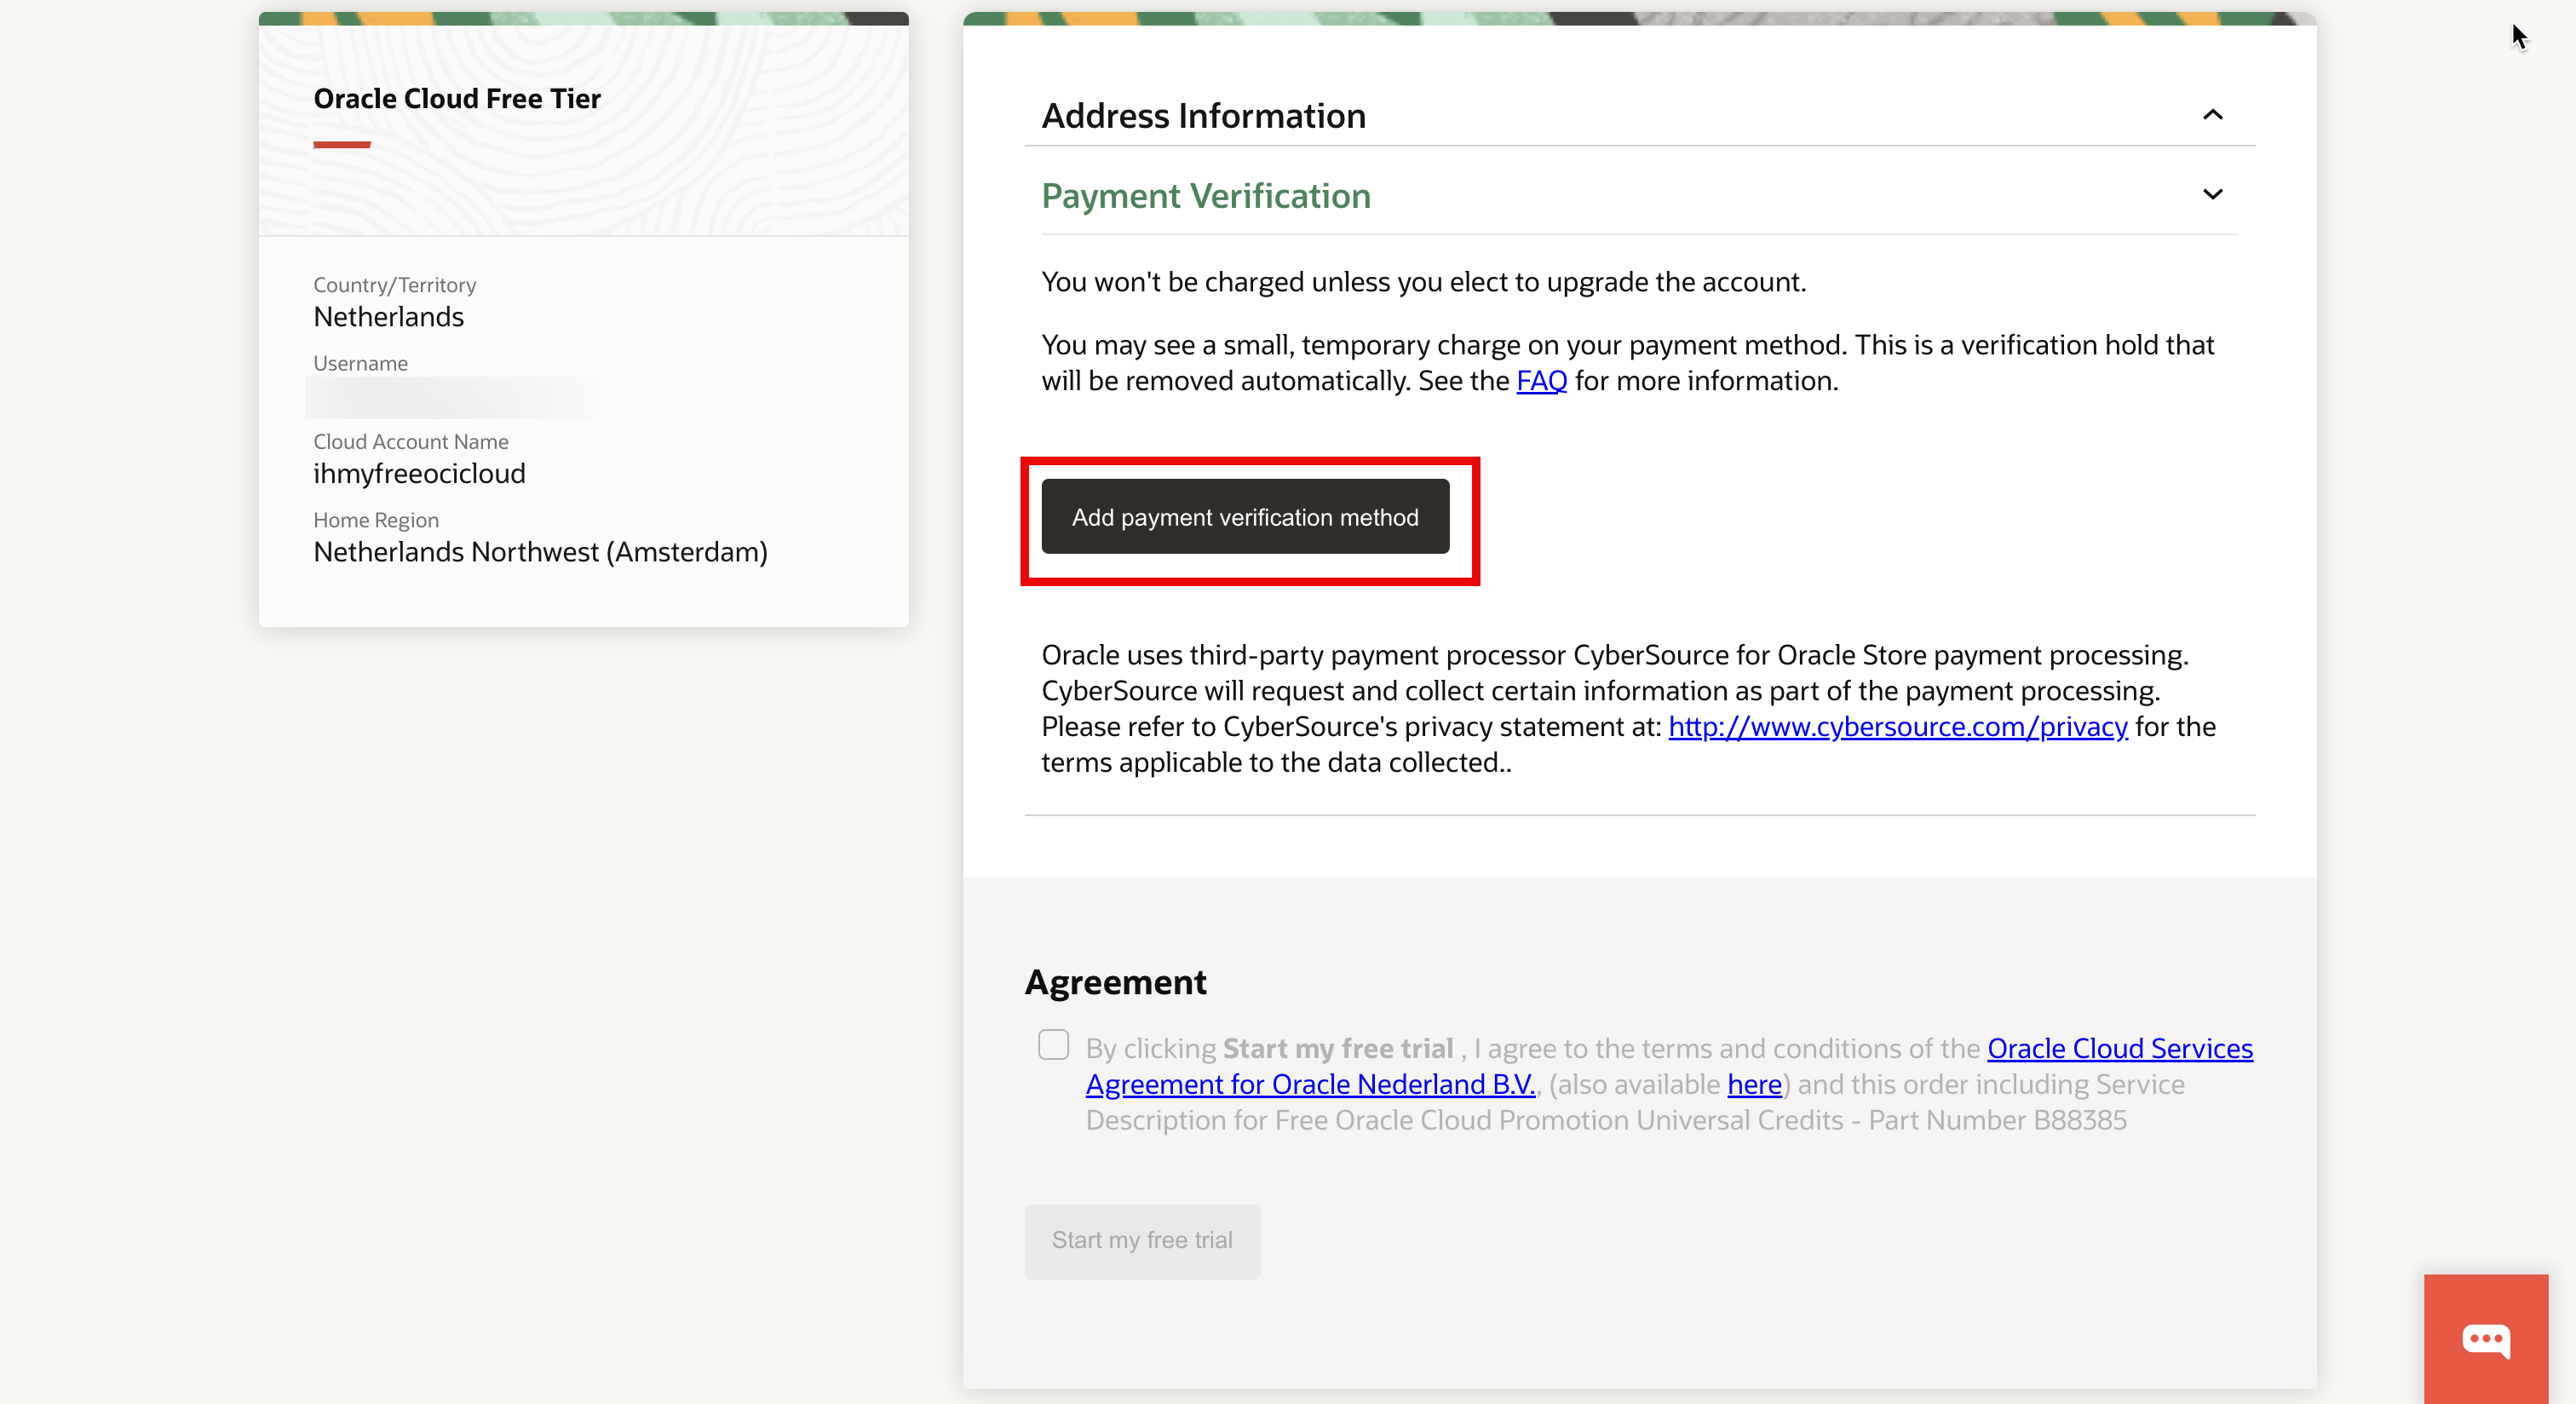
After your profile details and home region are specified you need to add your payment details.
- Click Add payment verification method.
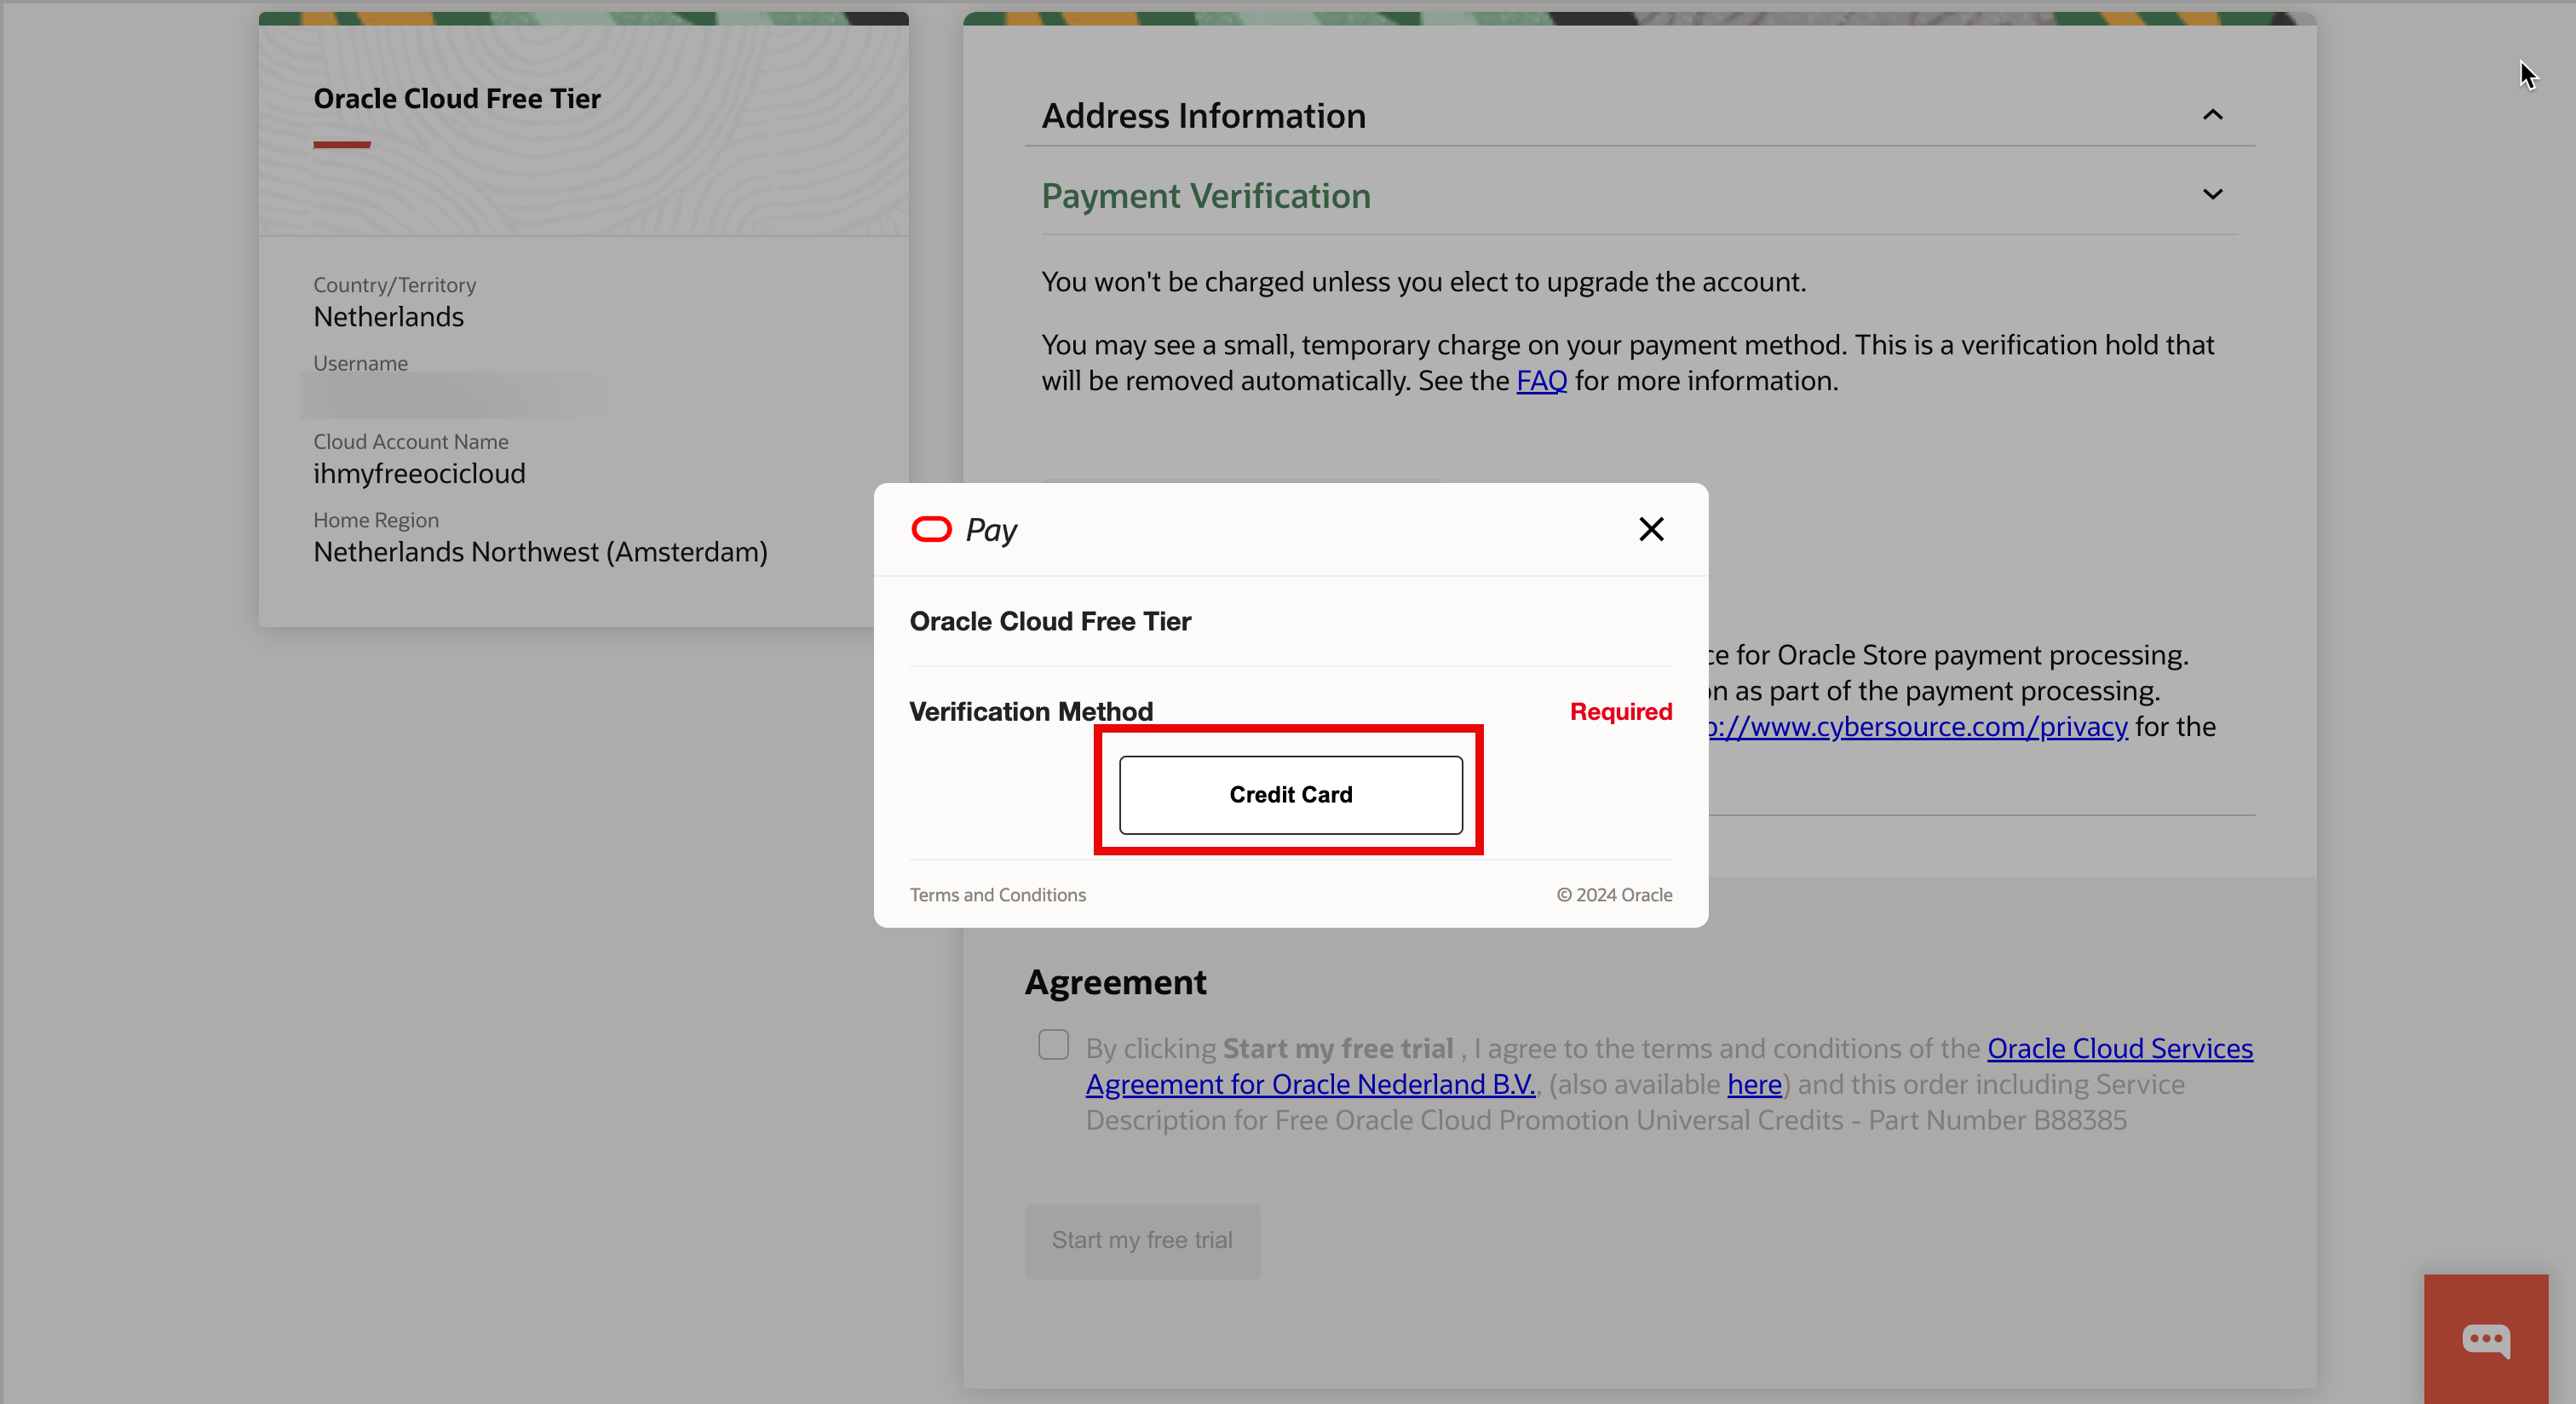
- Click Credit Card.
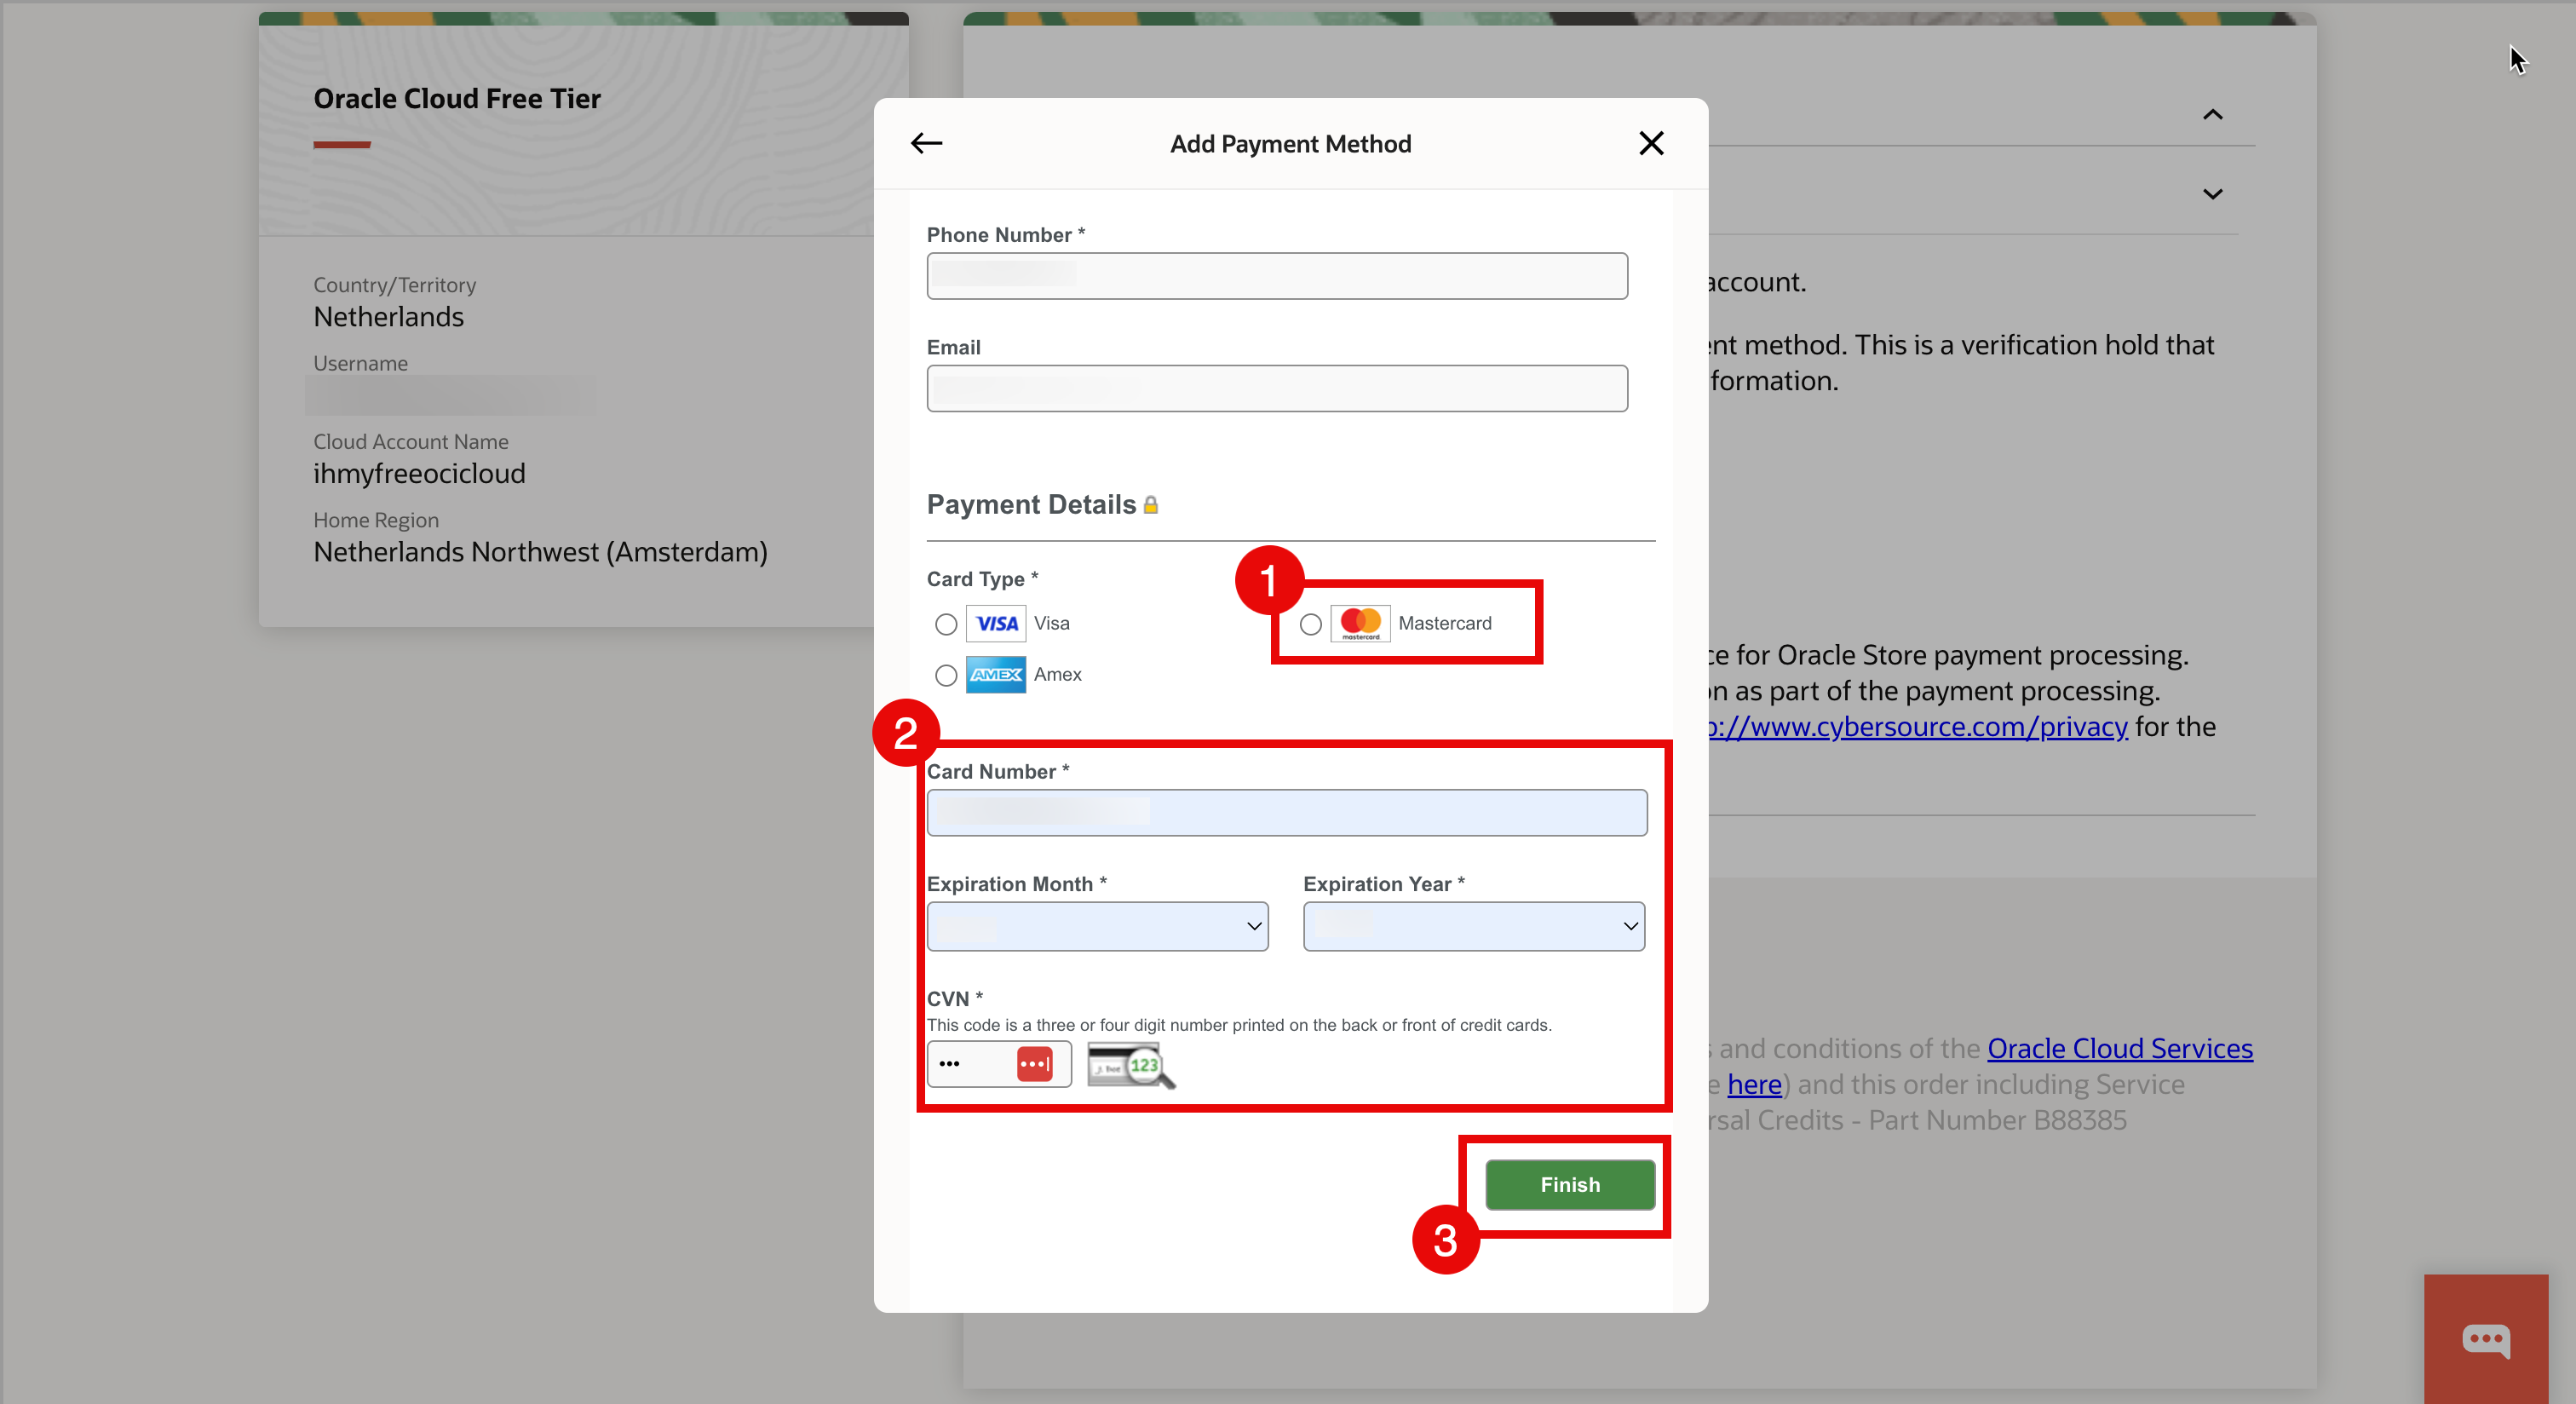
- Most of the billing information will be pre-filled for you based on the information previously entered. Scroll down to enter the payment details.

- Select your Credit Card Type. For this tutorial, we will select Mastercard.
- Enter your credit card number, expiration month, expiration year and CVN.
Note: When you are using a credit card, make sure you are not using a prepaid credit card as this is blocked by Oracle.
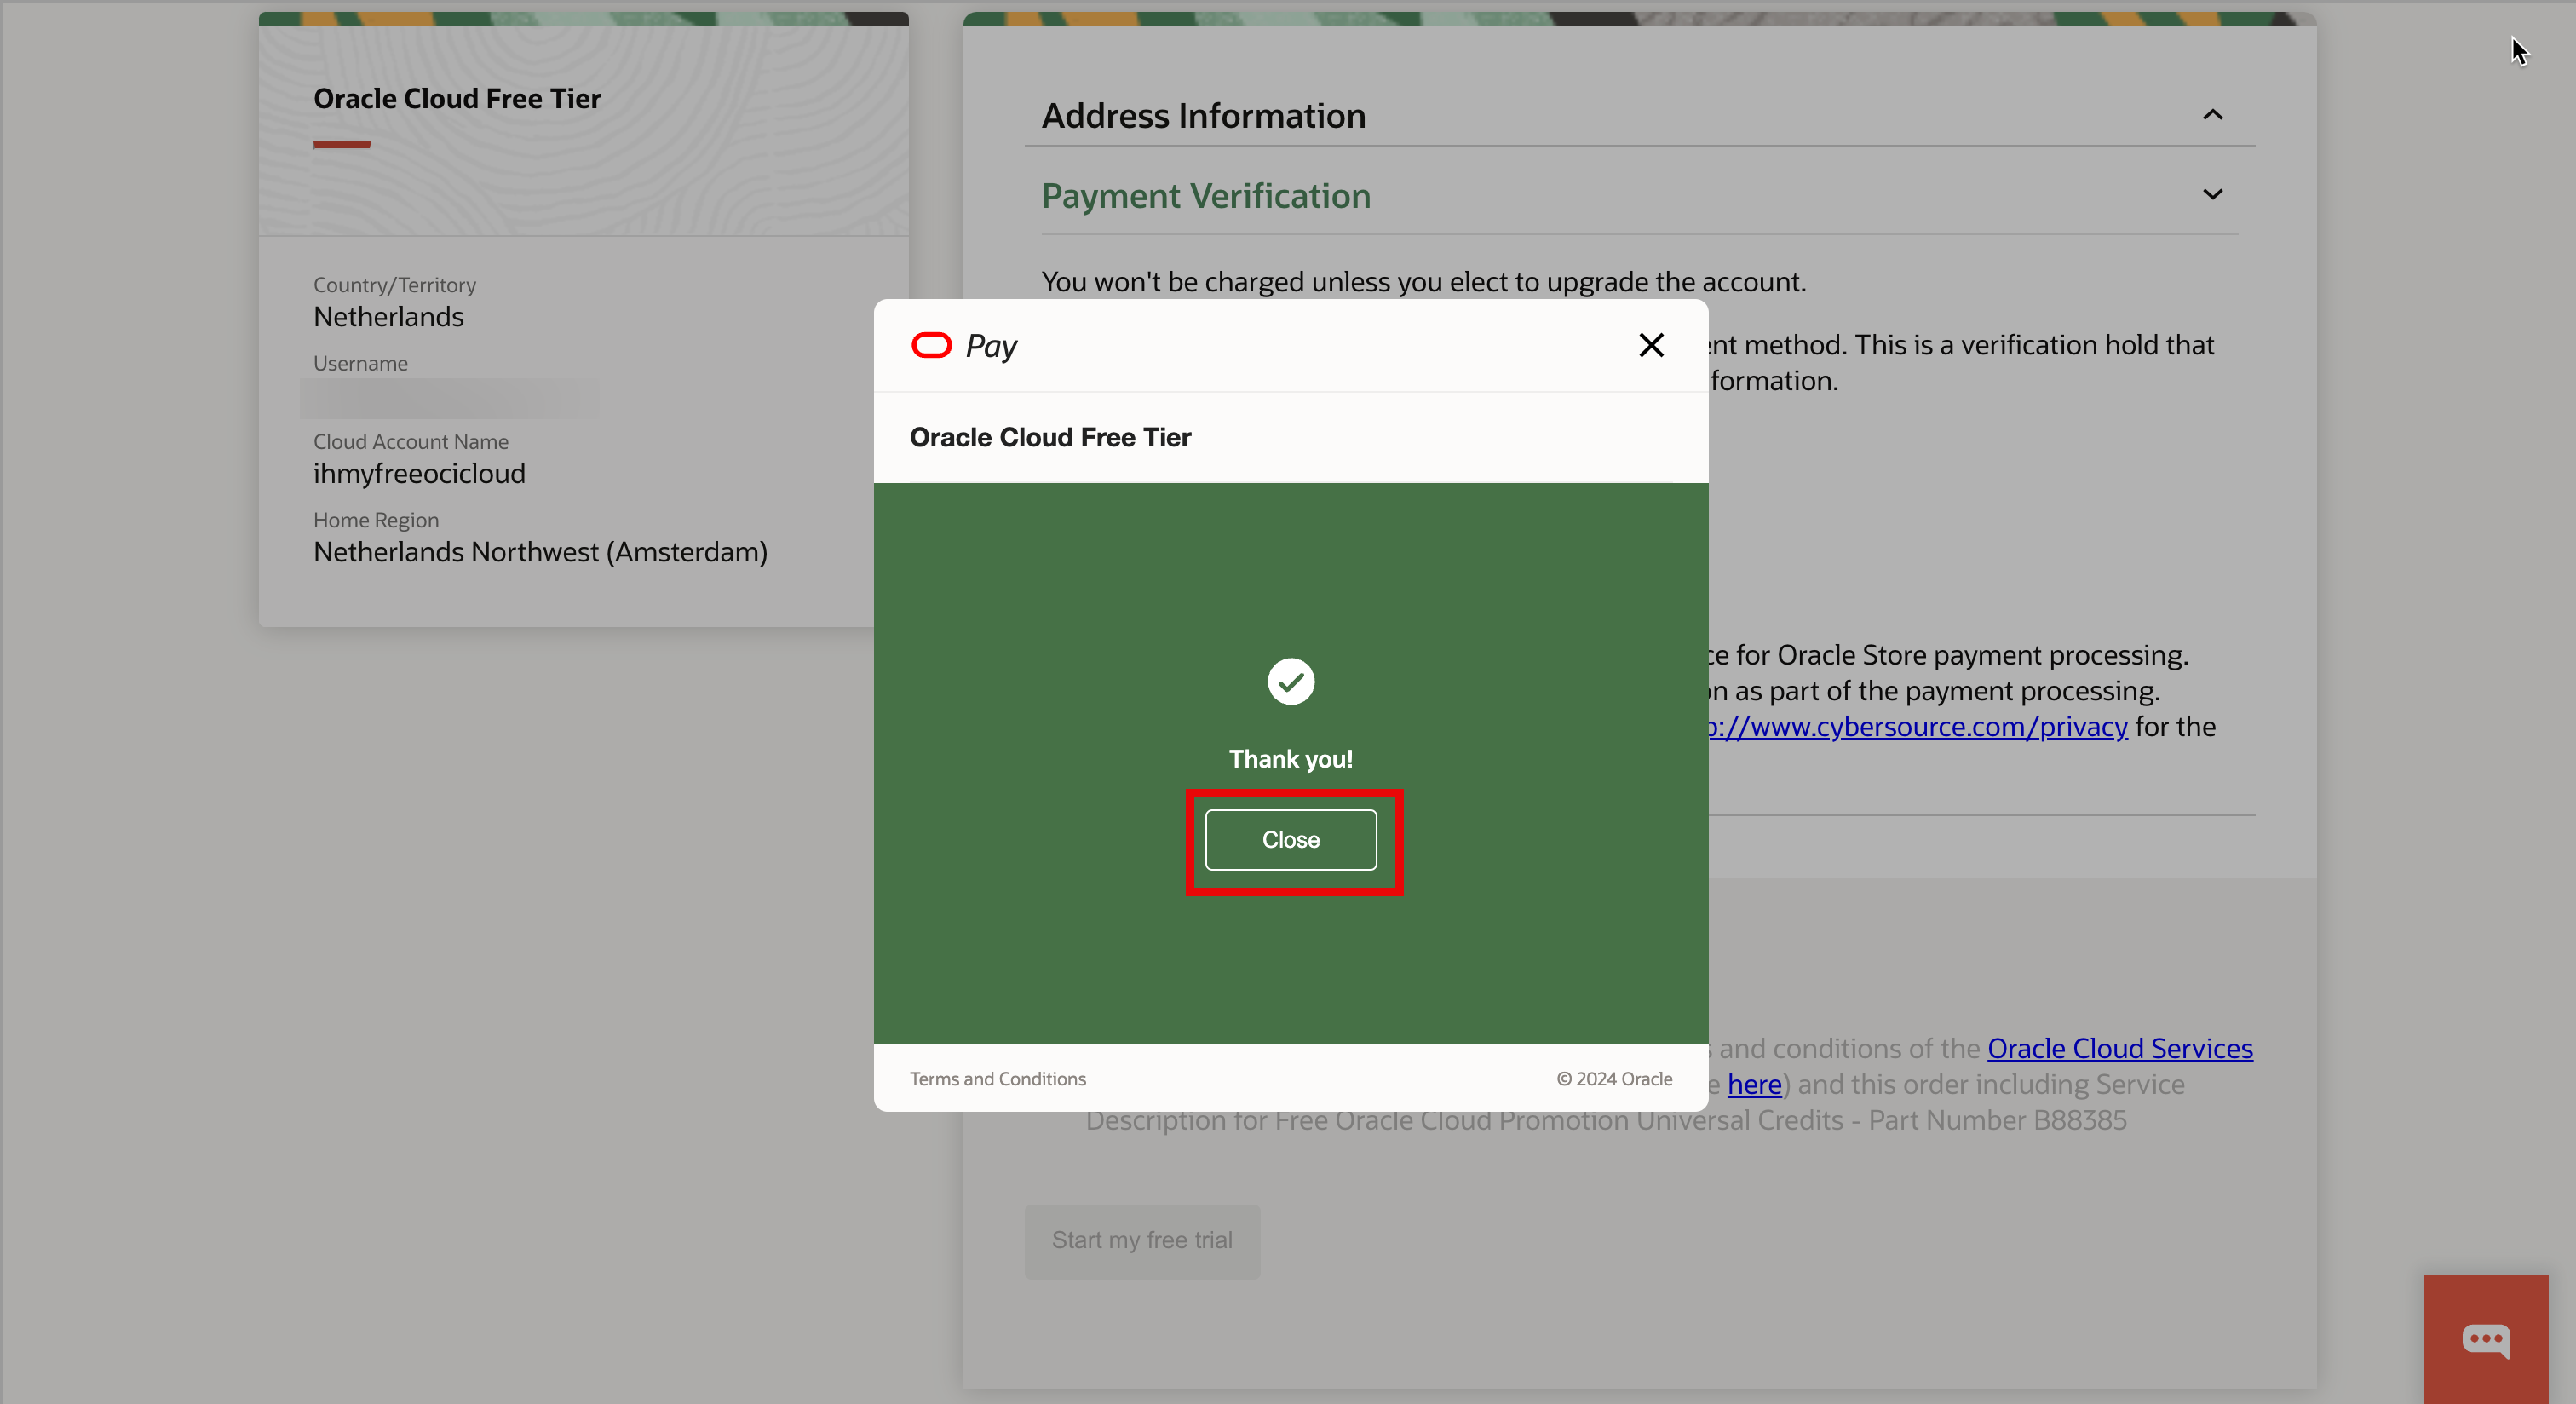
Click Close.
Task 3: Start your Free Trial
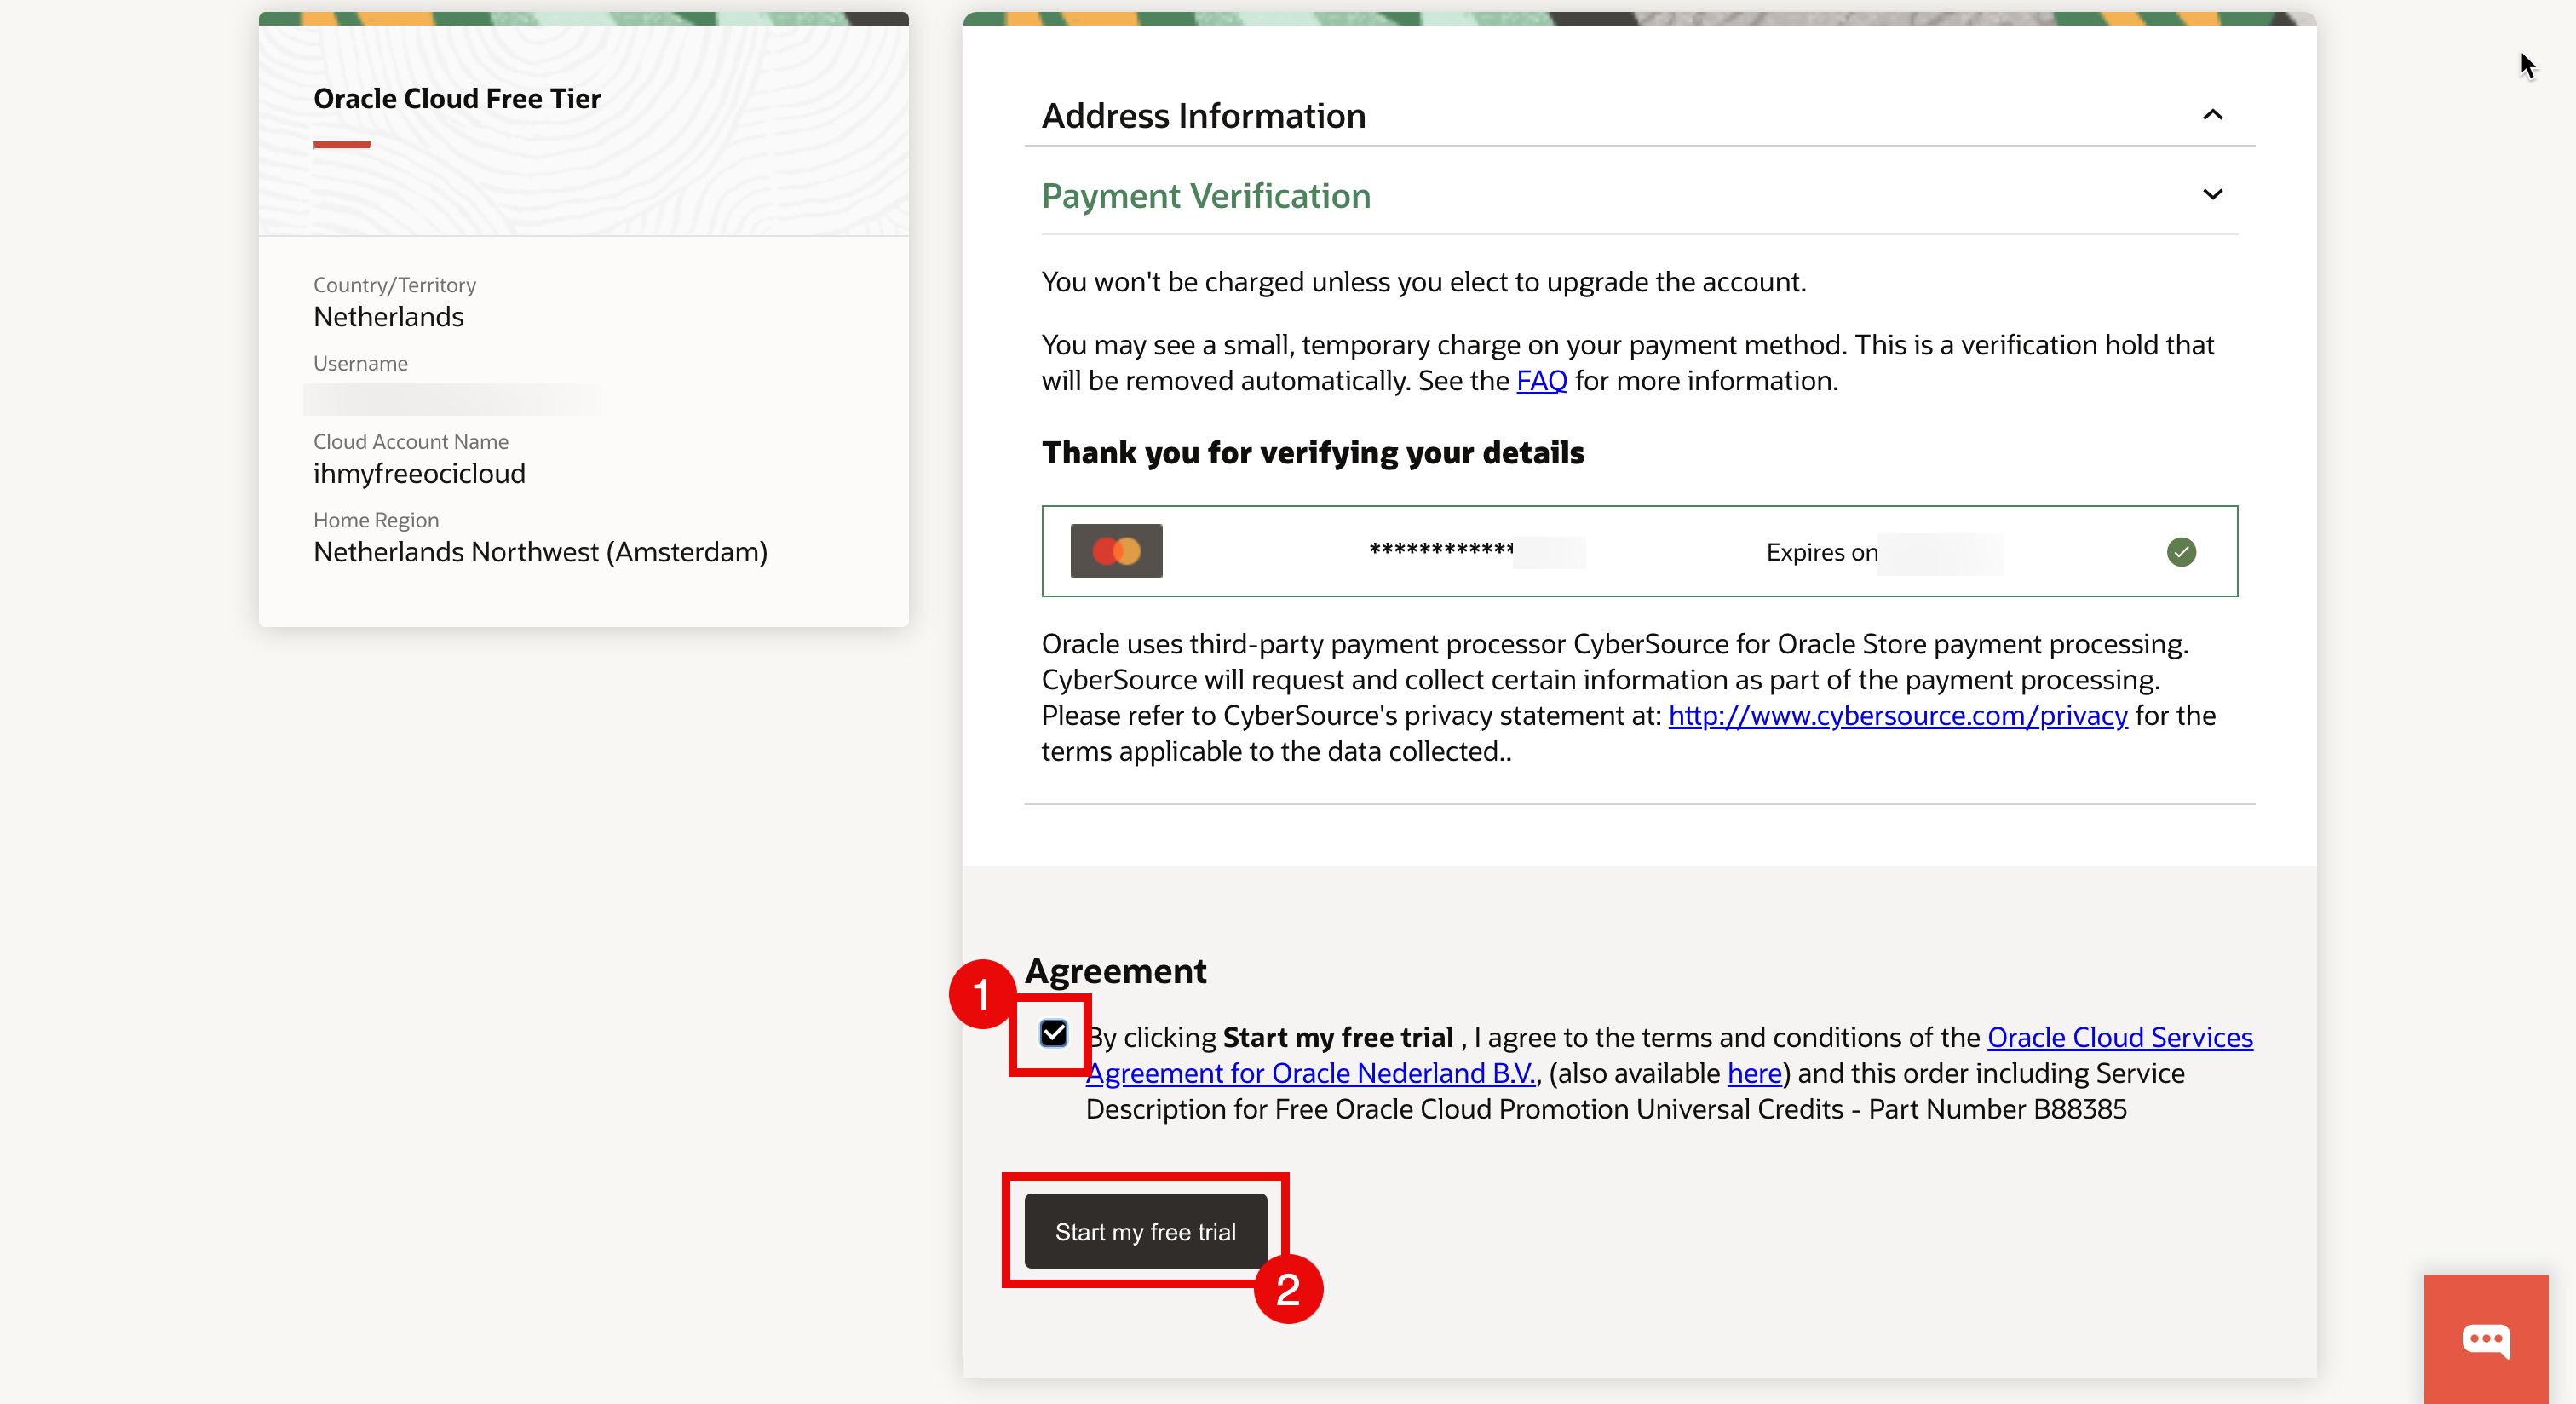
- To start you free trial accept the agreement.
- Accept the terms and conditions.
- Click Start my free trial.
Your Oracle Cloud environment will be created and this can take a few minutes.  In the meantime, when your Oracle Cloud environment is prepared, you will get an introduction email.
 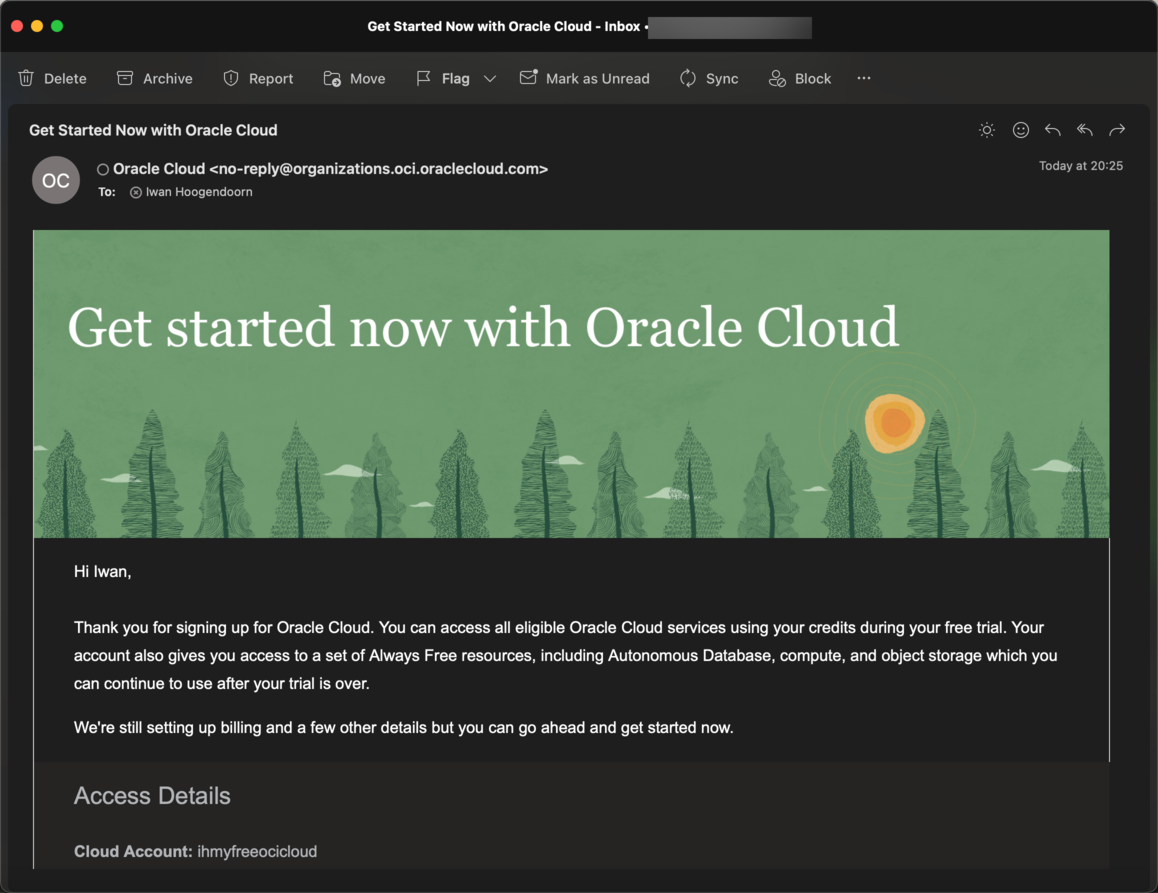 When your Oracle Cloud environment is ready, you will also get an email containing Your cloud account and service are ready.
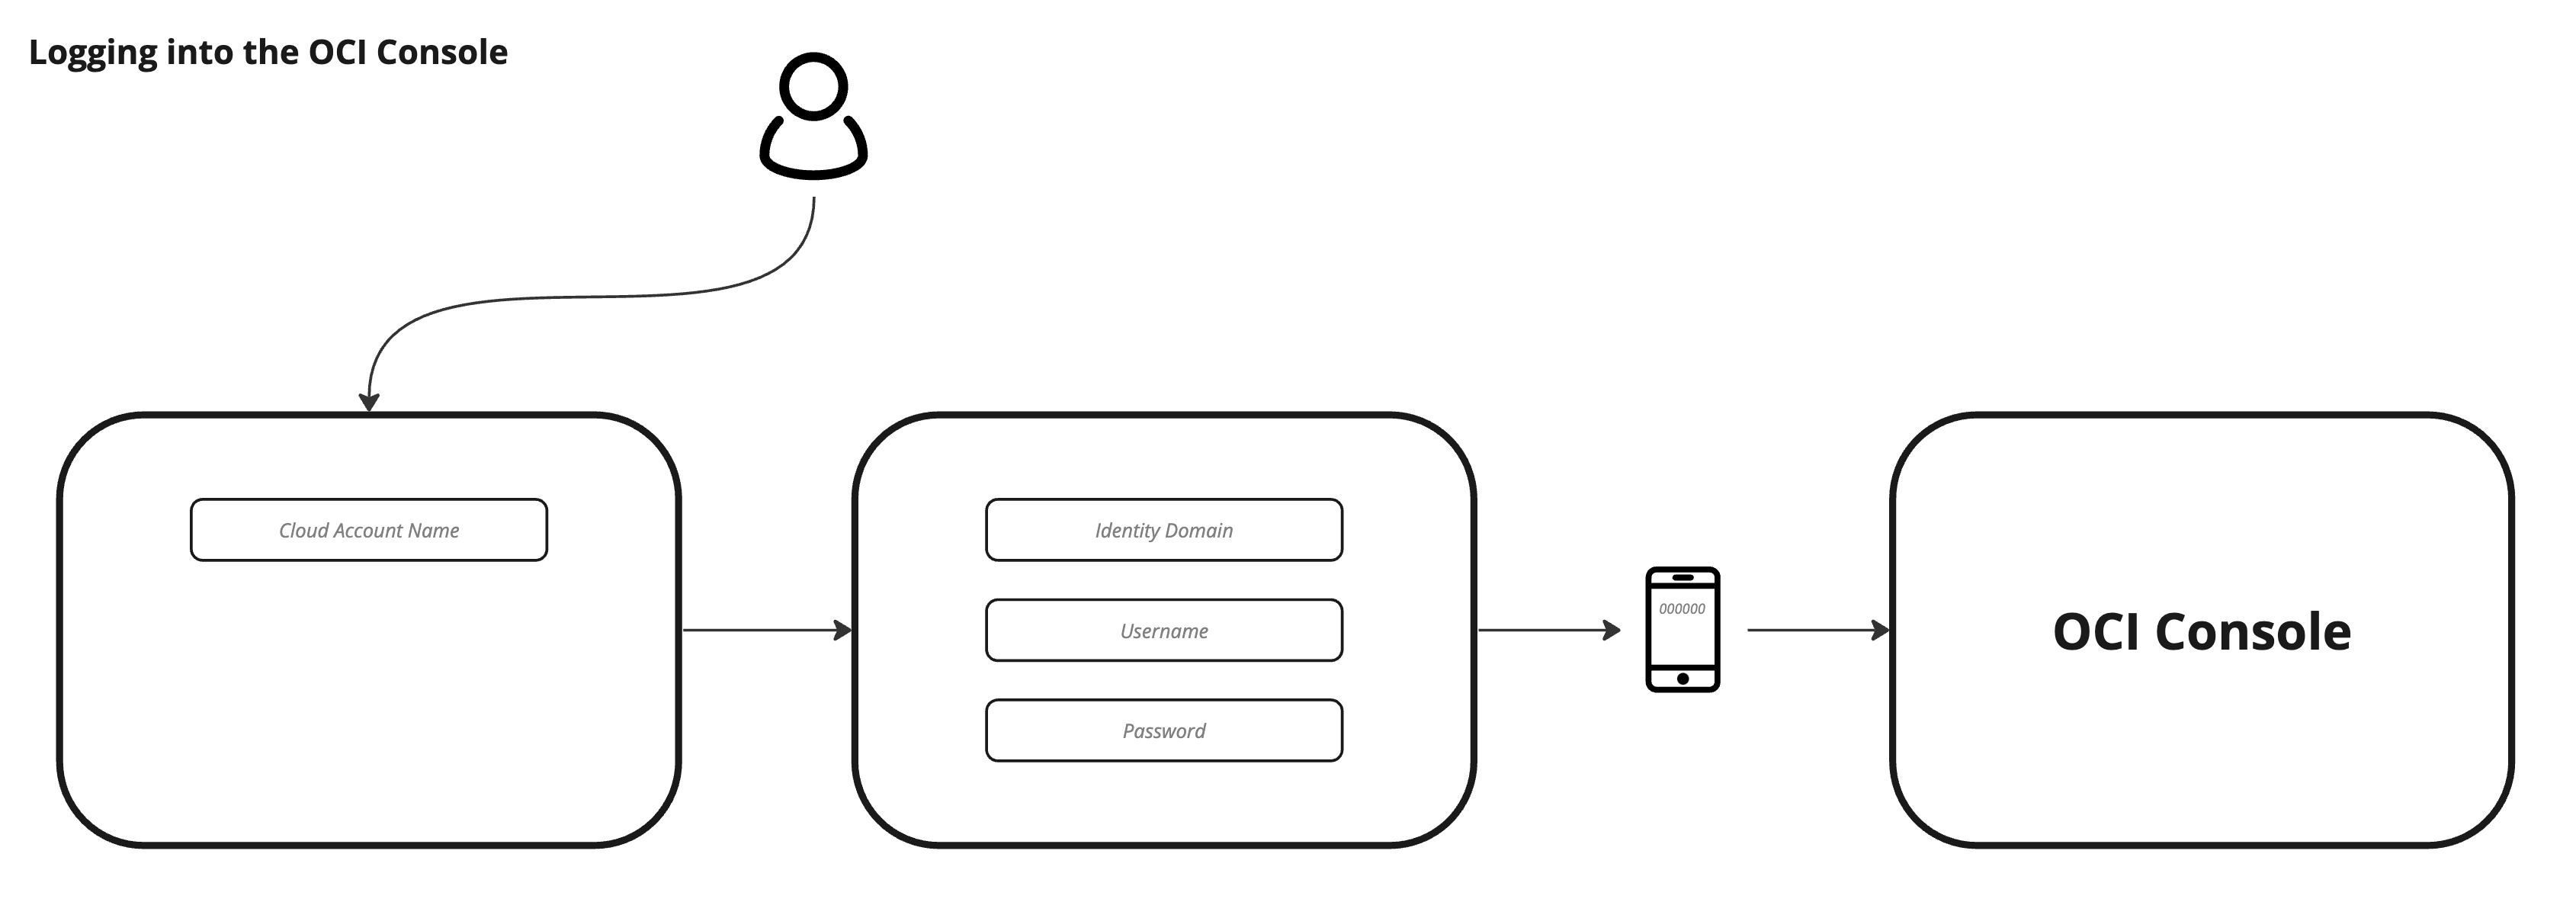
Task 4: Log in to OCI using the New Account
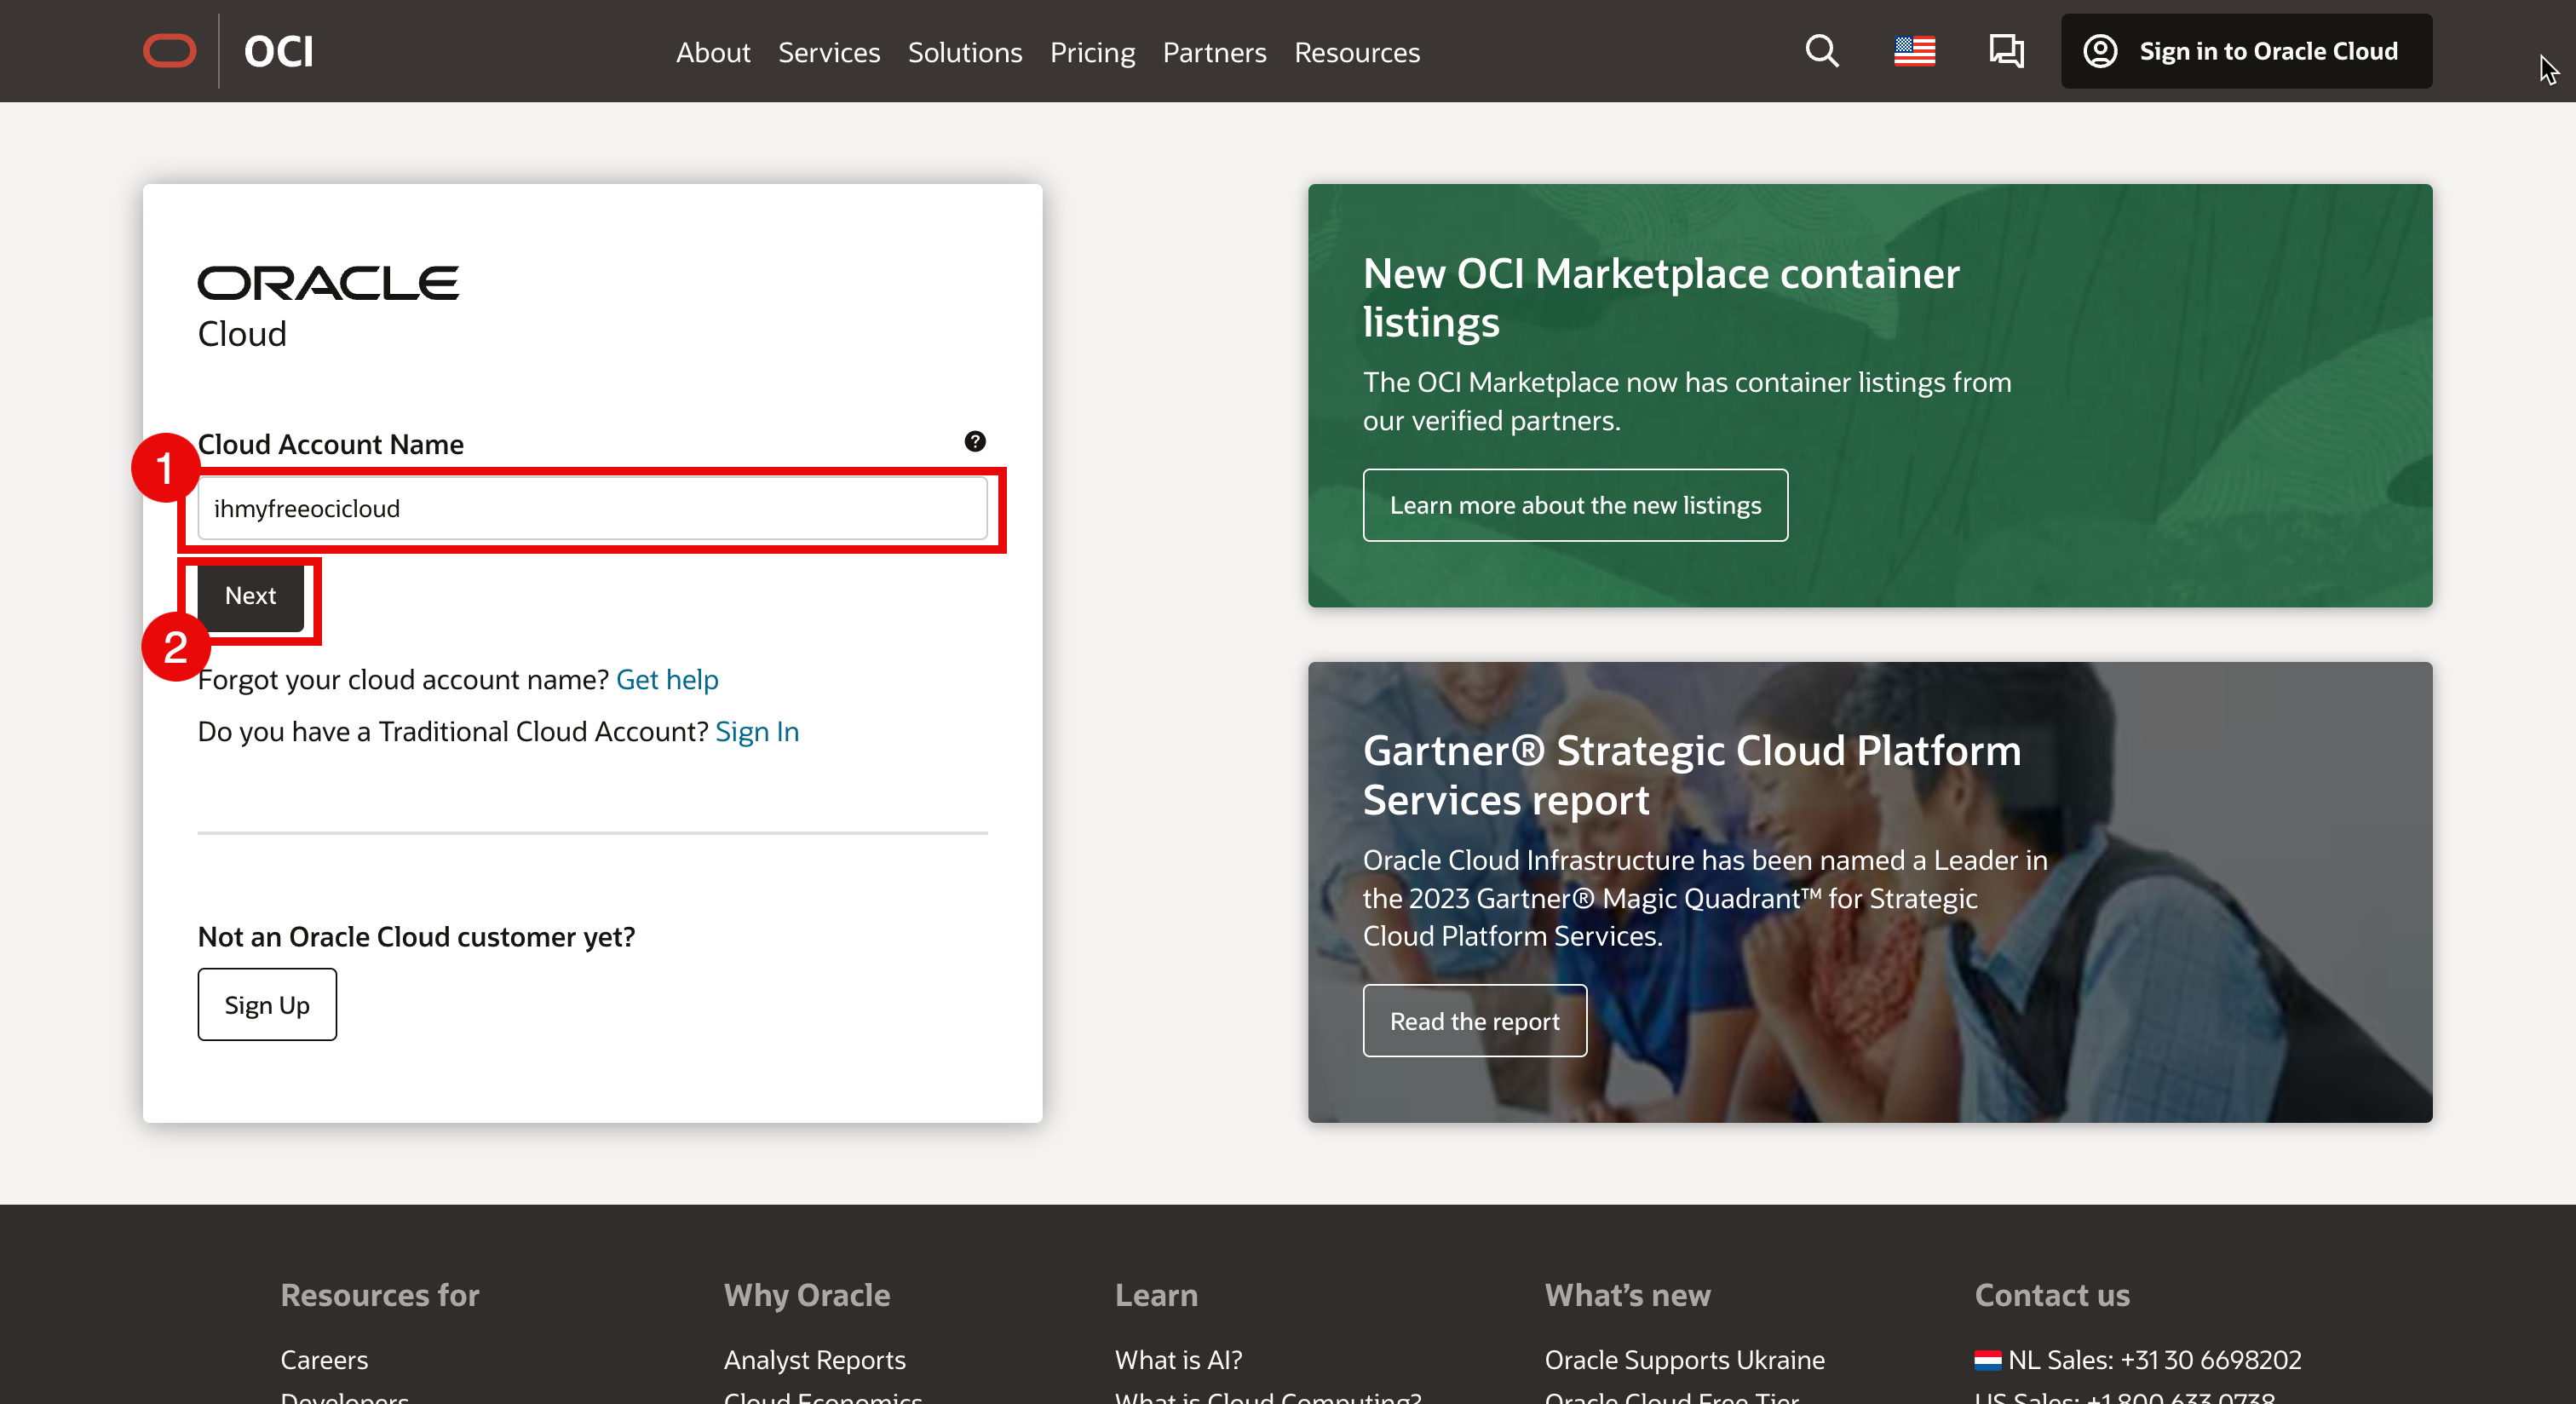
Log in to your Oracle Cloud environment from cloud.oracle.com.
- Enter your Cloud Account Name that you specified during the registration process. In this tutorial, we will use ihmyfreeocicloud .
- Click Next.
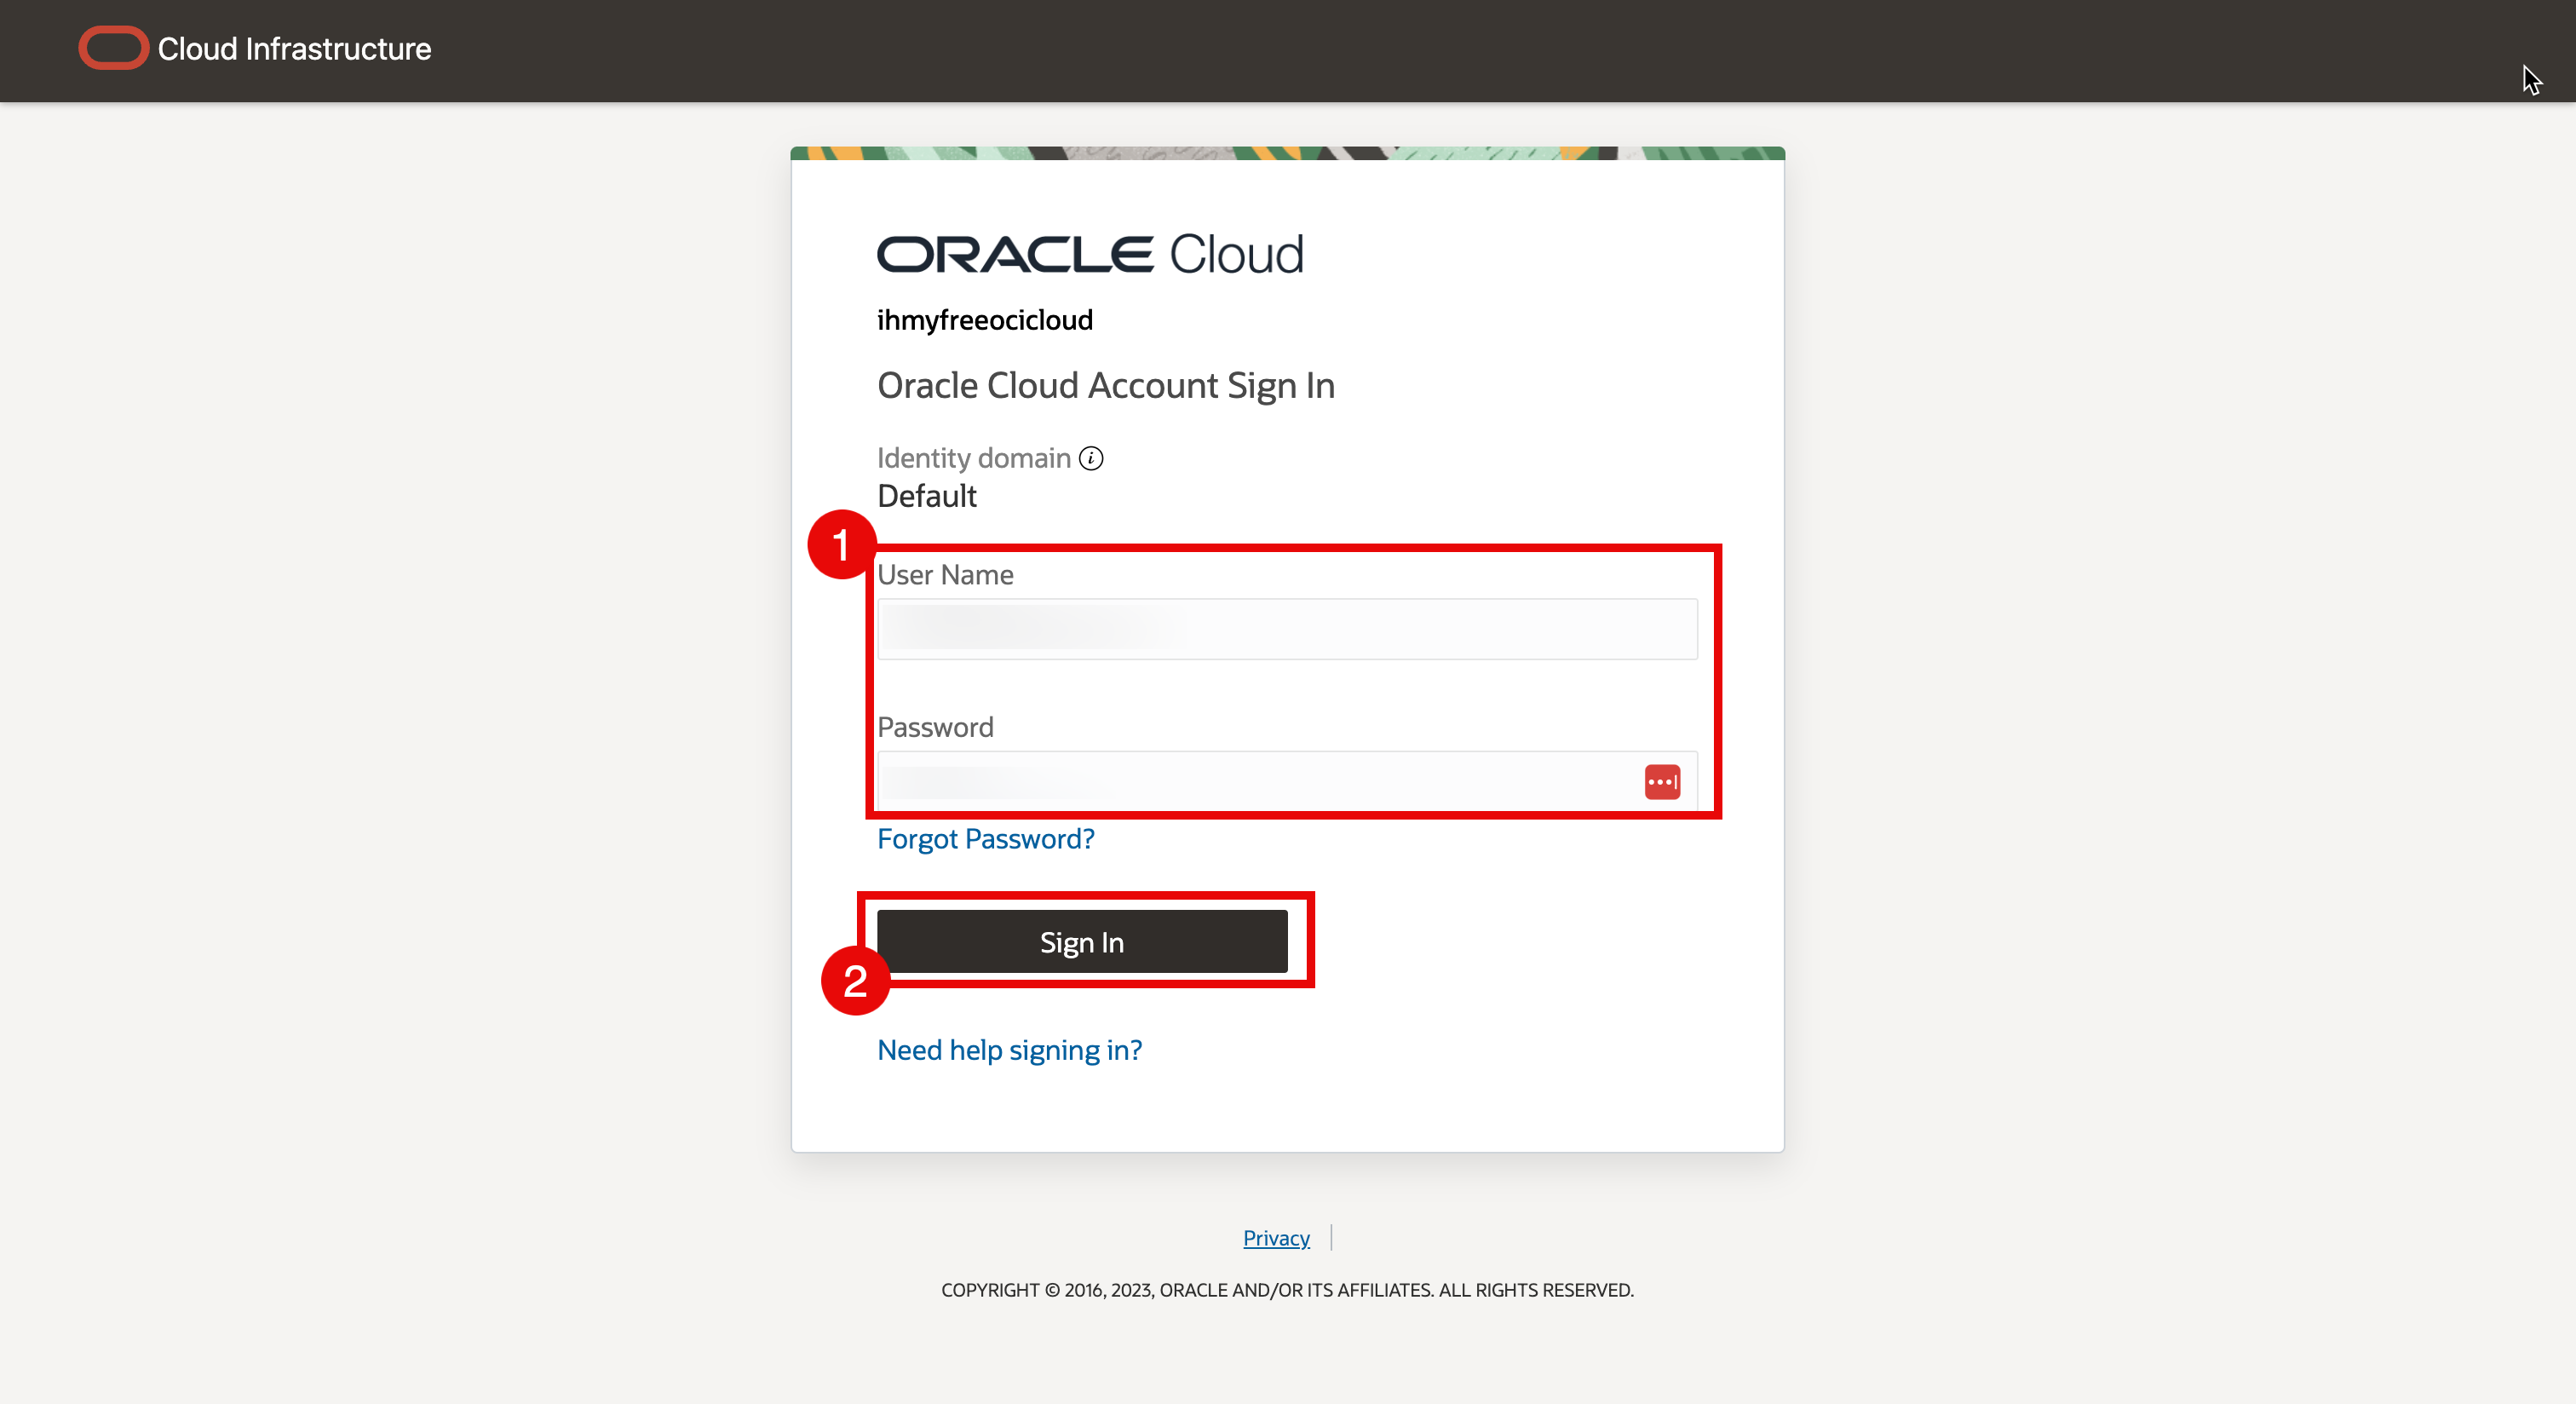
- Enter your Username and Password that you specified during the registration process.
- Click Sign In.
Task 5: Enable MFA using the Oracle Mobile Authenticator
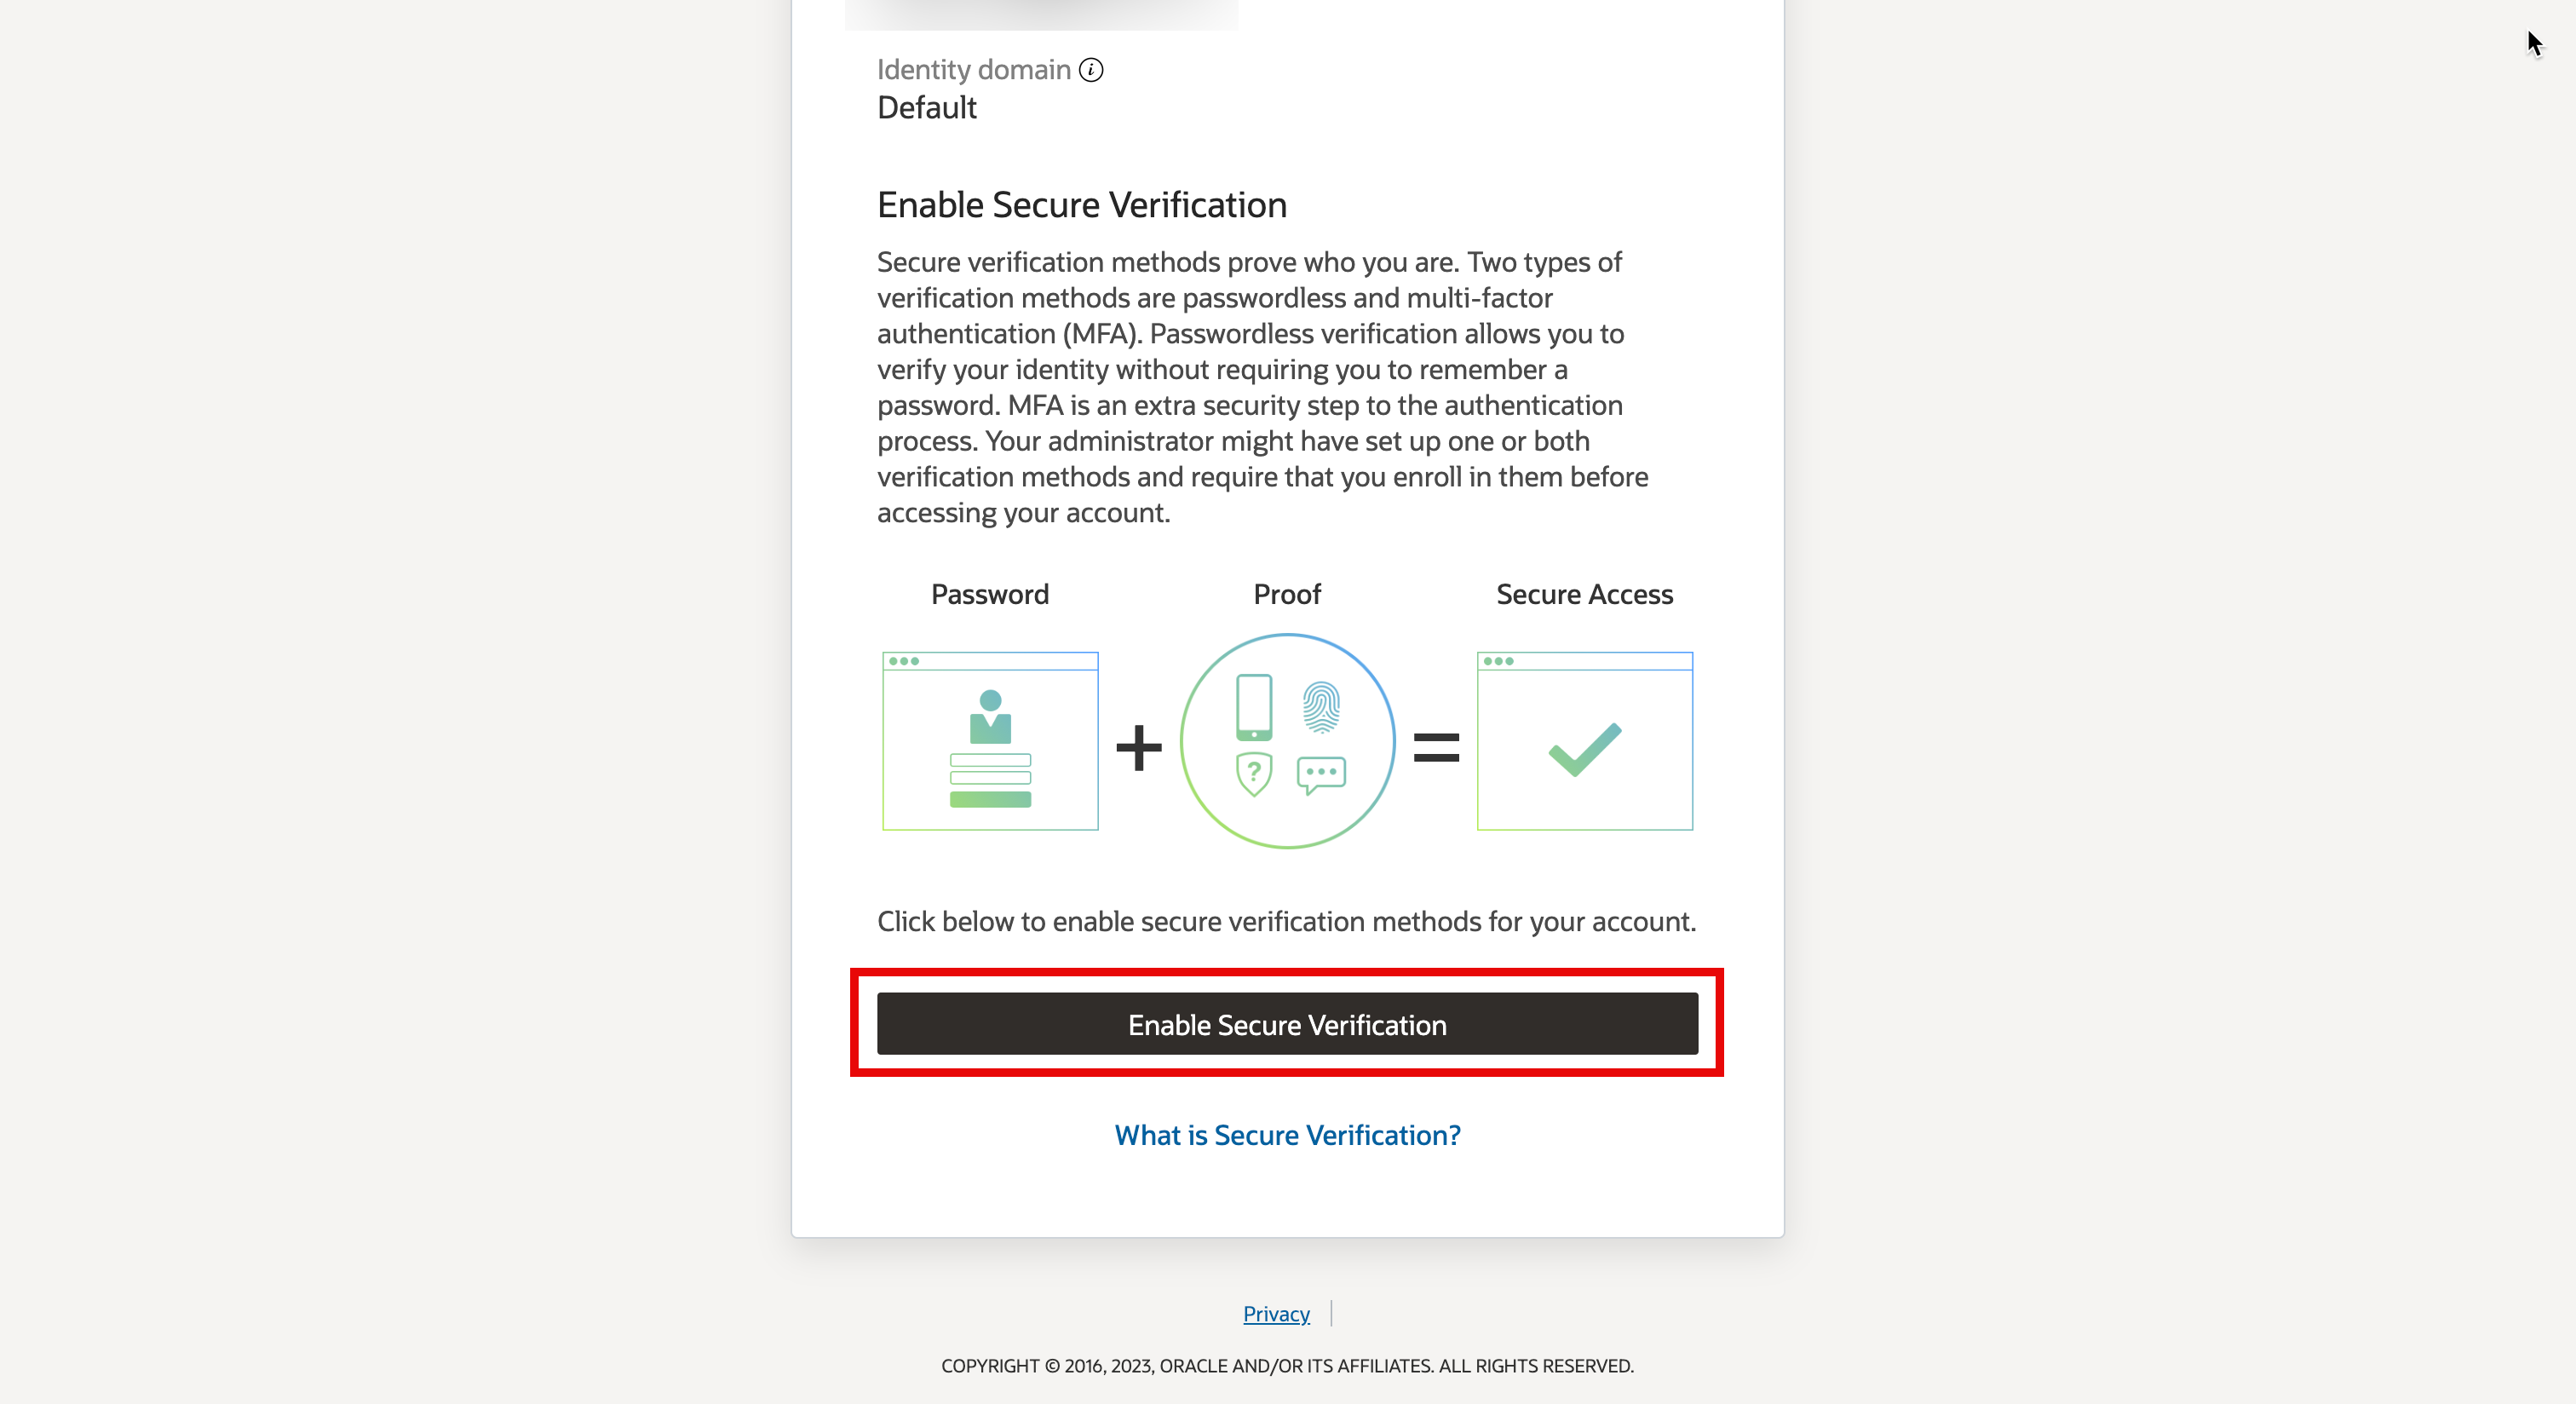
The first time you log in, you are prompted to enable Multi Factor Authentication (MFA). This cannot be dismissed and is mandatory now.
Note: Make sure to download the Oracle Mobile Authenticator mobile application from mobile app store.
- Click Enable Secure Verification.
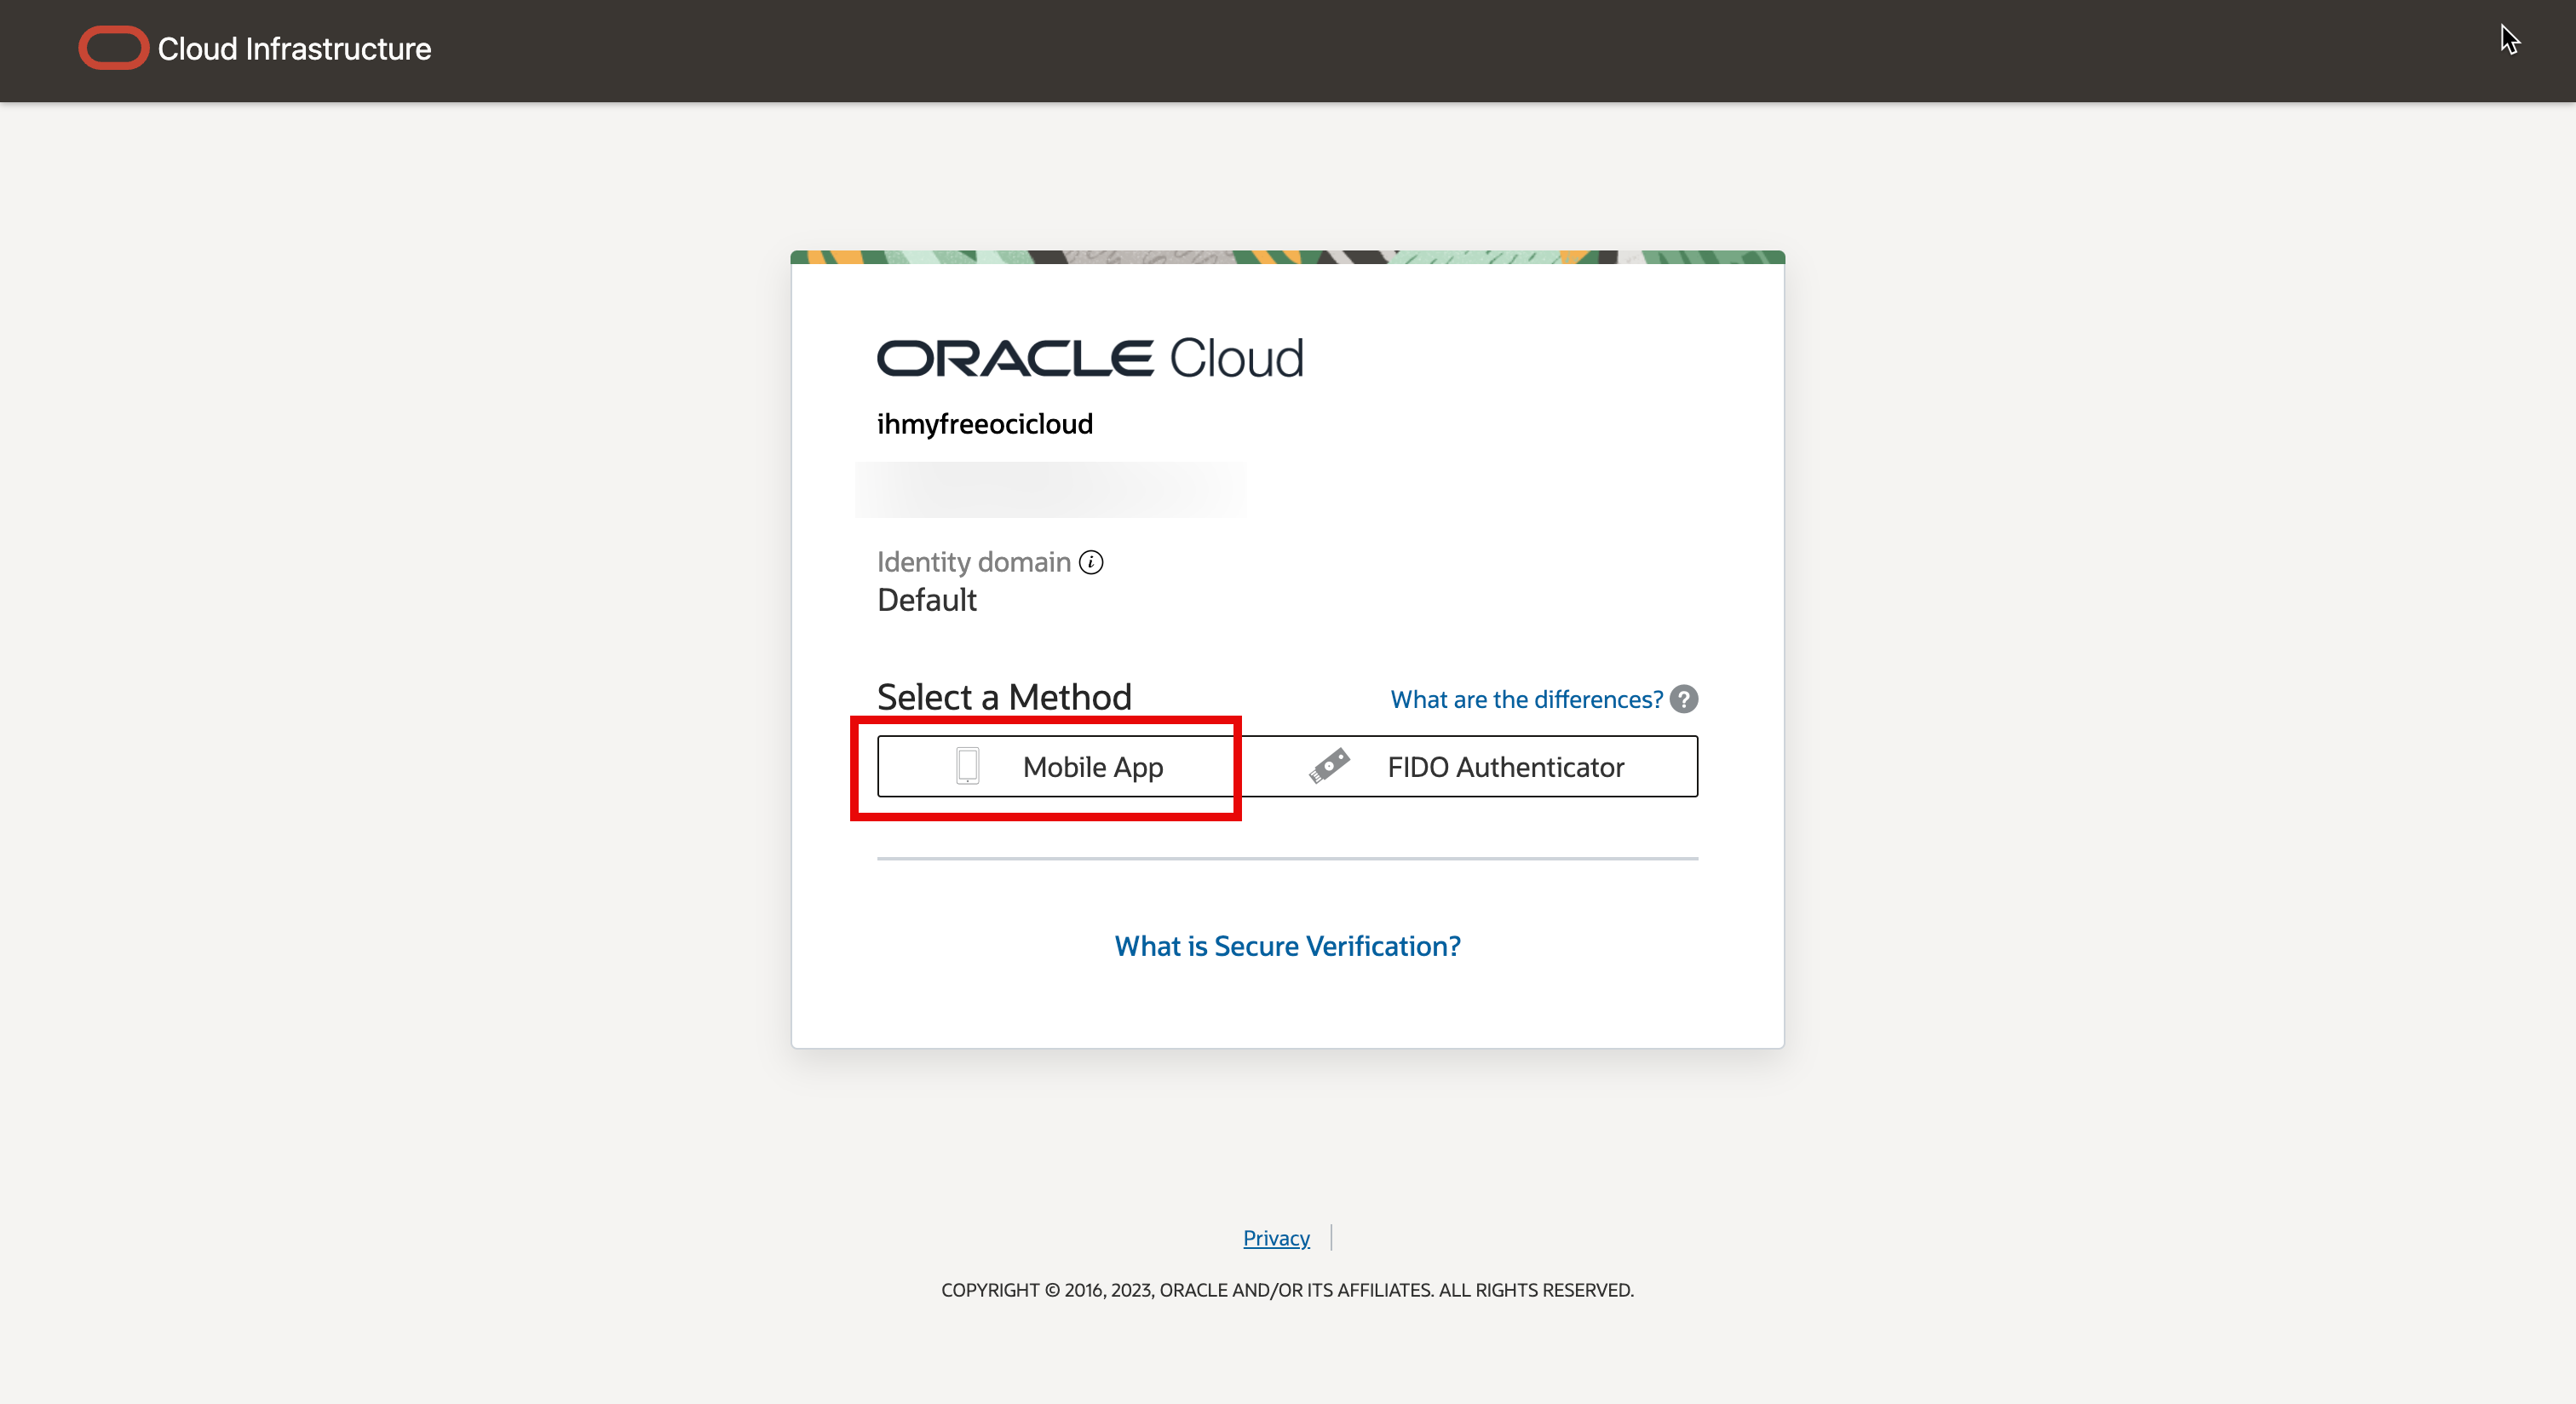
- Select your main MFA method. For this tutorial, it is Mobile App.
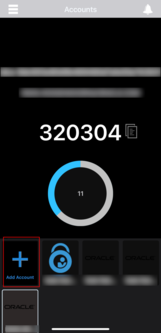
- Scan the QR code presented on the screen from your Oracle Mobile Authenticator mobile application using the camera.
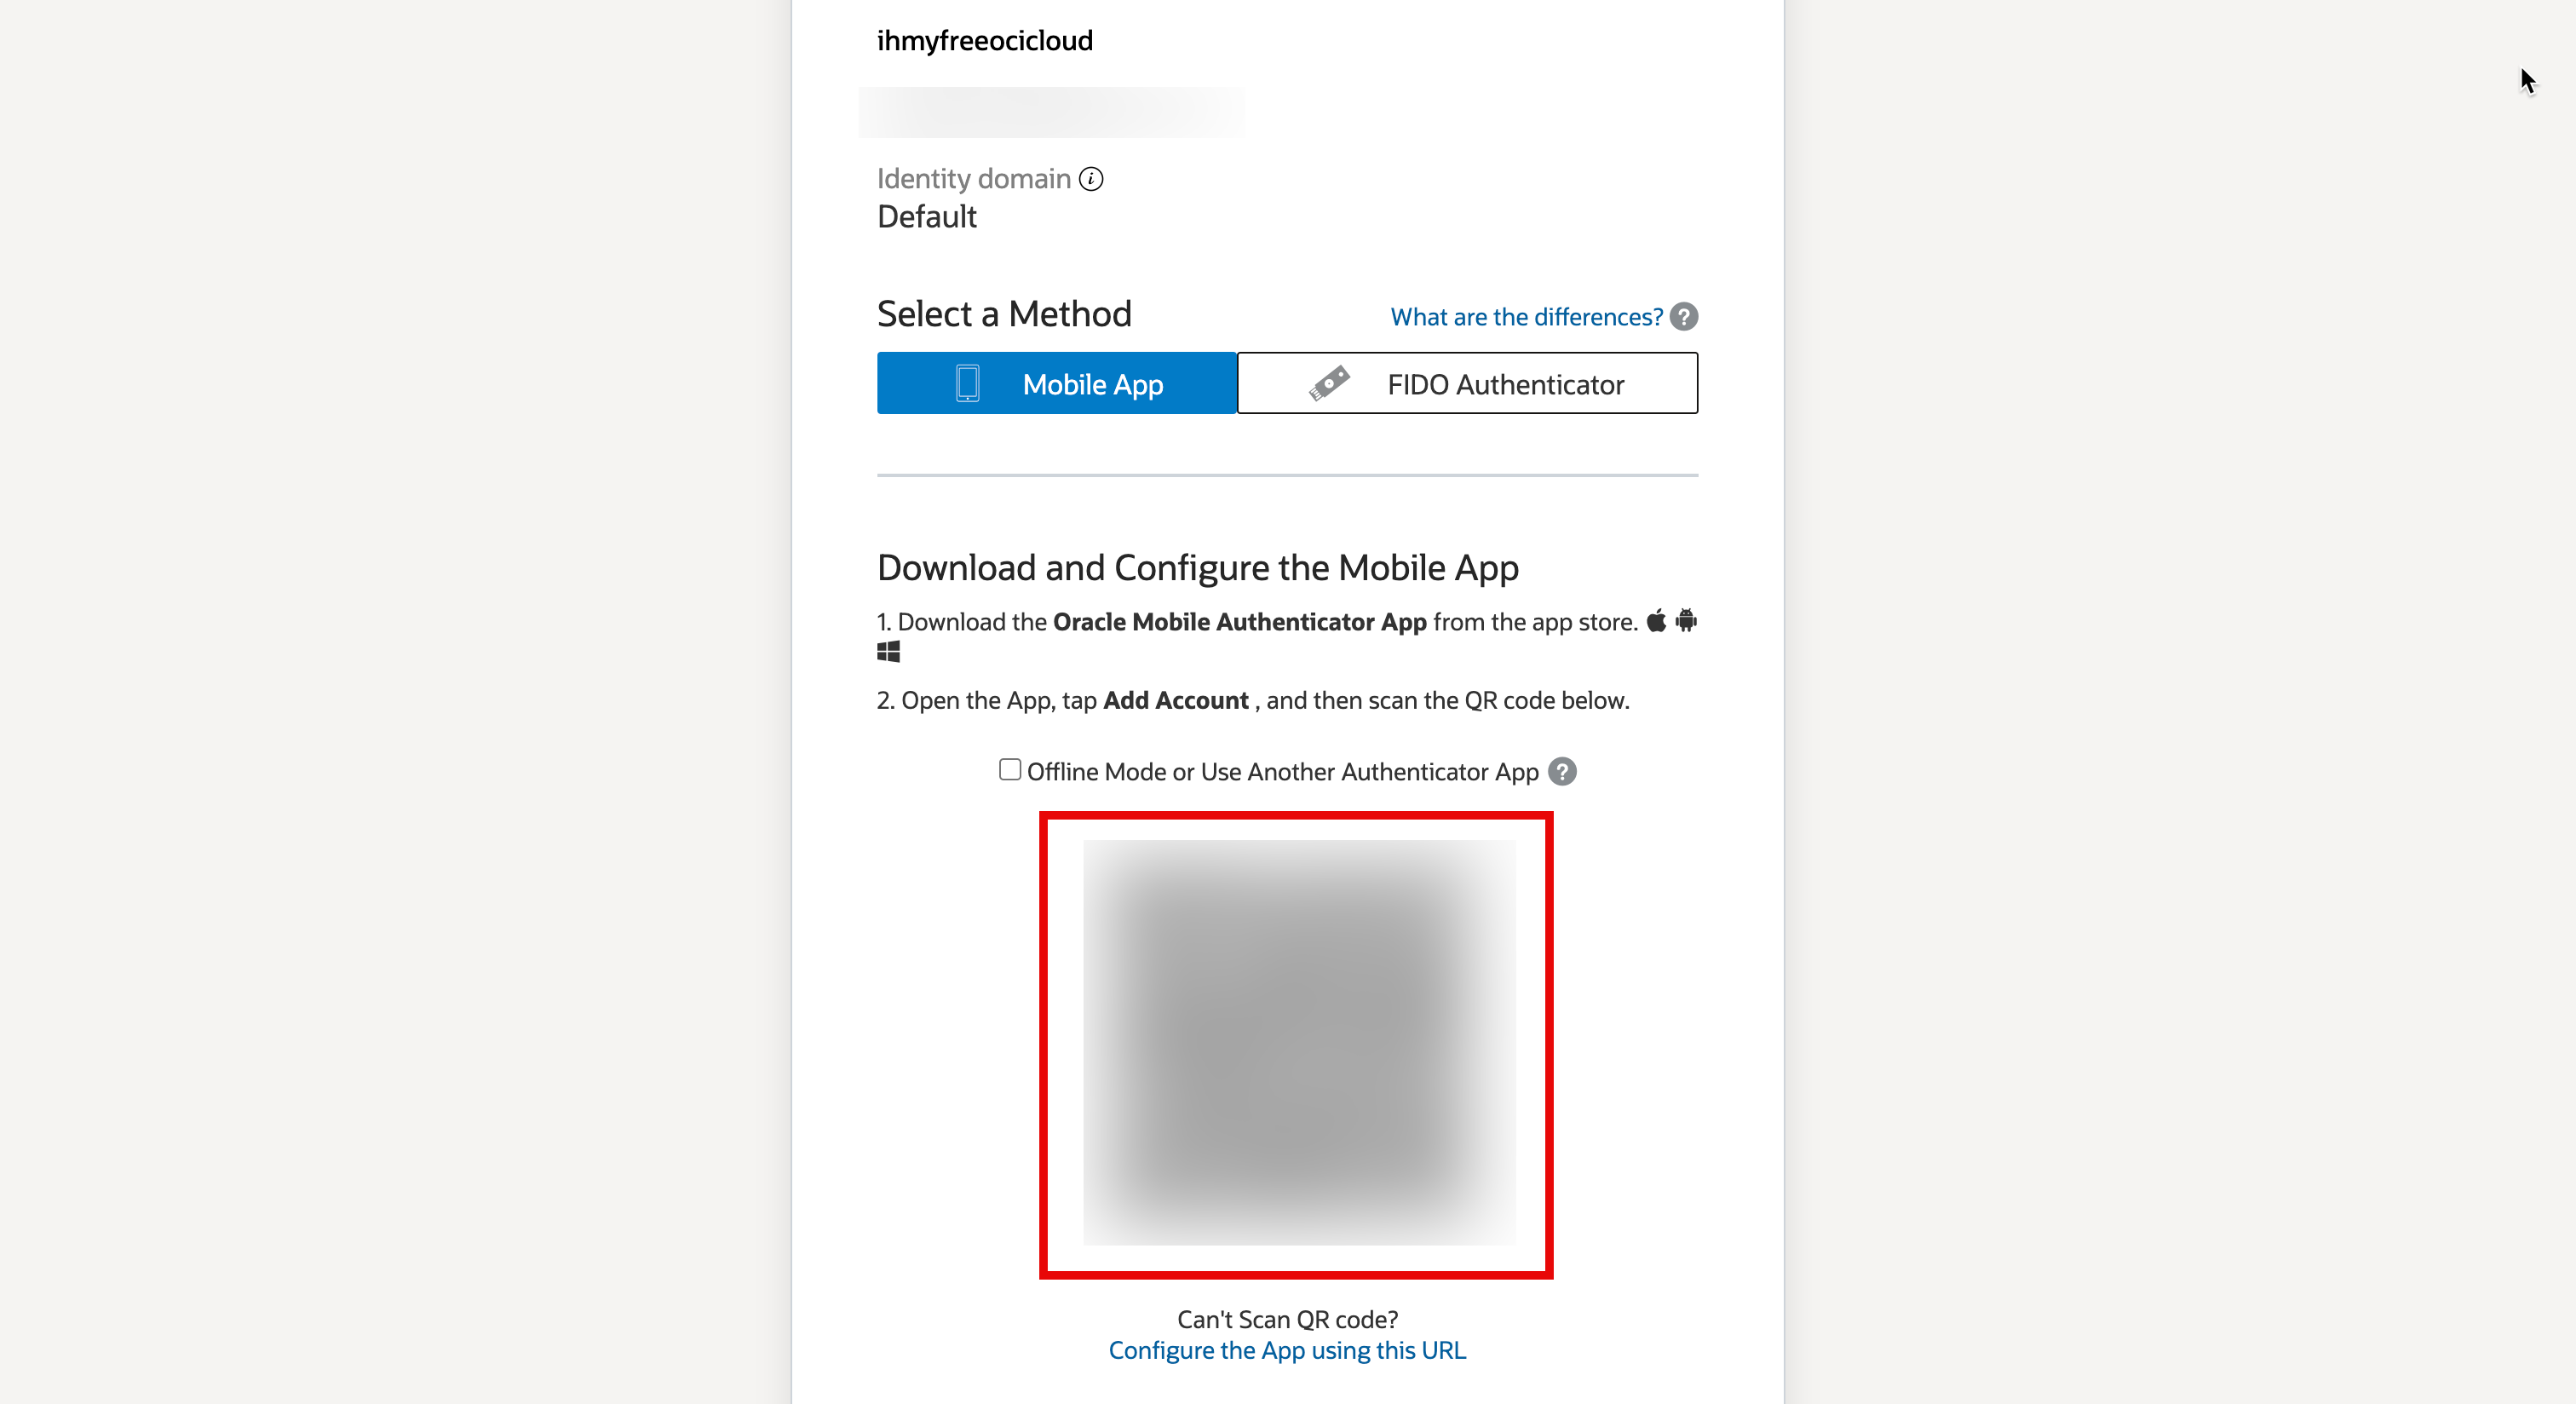
- In the Oracle Mobile Authenticator mobile application, select Add Account and scan the QR code presented on the screen of your browser.
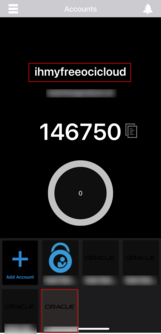
- After you have scanned the QR code a new account is added to your App.
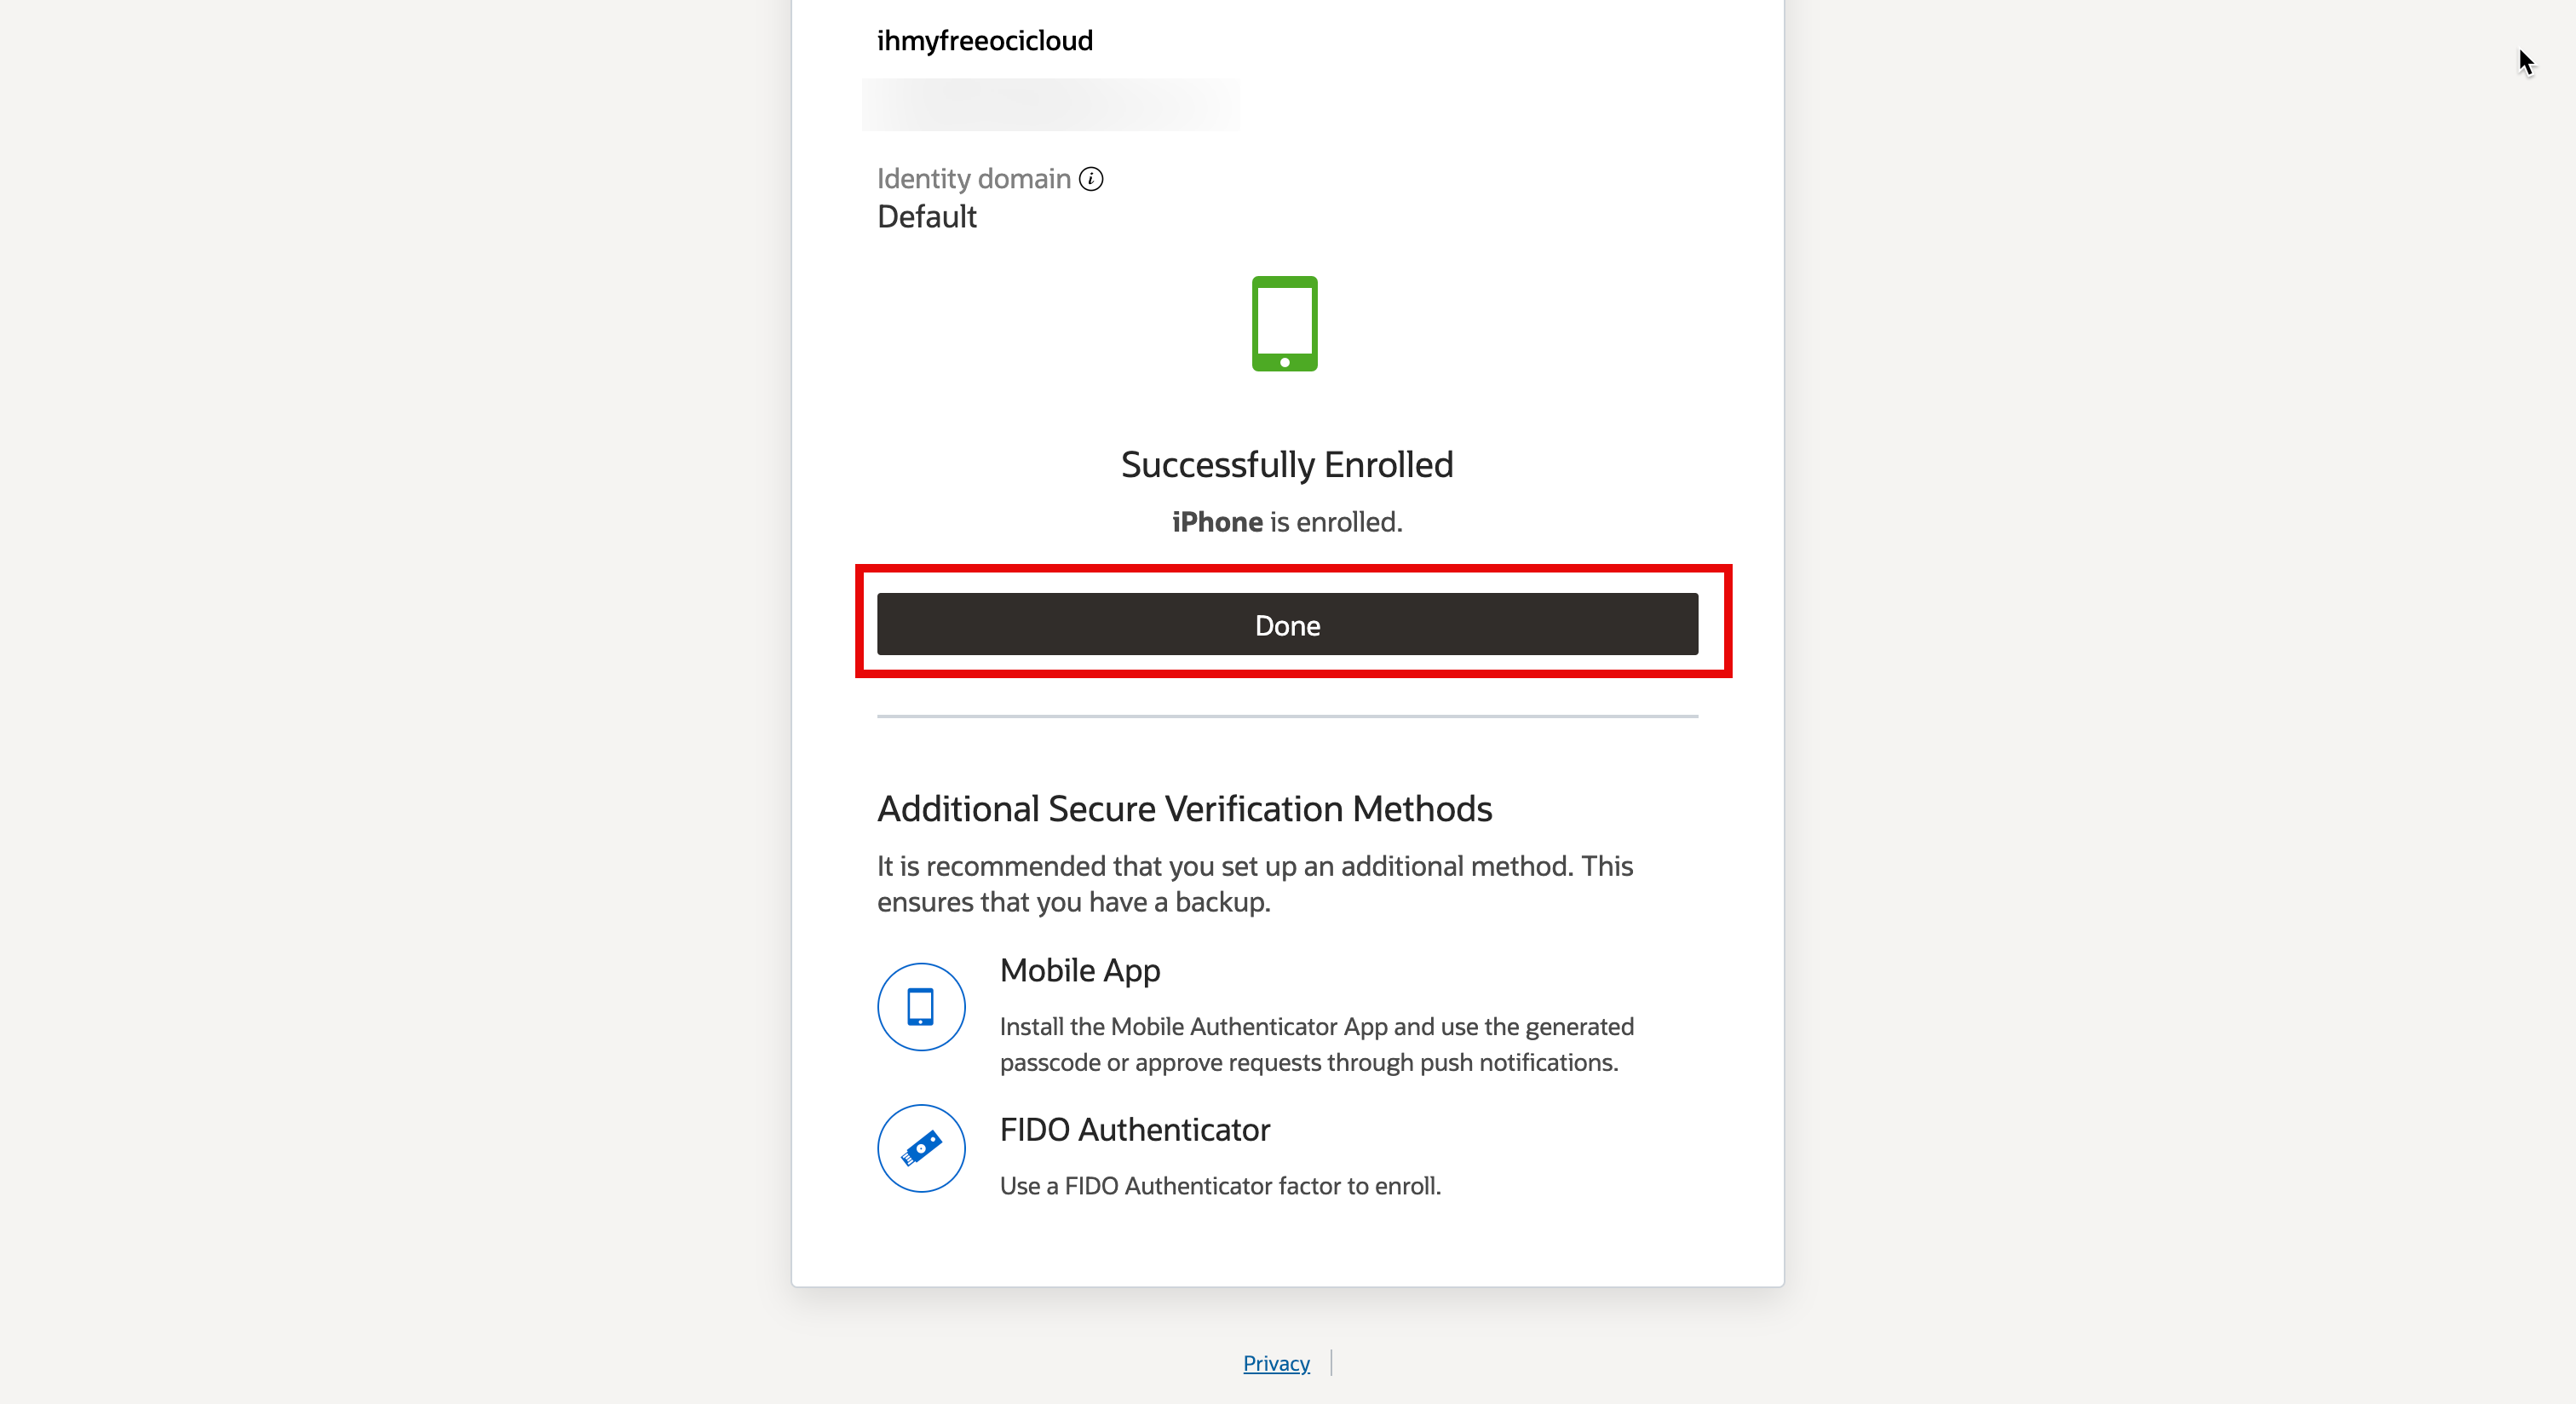
- After your account has successfully been added to your Oracle Mobile Authenticator mobile application for MFA, click Done.
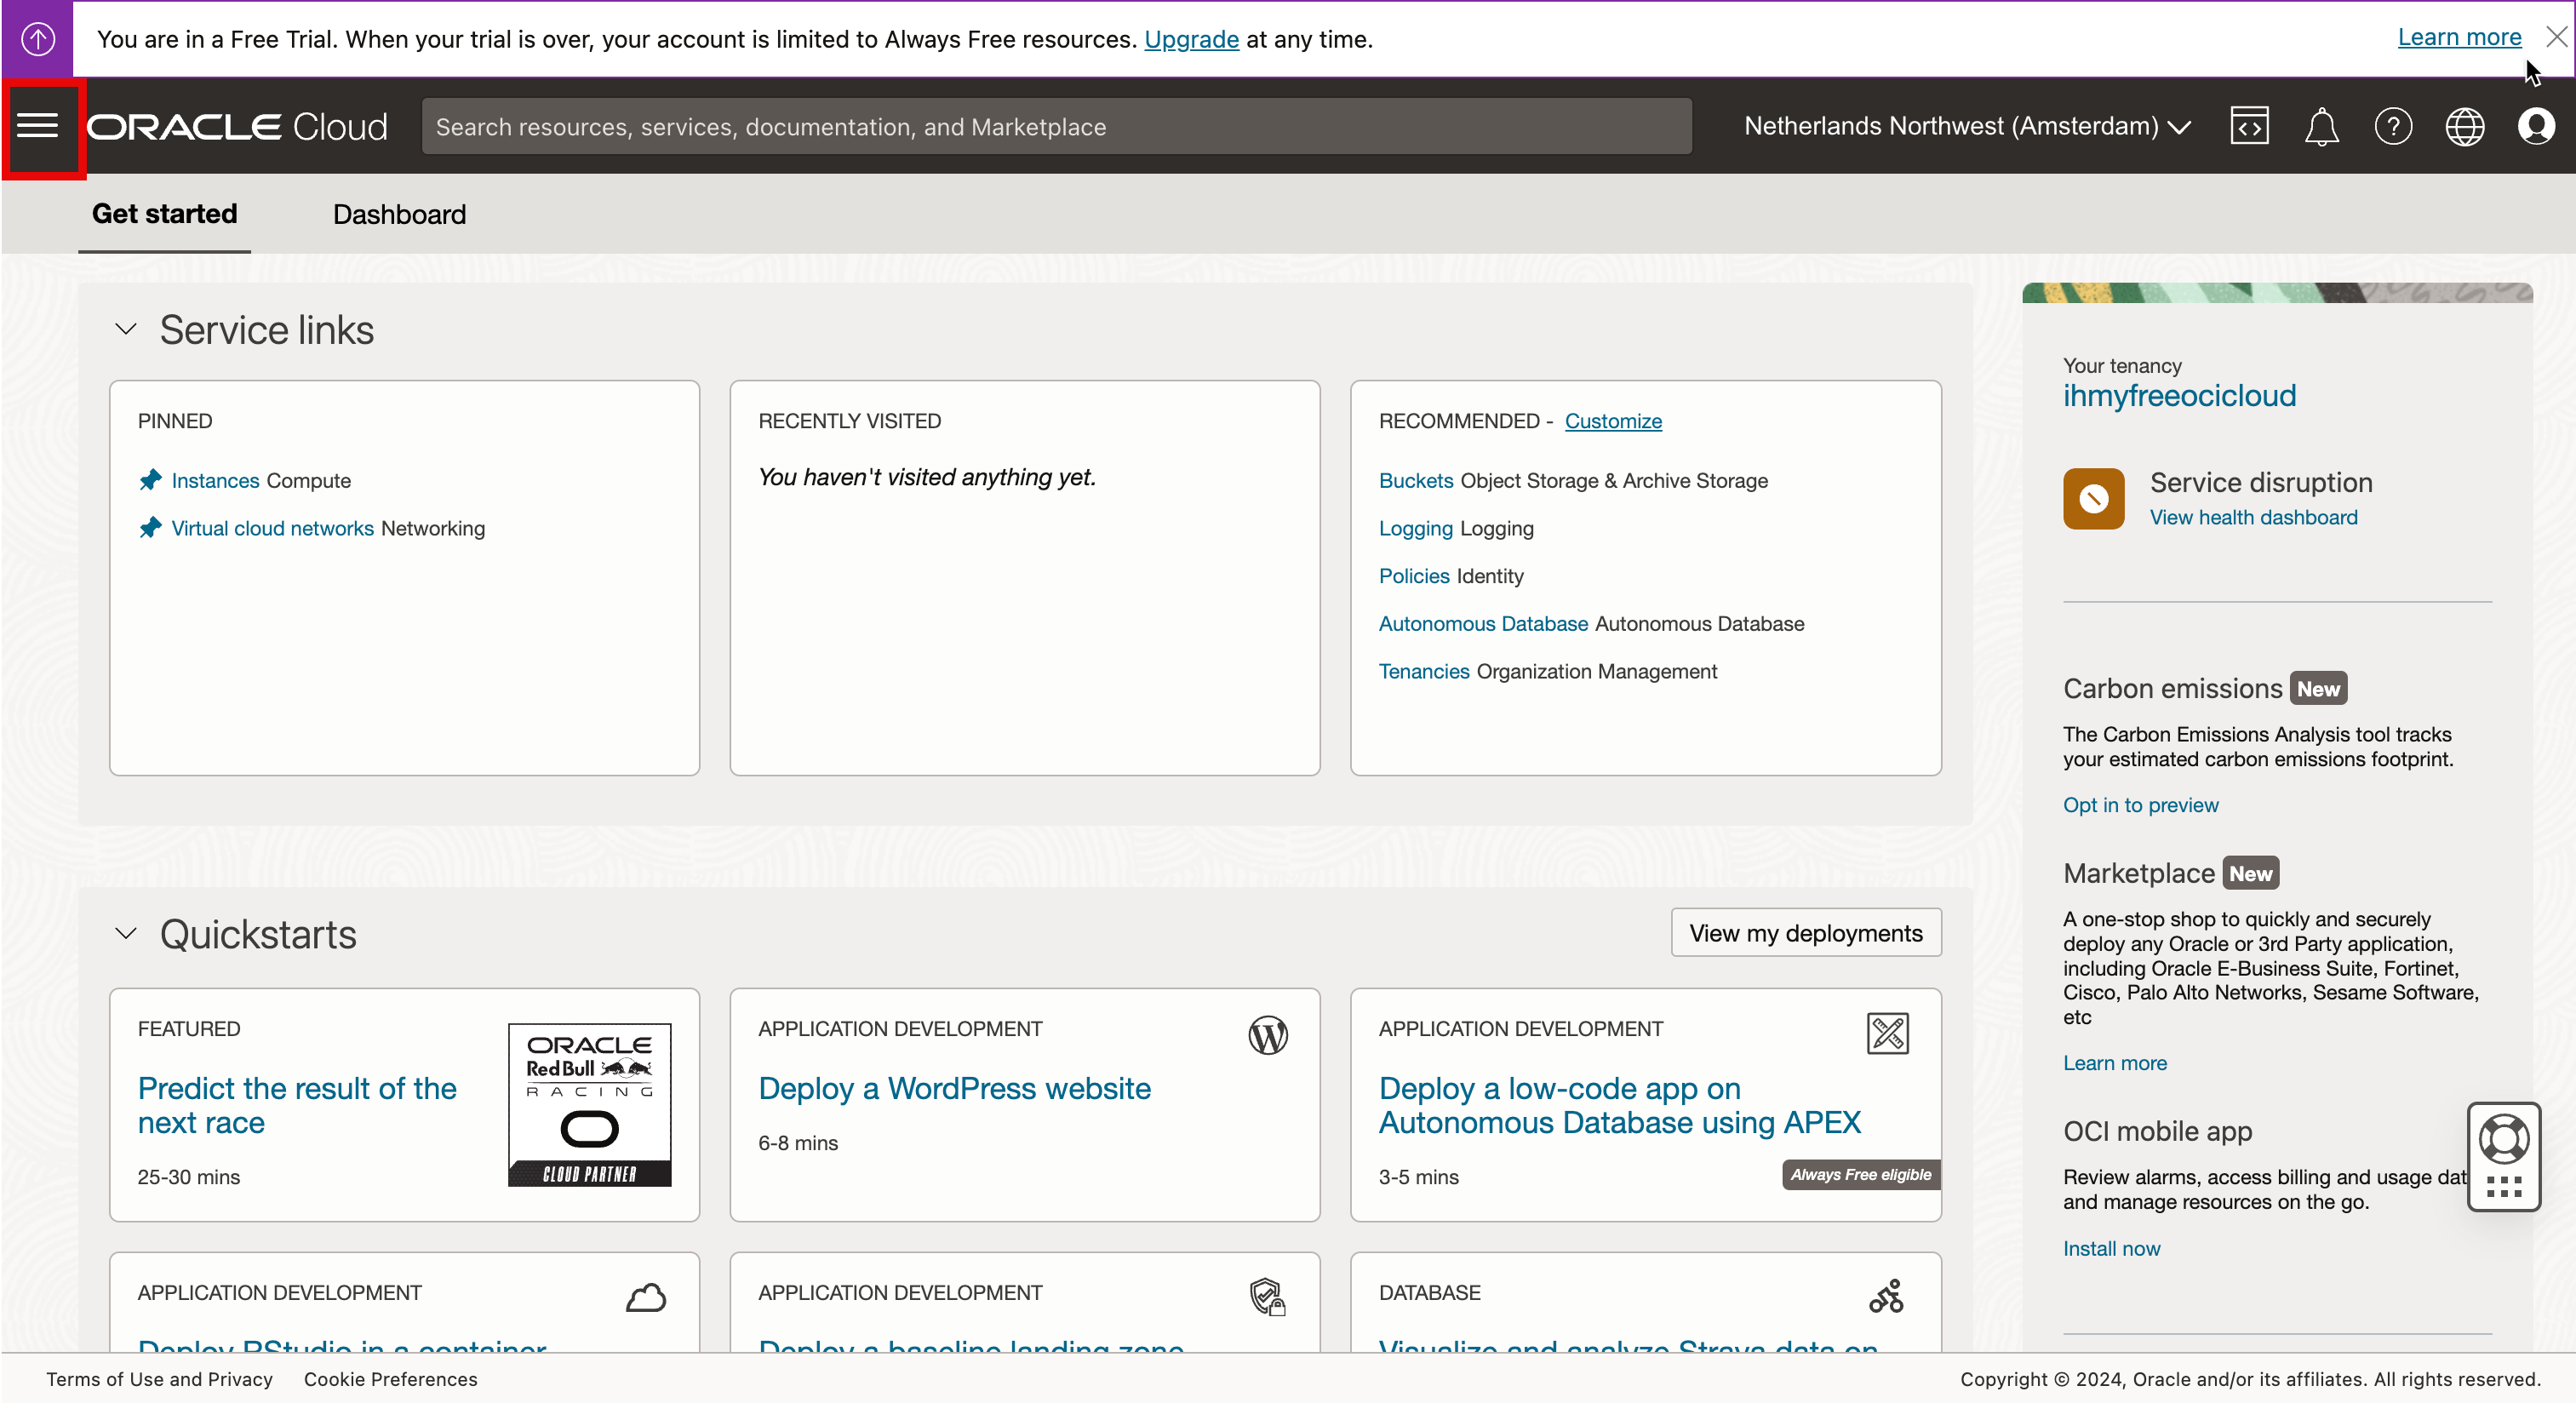
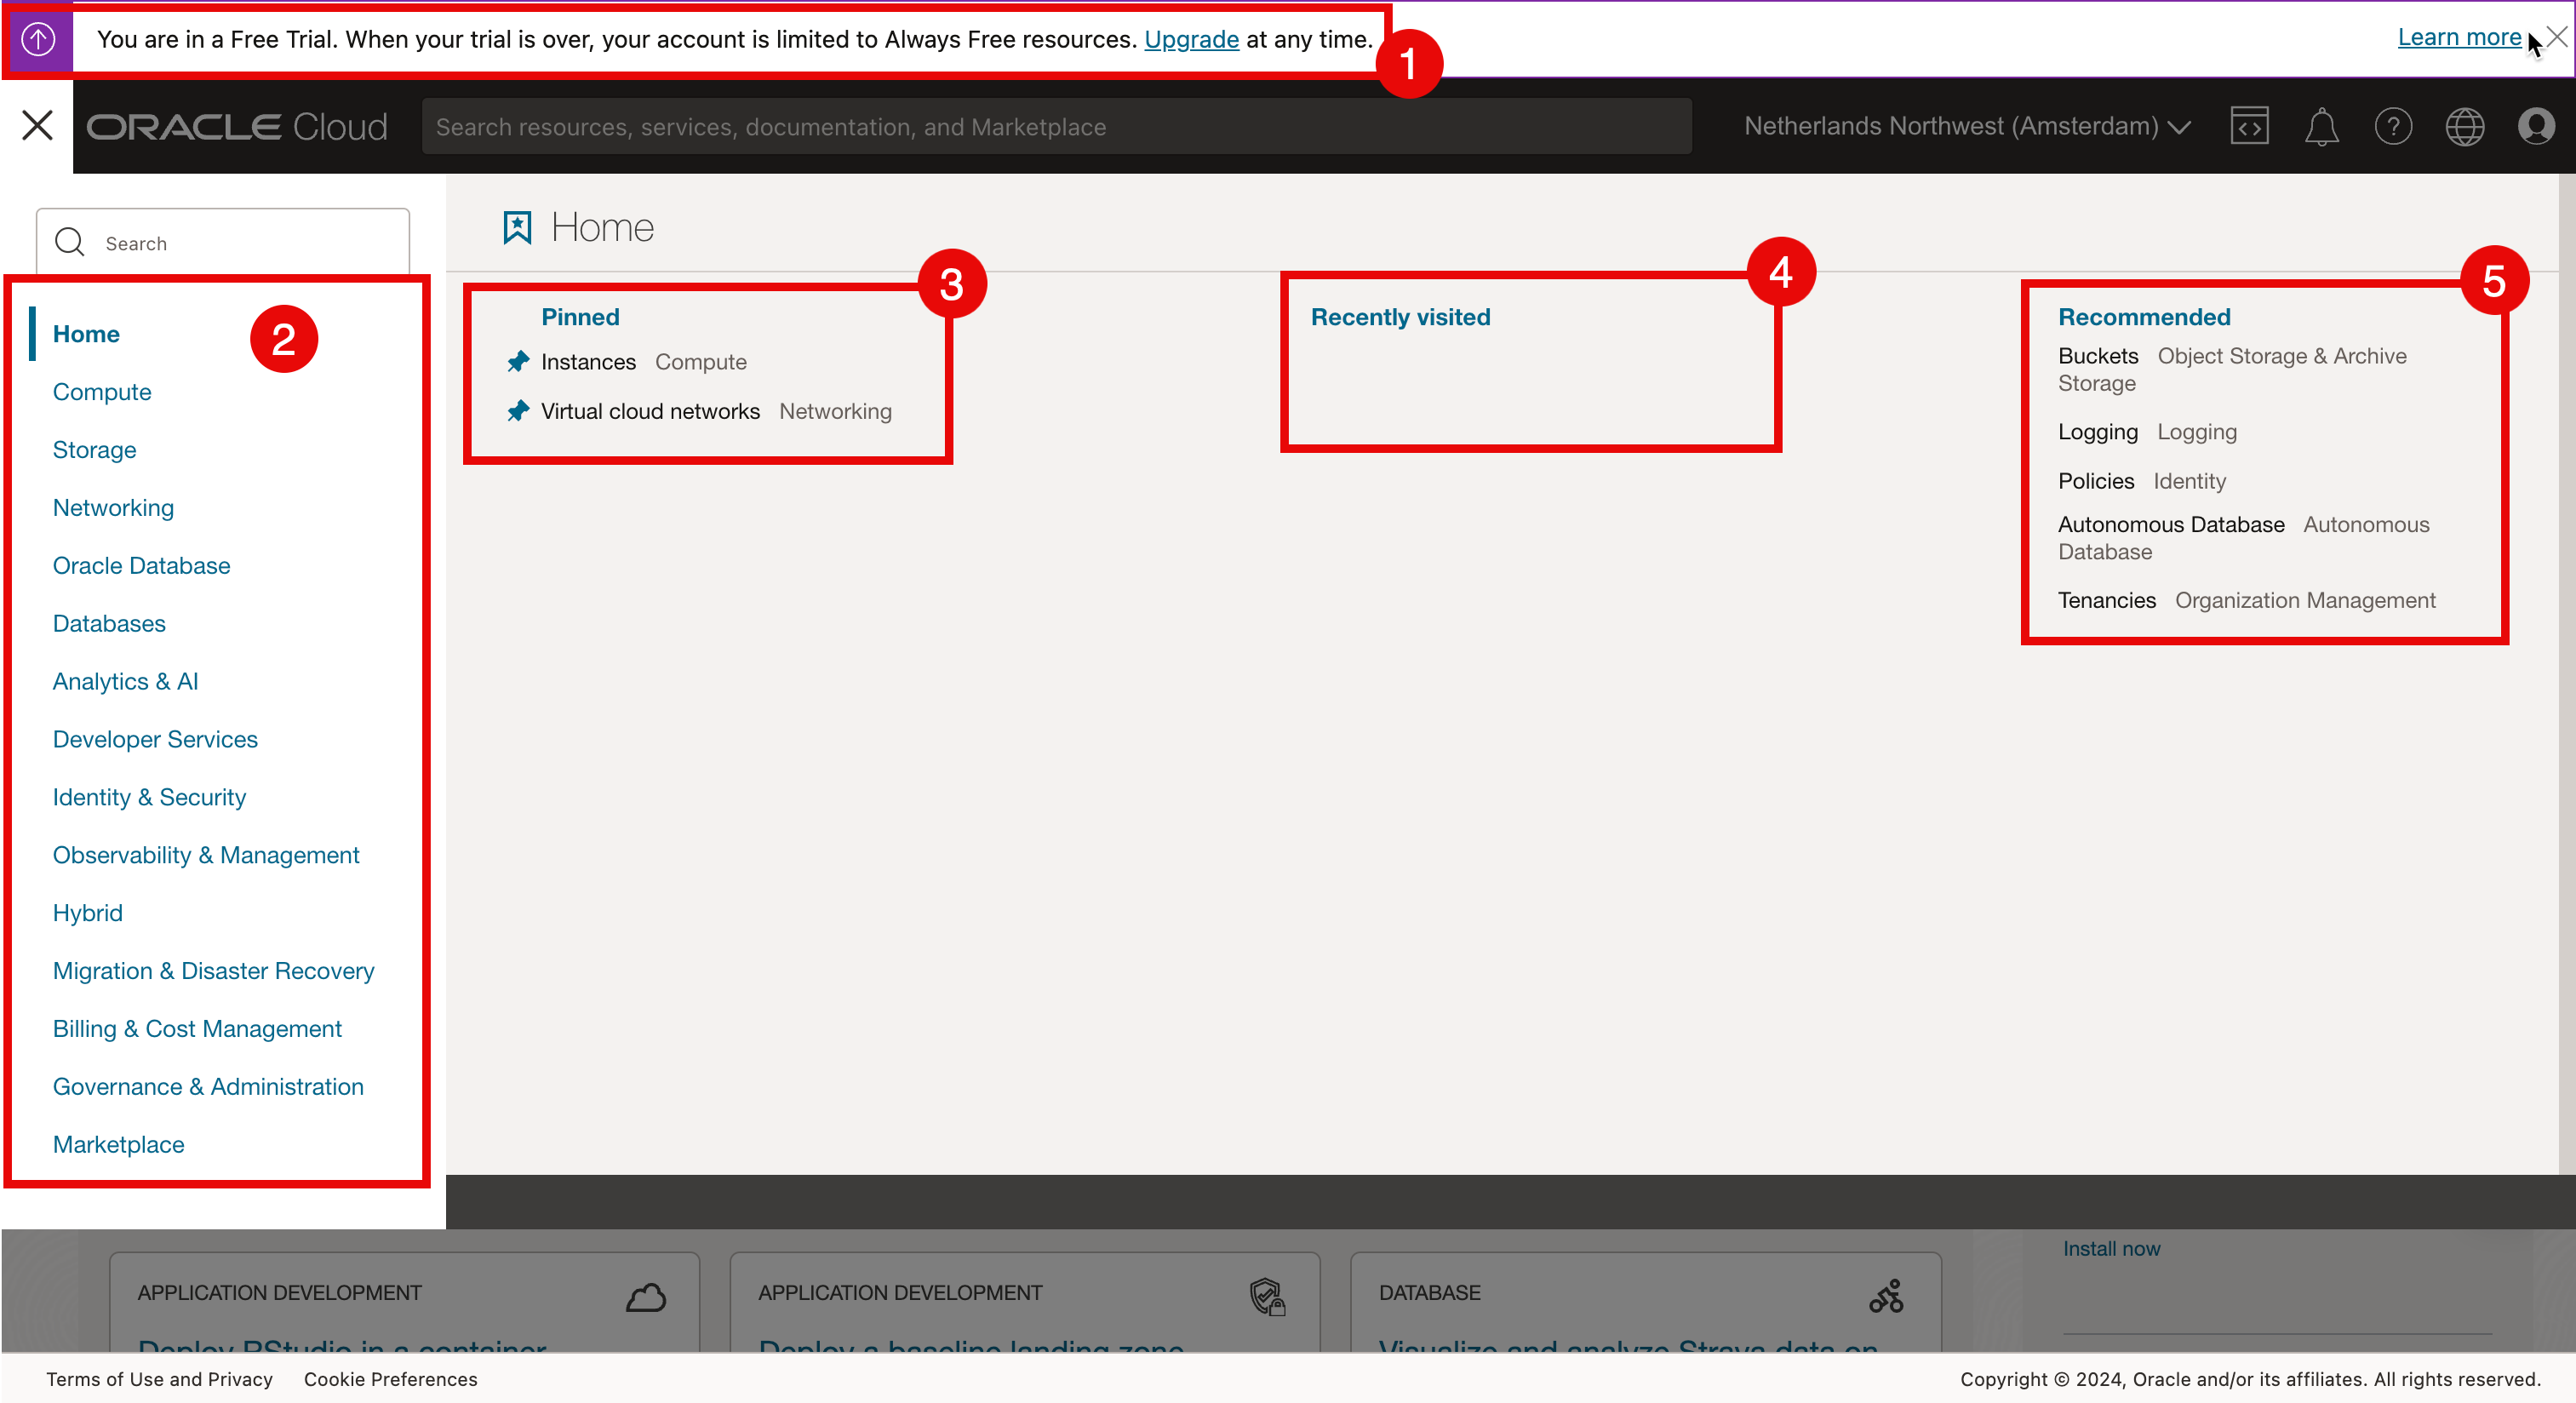
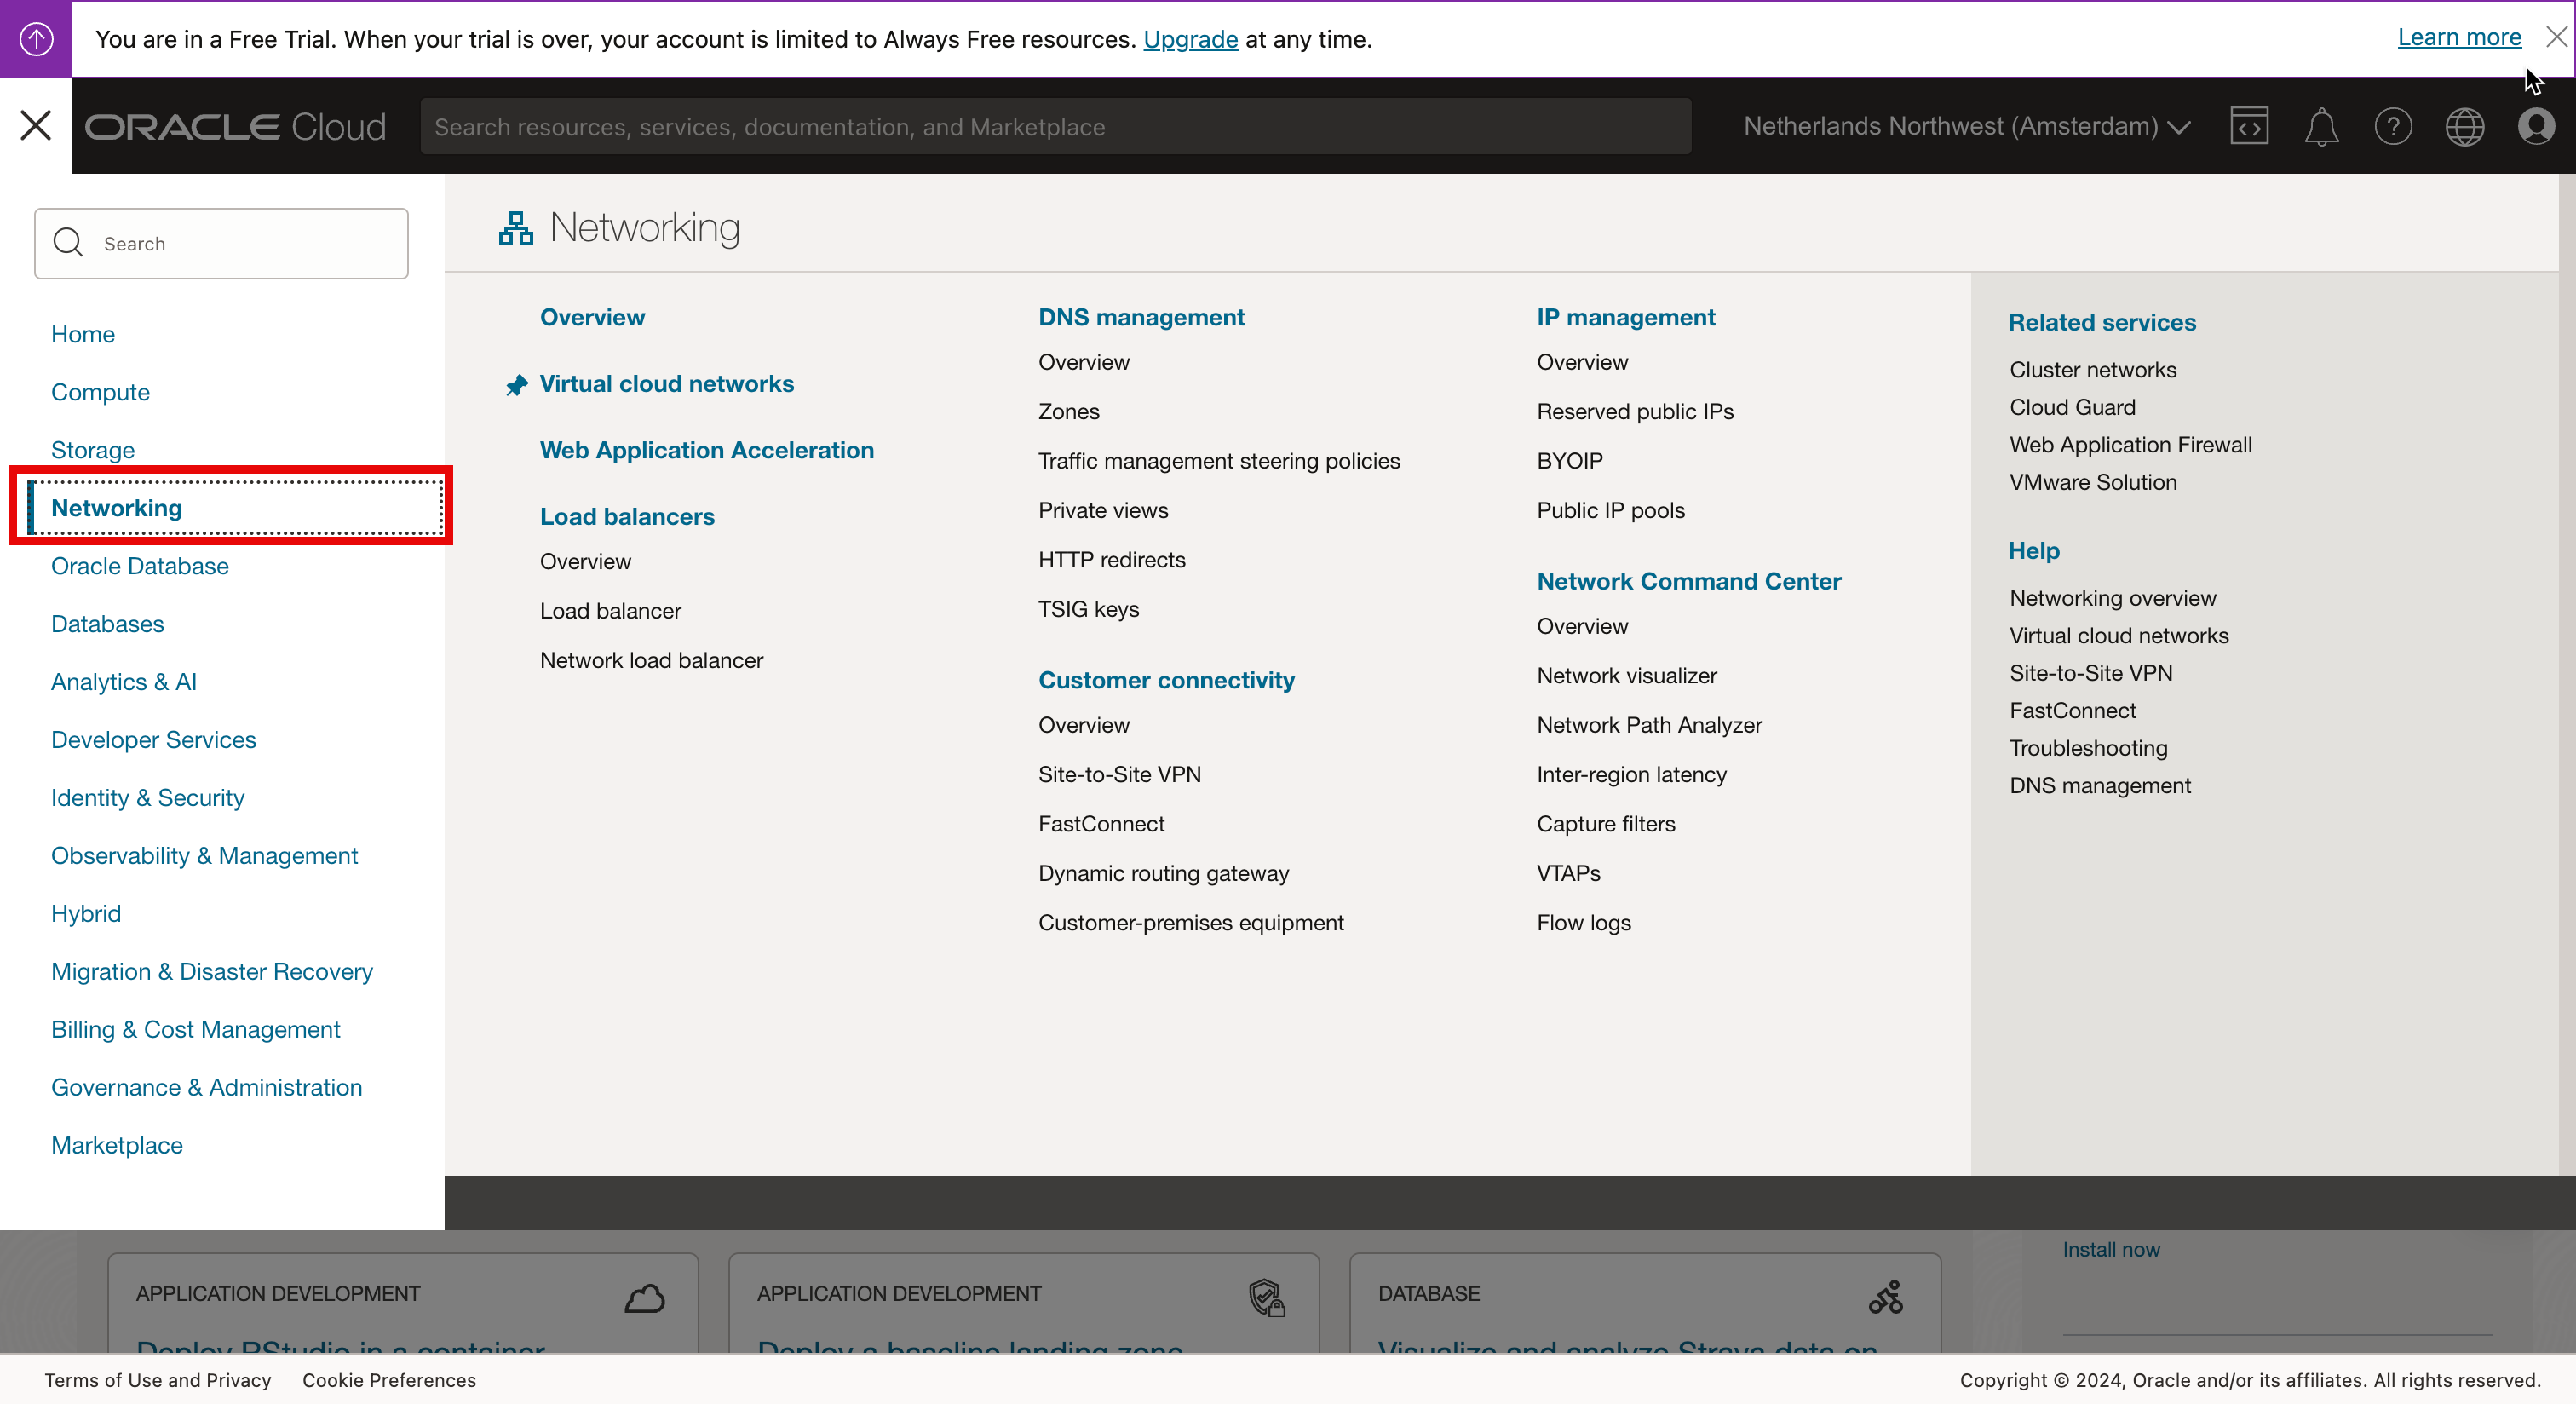
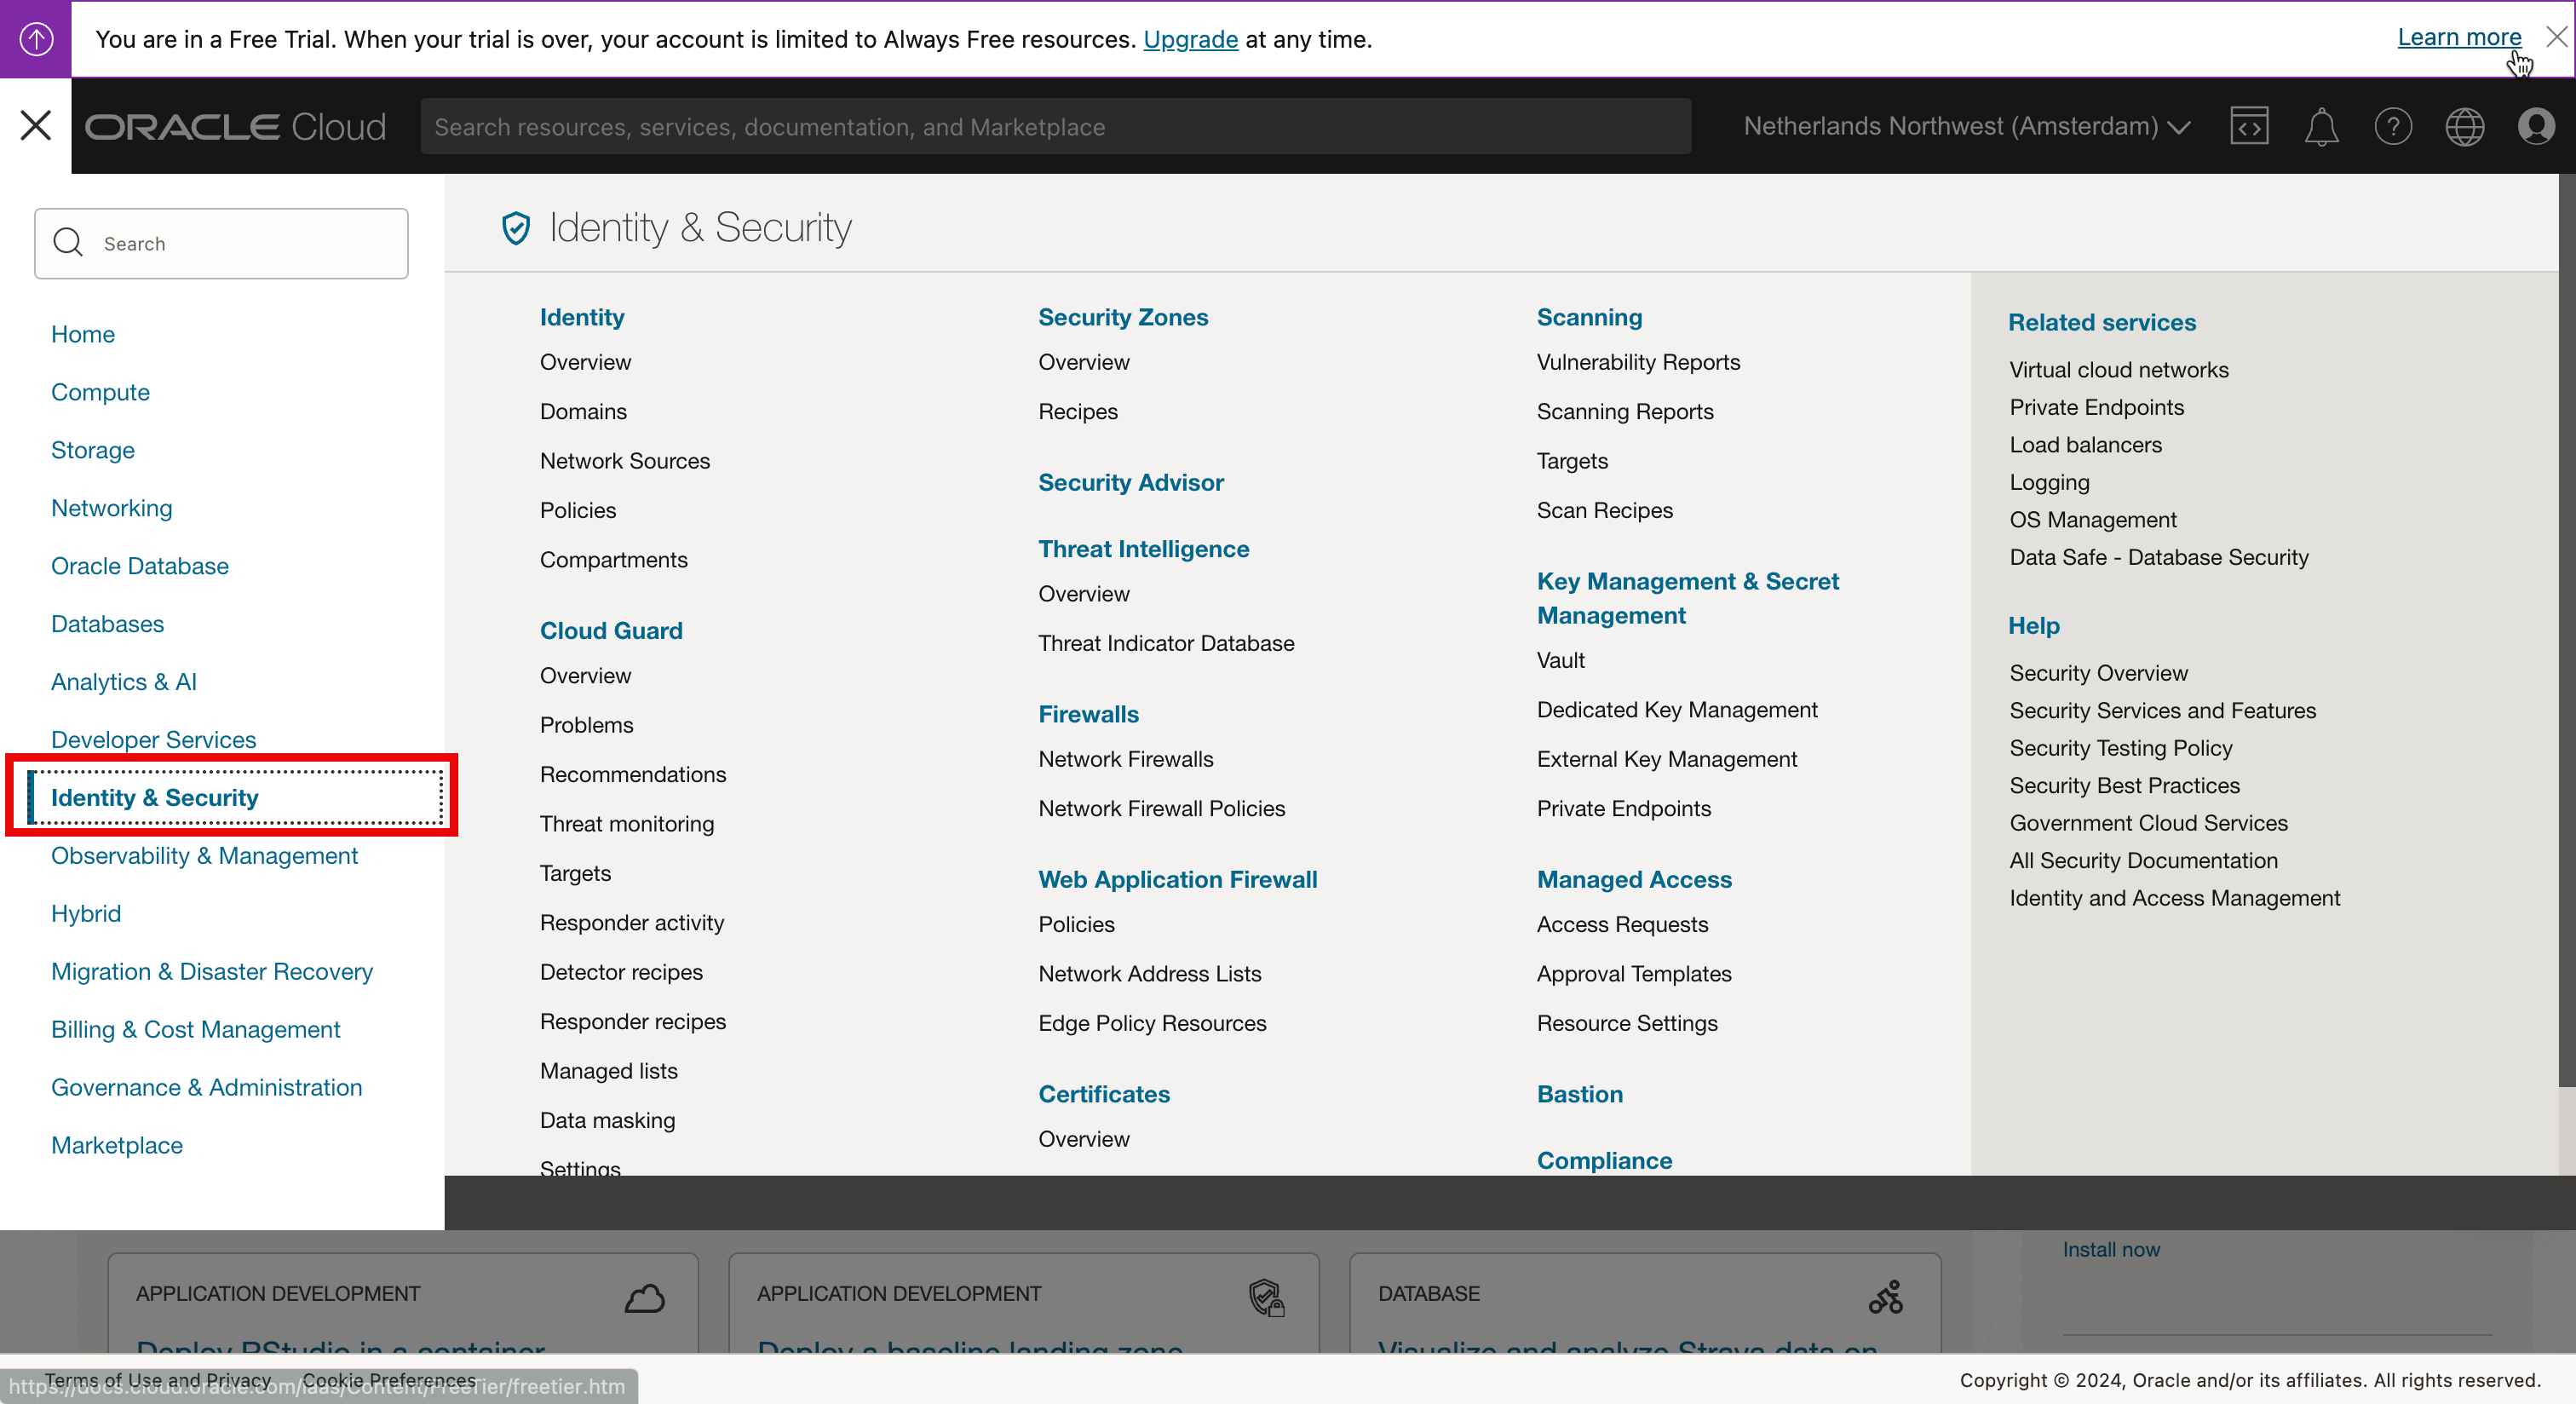
Task 6: Review the OCI Console
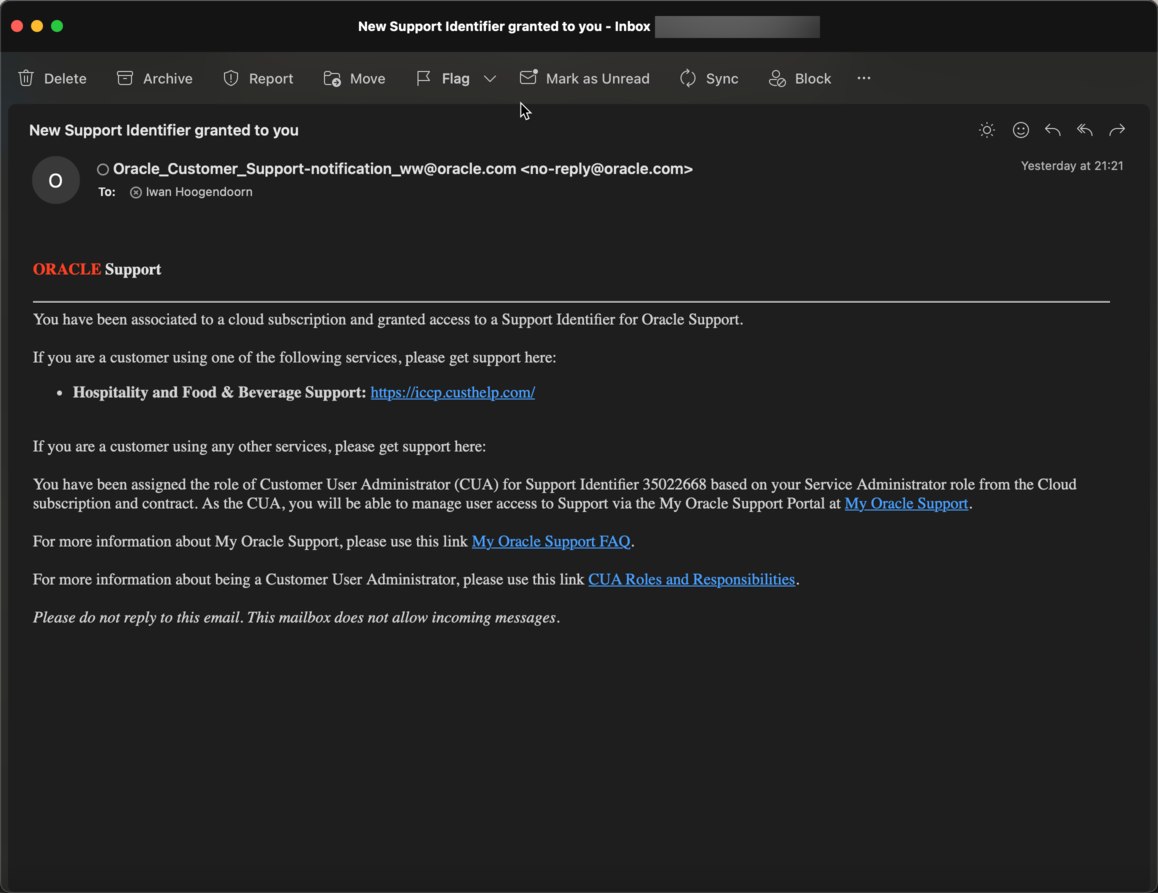
After your Oracle Cloud environment is provisioned and you have logged in, you will get an email regarding Oracle support in case you need this.
Next Steps
In this tutorial, we have shown you the steps that you need to take in order to start using or testing Oracle Cloud. You will need it to follow along with our next OCI related articles.
Acknowledgments
- Author - Iwan Hoogendoorn (OCI Network Specialist)
More Learning Resources
Explore other labs on docs.oracle.com/learn or access more free learning content on the Oracle Learning YouTube channel. Additionally, visit education.oracle.com/learning-explorer to become an Oracle Learning Explorer.
For product documentation, visit Oracle Help Center.
Get Started with OCI and OCI Console Using a Free Account
Copyright © 2024, Oracle and/or its affiliates.


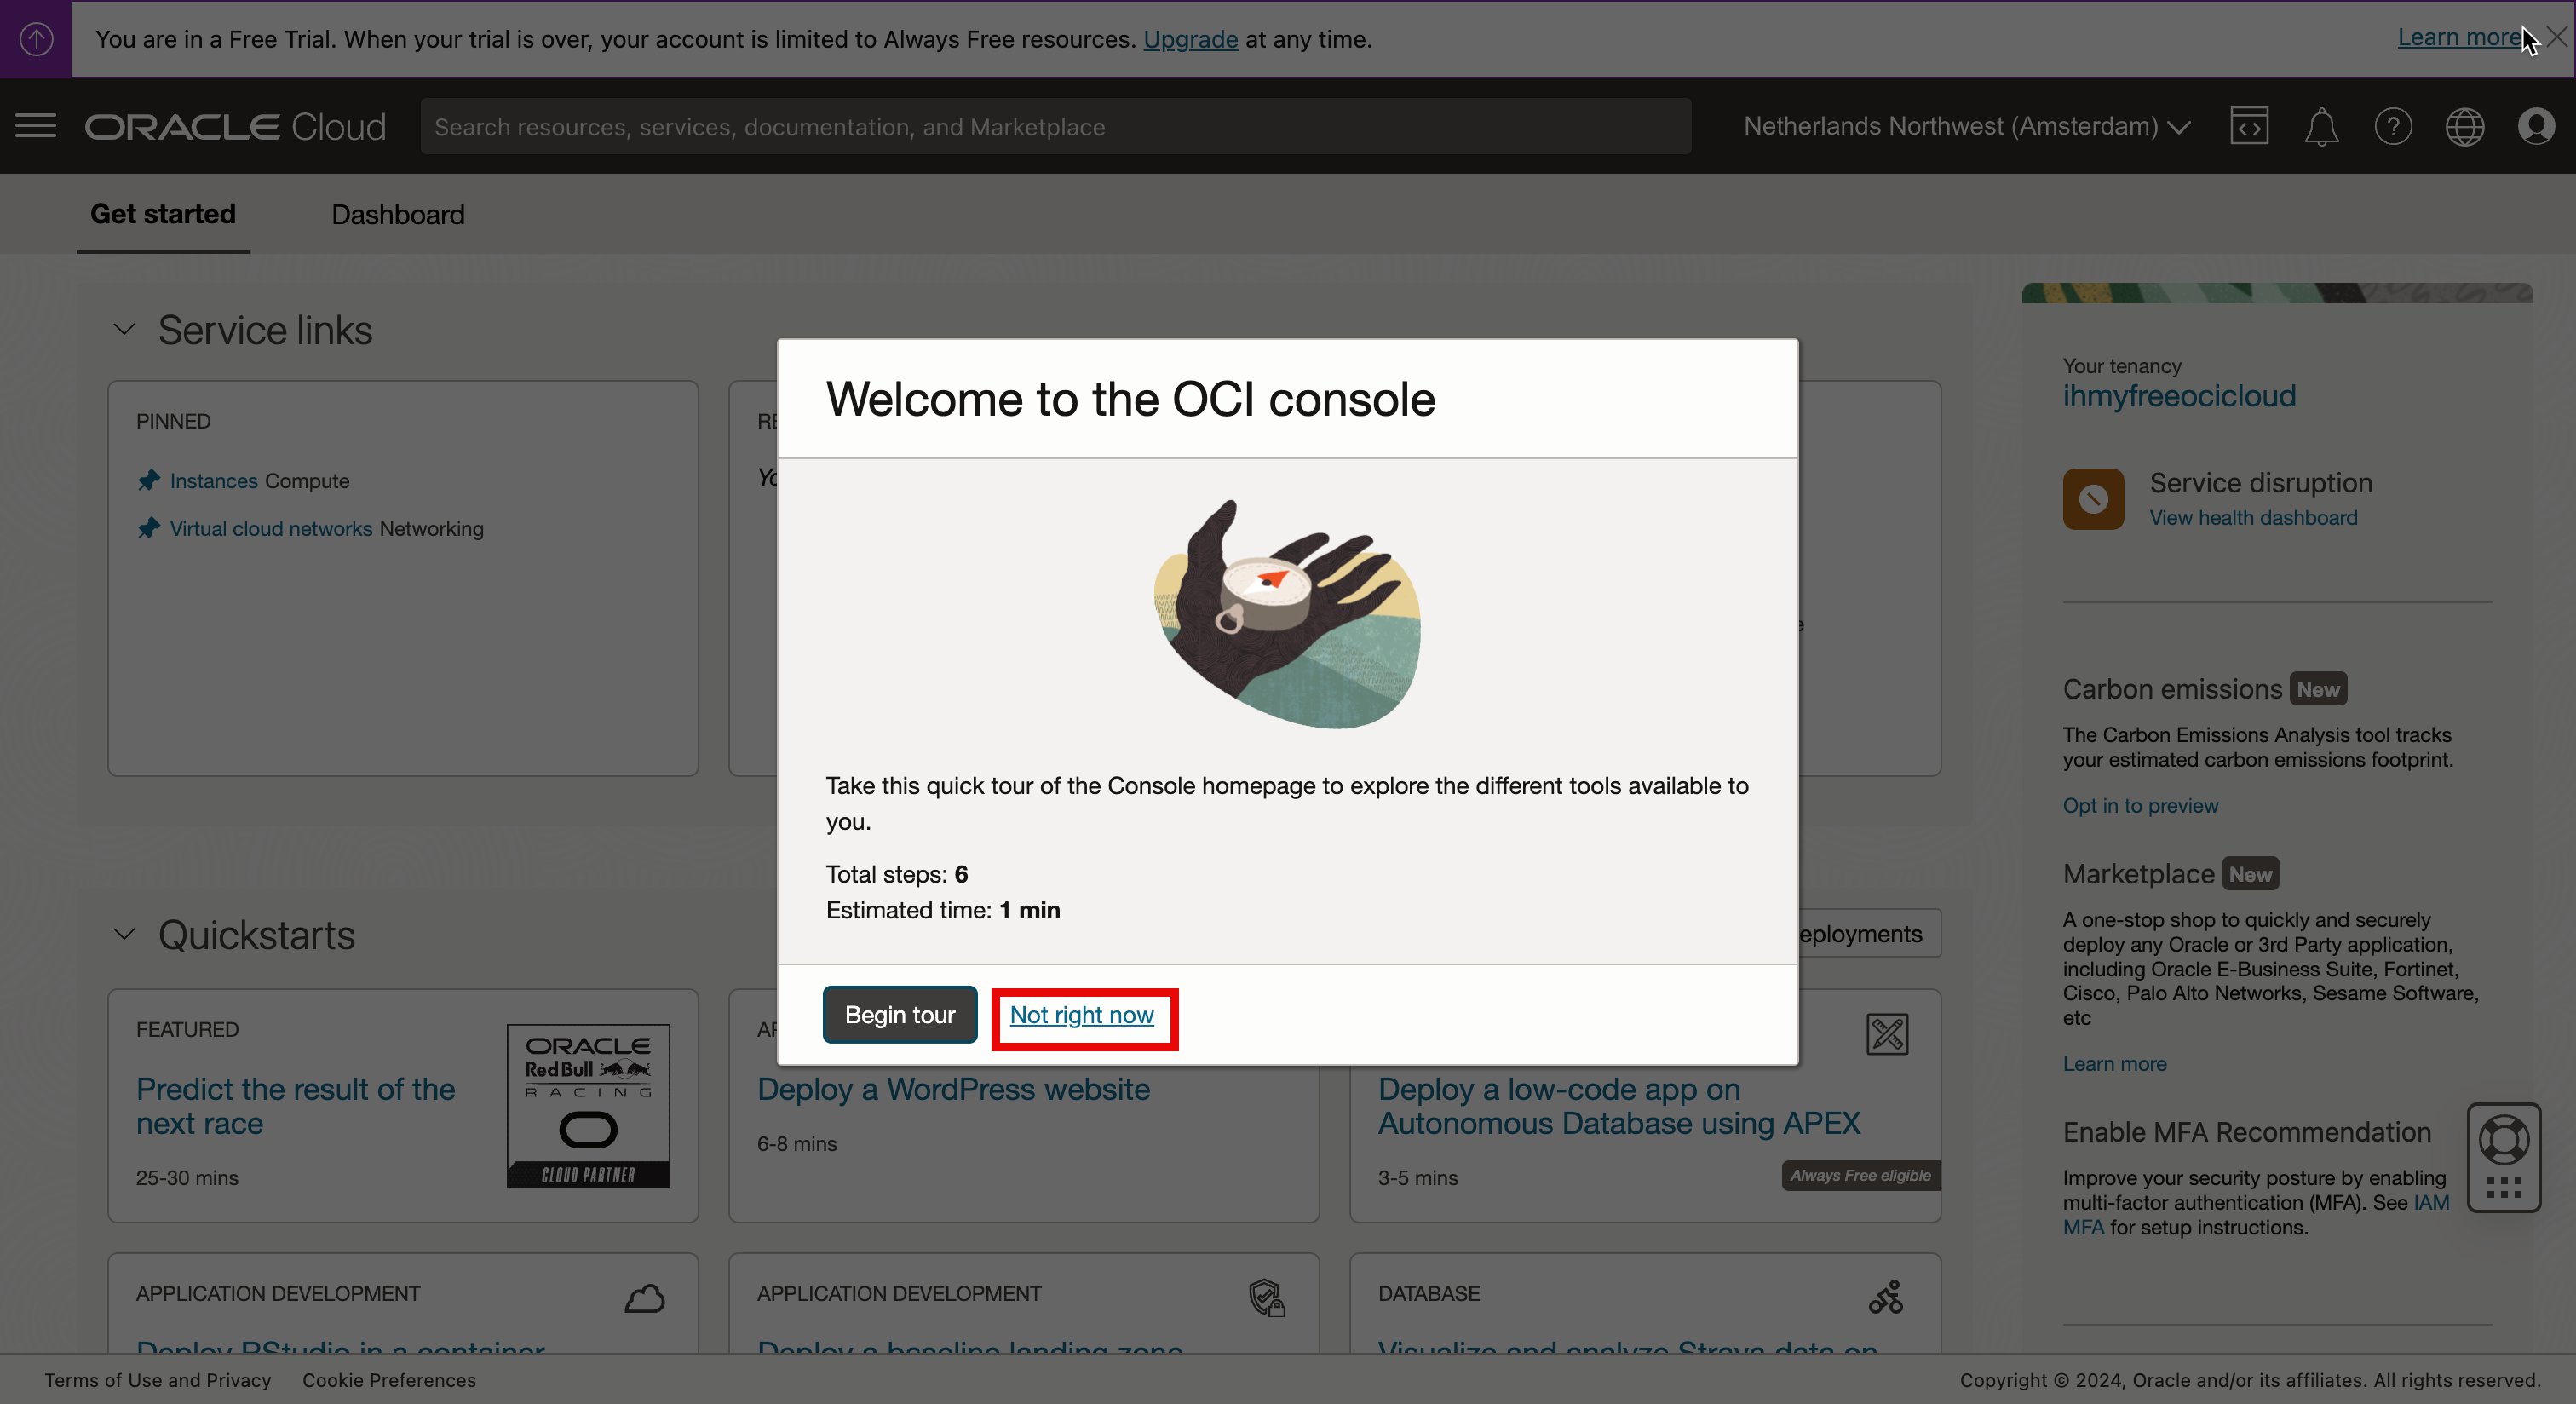 Once the required steps are completed, the OCI Console screen is displayed.